MMS121 - Iron Man 2: 1/6th scale Whiplash Limited Edition Collectible Figure

Collector Freaks Forum

Help Support Collector Freaks Forum:

This site may earn a commission from merchant affiliate links, including eBay, Amazon, and others.
So I just got this figure in today awsome detail. I have a couple questions were do you find a screw driver small enough to get the battery compartment open and how much bleach and wha tprocess do you use to bleach the pants. I was thinking of leaving the pants as is because once you get them off it seems that they would be a pain to put back on.
 
I found a screwdriver set at Big Lots for like $4 and it had several small sizes. I think the bleach to water ratio is 1 cup bleach and 2 cups water. It takes about 30 seconds, you can see the change happing as it sits in the water. As for getting the pants off, its easy, just slide the belt up to his stomach and you can slide the pants down, but take the shoes off first. It was an easy custom and it makes the figure look great. good luck, just take it slow.
 
yeah you have to do his pants. cant really go wrong as the bleach wont fade the orange much just take it out and rinse it once you see a nice orange. if you overdo it you will loose more of the burnmark black on the edges which you can easily add back
 
Better electricity effect:

<object width="425" height="344"><param name="movie" value="https://www.youtube.com/v/V-kW7hmUxcw?hl=en&fs=1"></param><param name="allowFullScreen" value="true"></param><param name="allowscriptaccess" value="always"></param><embed src="https://www.youtube.com/v/V-kW7hmUxcw?hl=en&fs=1" type="application/x-shockwave-flash" allowscriptaccess="always" allowfullscreen="true" width="425" height="344"></embed></object>
 
this is what's going around:


I did that, saw the results, but still wanted them brighter based on the below screenshots, so I put them in for another 5-7 seconds.

whip1.jpg


whip2.jpg


It's all personal preference, but way super easy. Besides if you're unhappy, a new set of pants from eBay can be on its way!

Good luck and post your results and what you think!

I just did this process and I am now waiting for the pants to dry. It really makes the burn spots pop and it looks great I will take pics once dry of the jumpsuit so you guys can tell me if they need to go back in the bleach a lil longer or if it looks great as is.
 
Better electricity effect:

<object width="425" height="344"><param name="movie" value="https://www.youtube.com/v/V-kW7hmUxcw?hl=en&fs=1"></param><param name="allowFullScreen" value="true"></param><param name="allowscriptaccess" value="always"></param><embed src="https://www.youtube.com/v/V-kW7hmUxcw?hl=en&fs=1" type="application/x-shockwave-flash" allowscriptaccess="always" allowfullscreen="true" width="425" height="344"></embed></object>

THIS IS AWESOME! What? HOW? WHERE? HOW MUCH $?
 
well tell me what you guys think camera is old but I think the pants came out great.
 
Last edited:
There are 3 inverters, 2 of which can strobe or pulsate. I hooked them up to thinner wire. You have to get a good strobing inverter, not just flashing. The flashing ones blink more than flash.
 
Got my Whiplash at the end of last week and sorted his pants last night. Looks SO much better !!! :yess:

DSCI0024-3.jpg


Bob
 
There are 3 inverters, 2 of which can strobe or pulsate. I hooked them up to thinner wire. You have to get a good strobing inverter, not just flashing. The flashing ones blink more than flash.

Great Job!!!!!!! This is going to look epic with MV. Any more detailed instructions for DIYer would be great

well I put the pants back on what do you guys think

Looks great.. might be the flash but looks like the burn marks wore out a lil so adding them back sure will make this look even better

Got my Whiplash at the end of last week and sorted his pants last night. Looks SO much better !!! :yess:

Bob

Wow so many new members :D congrats!!
 
Better electricity effect:

<object width="425" height="344"><param name="movie" value="https://www.youtube.com/v/V-kW7hmUxcw?hl=en&fs=1"></param><param name="allowFullScreen" value="true"></param><param name="allowscriptaccess" value="always"></param><embed src="https://www.youtube.com/v/V-kW7hmUxcw?hl=en&fs=1" type="application/x-shockwave-flash" allowscriptaccess="always" allowfullscreen="true" width="425" height="344"></embed></object>

AMAZING, anyway to do this without the end of his whips hooked up to bg boxes? hiding it as much as possible is obv ideal.

keep us posted!
 
the pants are the only thing holding me back on this fig. I mean how hard is it to get the right color of his jumpsuit???


It's such an easy mod, anyone here who has done it will tell you the same, buy this figure and do this mod(this thing may shoot up in price once the mv is out), i hate to see it left brown:gah: when it's so easy to make it orange.
 
Finally got the pants orange. I took video of the process but don't know how to go about showing it. Kinda dorky too so.
Anyway. I did the:
1. 1 cup water, 1.5 cups bleach (not colorsafe bleach)
2. a sink full of water and laundry detergent on the side
3. hold the pants in the bleach solution for 30 seconds (you could hold in it till desired color. but be advised the bleach is still working even after you just pulled it out of the solution)
4. remove pants from solution and drop it in the sink with water and detergent and soak it and just sorta hand wash it.
5. squeeze excess water out and air dry.


After watching the video and looking at the timer on the video, I actually had the pants in the solution for almost a min. I was counting off and I guess I count to slow.

I am happy with the result. Now I just have to wait till I get home and put on his pants. If anyone really wants to see the video, please provide me with info on how to post it or I can try to email it. Forgot to change the format on the Camera and shot it at 720 resolution and about 5 min long so its pretty huge file.

right after I finished rinsing it off in the sink. looks dark but its due to being wet.
CIMG4954.jpg


after it dried:
CIMG4965.jpg

CIMG4967.jpg
 
EL Electricity Effect:

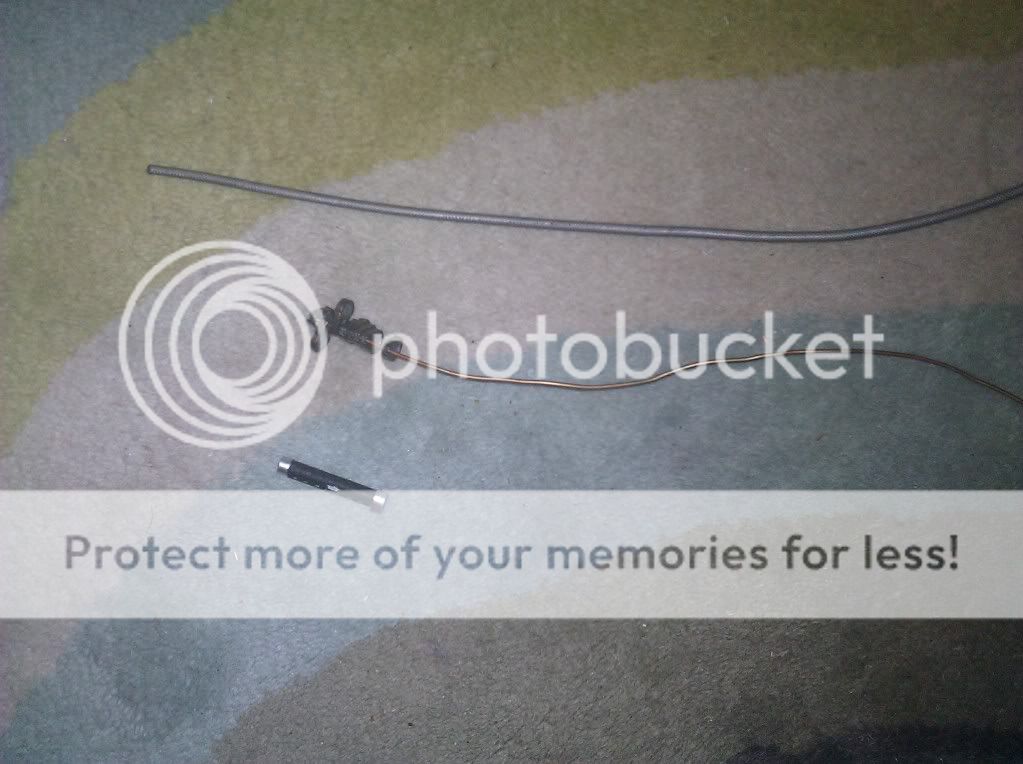
Start by disassembling the whip:

IMG_20110228_183511.jpg


Then drill a hole through the handle. I used a file the widen the hole as much as possible. It's just a circular file that looks like a long spike. 3 wires will have to fit into that handle.

IMG_20110228_183643.jpg


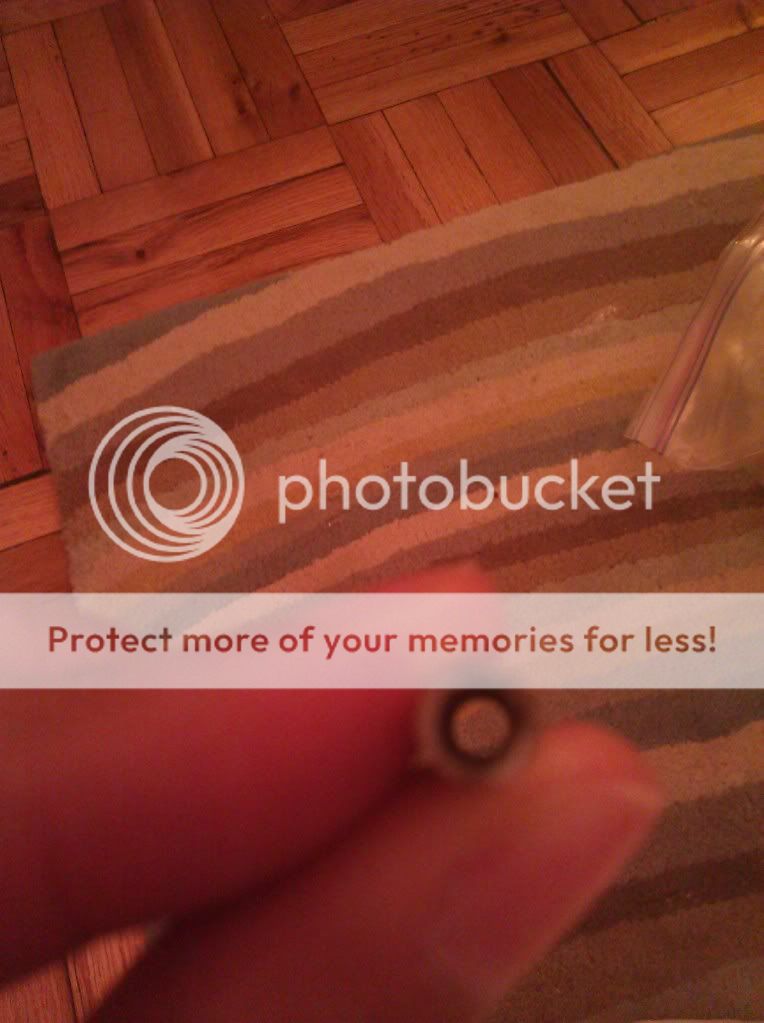
Then insert the main whip. I used 3.2 mm el wire for this and it fits the handle relatively well. Connect the el wire whip to a constant/steady el inverter. These are relatively cheap. I think connecting el wire has been shown before in earlier tutorials. Then put the whip wire through that muti-ringed housing thingy that comes with the whip. You'll have to glue the rings back in place unless you're ok with them sliding around.


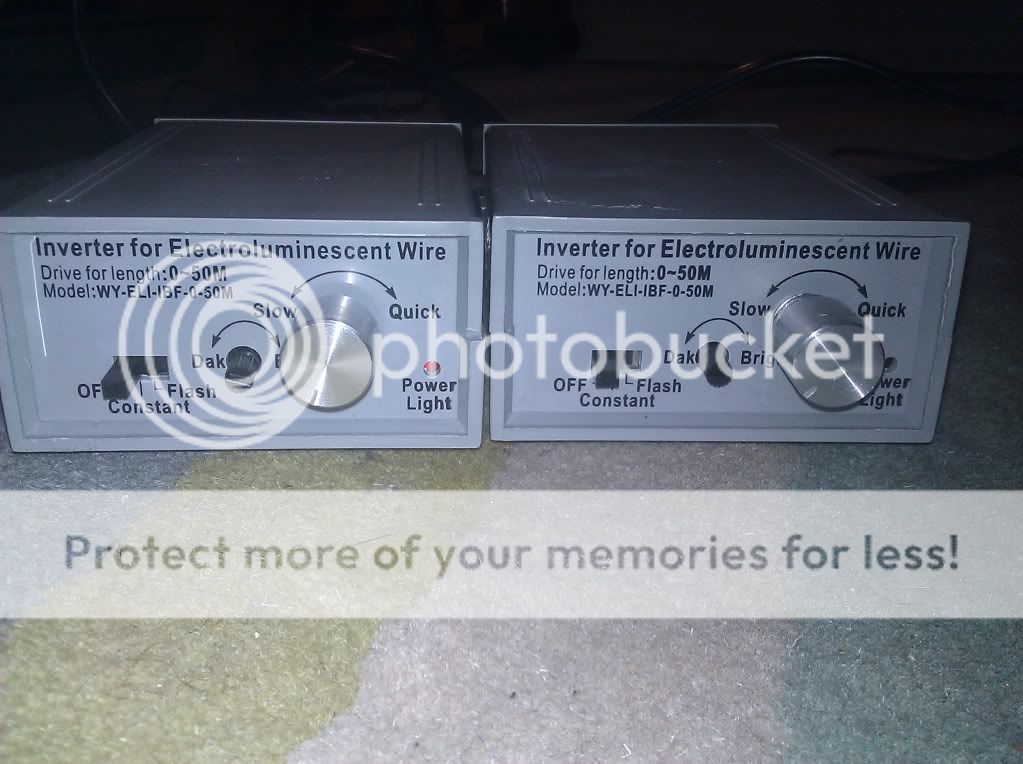
I then used 1.2mm el wire and connected it to a strobing inverter like this:

IMG_20110228_183809.jpg


These are not so cheap. But it's a very good strobing inverter. Slide the wire in from the back and crimp and bend to the desired effect. Do it again with the other wire and connect it to its strobing inverter.

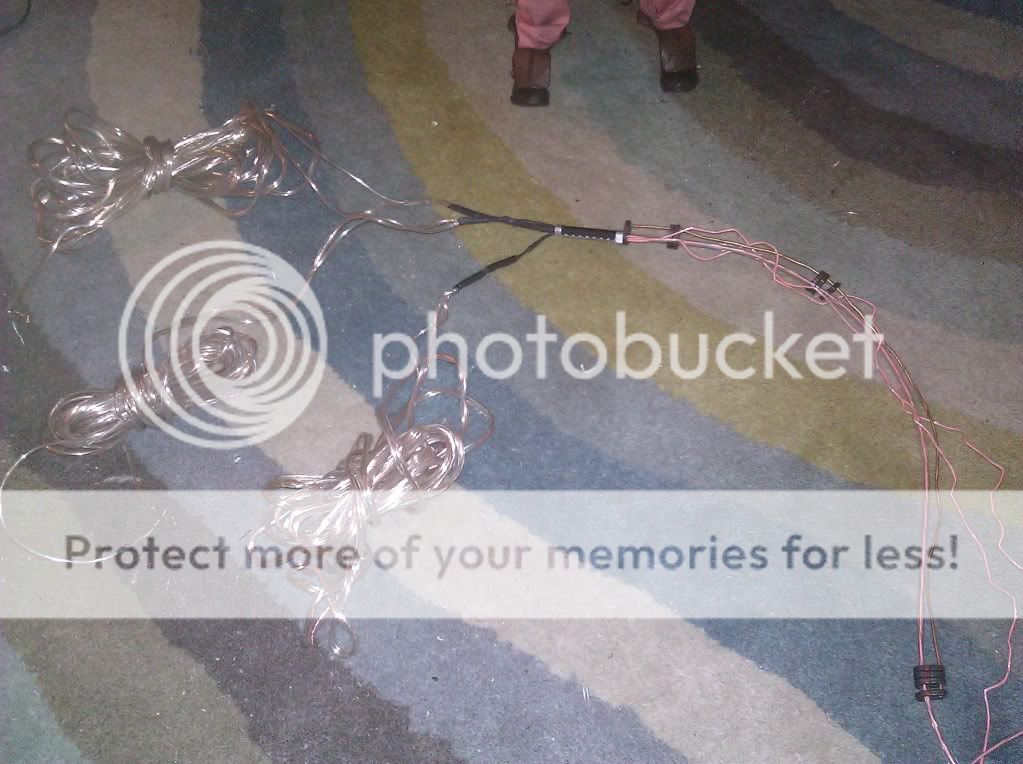
All 3 wires now running through the handle. The whip wire is solid and each effects wire is connected to its own pulsating inverter.

IMG_20110228_184228.jpg


Although this pic does not show them connected you get the idea. I used 22 gauge speaker wire which works fine. Plus you can buy 25' for $2.

With each effects wire hooked up to is own inverter you can adjust the crackle effect to your liking.

When you are done it should do this:

<object style="height: 390px; width: 640px"><param name="movie" value="https://www.youtube.com/v/AYA2t60UmCo?version=3"><param name="allowFullScreen" value="true"><param name="allowScriptAccess" value="always"><embed src="https://www.youtube.com/v/AYA2t60UmCo?version=3" type="application/x-shockwave-flash" allowfullscreen="true" allowScriptAccess="always" width="640" height="390"></object>

https://www.youtube.com/watch?v=AYA2t60UmCo


When you connect the other whip, just use a splitter. You don't have to buy a new set of stuff. Just cut the wire so it fits.

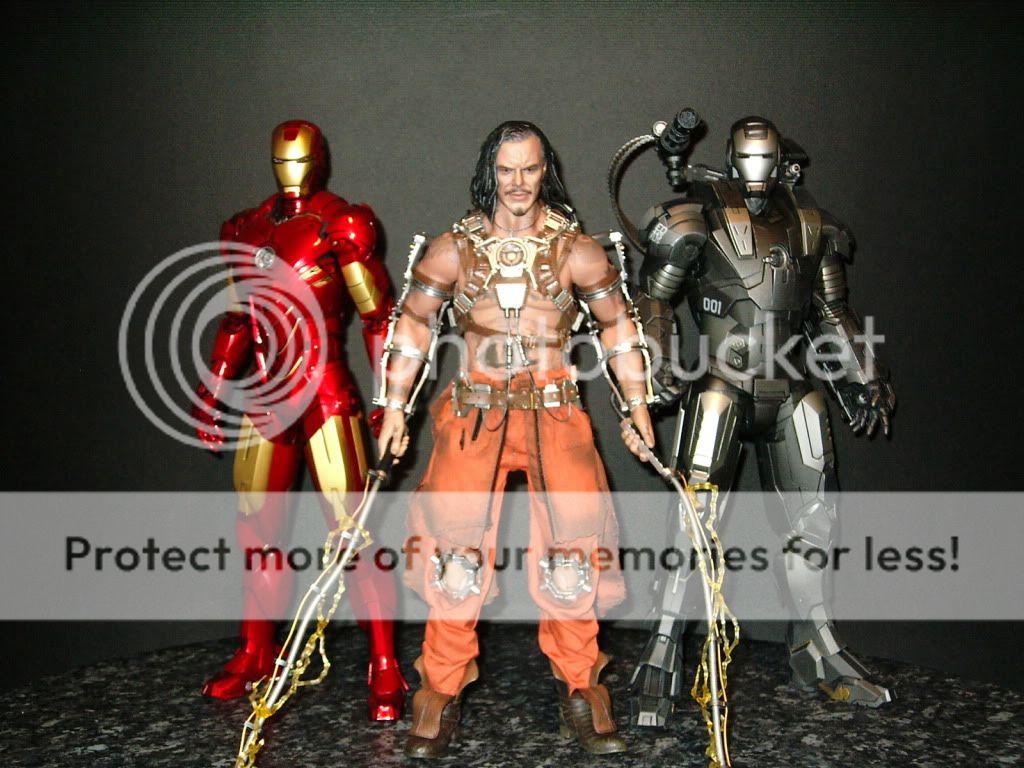
The gaggle of wires will be bundled in shrink tube, run up his arm, and then out through his pants leg. Thanks to those who thought it looked pretty cool.
 
Last edited:
Back
Top