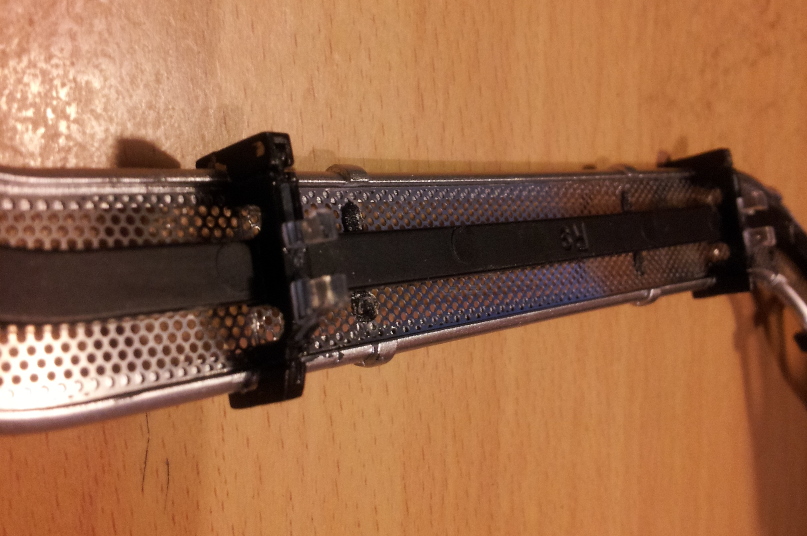
And for clarification in the above photo, the left jack is for the battery power (unhooked for photo). The right jack just goes to the three way button switch.
Make sure the power out is going to the switch.
Basically USBC goes to the power circuit and BATTERY pack goes to power circuit. The power output goes to switch.
This is the default. Hot toys did a lazy job with the circuit design.
I can promise you that getting the hood off is the actual hard part. The wiring is straight forward once you understand how poorly hot toys “designed” the circuitry. It’s literally a splitter into a splitter into another splitter.
I agree - thank you so much for your help so far!!
I am wondering if there’s a problem with the usb power. As a test I ran a jumper from the usb output directly to the battery terminal on the flight board, and nothing happened.
I may end up having to use one of those AA battery eliminators instead.
The hood portion can be removed via the screws under the hood and under the windshield wipers. You’d also have to pull out the front grille to access screws that hood onto the front. Remove the wiring on both sides and pull up from the back and it comes out very easily. I’ve circled the locations for all the screws. There’s a lot!
This is amazing!!!!! EXACTLY what I've been searching for! THANK YOU for having the guts to do this! Quick question, how did you pull out the front grill?
Tony
I agree - thank you so much for your help so far!!
I am wondering if there’s a problem with the usb power. As a test I ran a jumper from the usb output directly to the battery terminal on the flight board, and nothing happened.
I may end up having to use one of those AA battery eliminators instead.
Unfortunately I wouldn’t know. Maybe check the usb cable or power adapter you’re using? I’ve heard a report or two of the USBC port not working on this one too. If you have a volt meter, I’d check the output with a known working USB c cable and adapter connected. Good luck.
This is amazing!!!!! EXACTLY what I've been searching for! THANK YOU for having the guts to do this! Quick question, how did you pull out the front grill?
Tony
Good question! At first I was pulling at it with my fingers but it wouldn’t budge.
I didn’t want to pry it off so I took a glue stick, melt one end, then take that end and stuck it on one side of the grill. Let it sit and dry. Pulled the glue stick. Bam. Came out easily.
(little trick I saw people use to pull dents out of their car fenders, )
I had a play with them in March when the Delorean arrived. I came up with a way to hide the wires in with the car's wires. It just didn't give the effect I was after so I didn't feel it was worth the effort and I'm lazy. Maybe 4-5 wires on each band would give enough light.
Just saw this now, T800. That definitely has potential.
And by the way, I've got Part 2 Doc arriving in a day or two and Part 1 Marty later this week. I can't believe that I've hit the slippery slope and now need the third main character...
This is incredible work! I was contemplating doing the same thing but worry damaging it during drilling those same holes. Mega props to you for a job well done!


 )
)