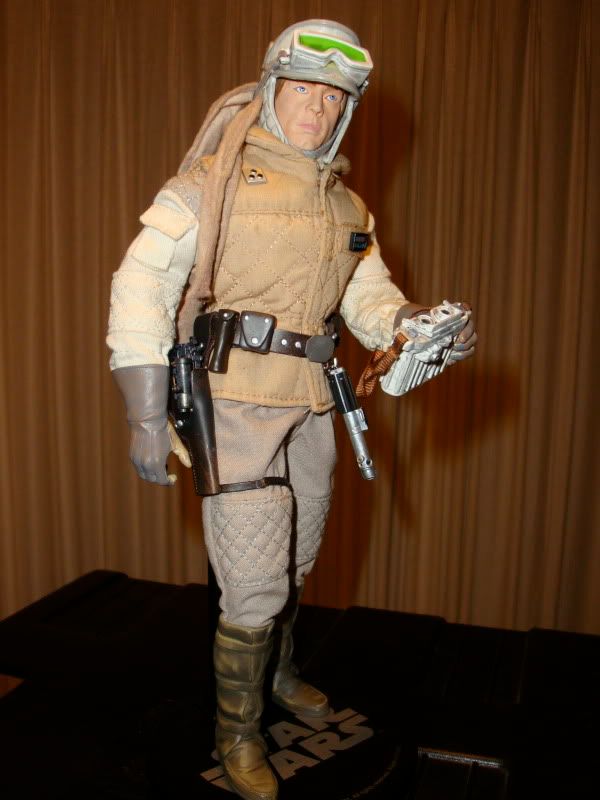
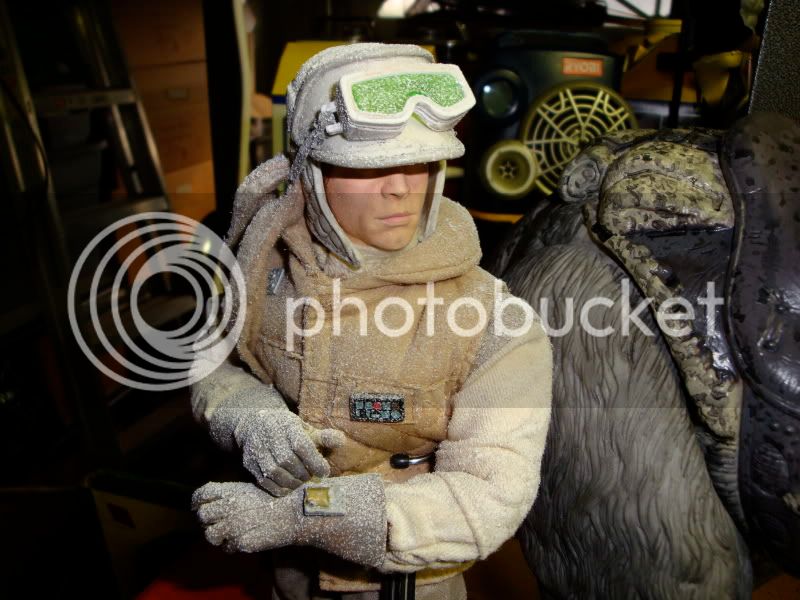
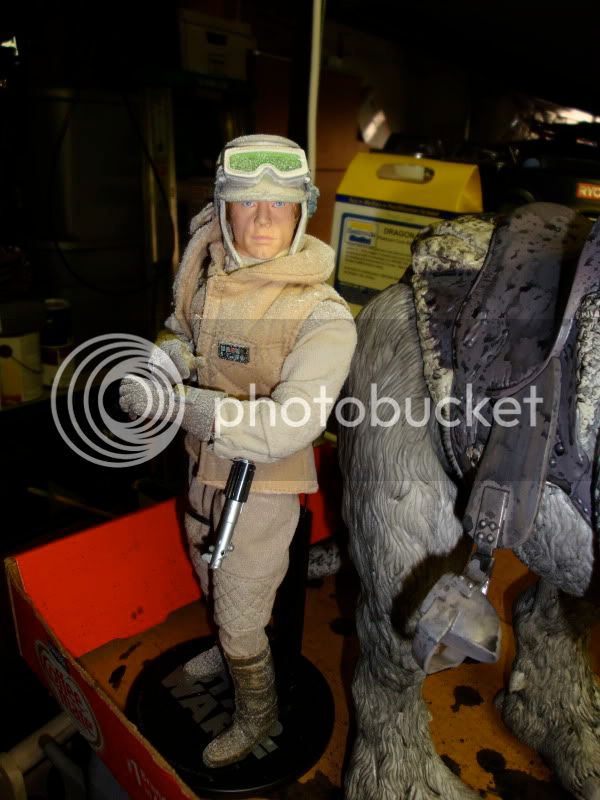
1/6 Hoth Luke WIP

Collector Freaks Forum

Help Support Collector Freaks Forum:

This site may earn a commission from merchant affiliate links, including eBay, Amazon, and others.
Well I will go to the foot of my Grannies stairs!!! Deathstalker, I love your hairy beast!!! Its fantastic, if you ever get the chance to do a tutorial on that process I would hive it a go.

I was thinking of having a little try and make a yetteee type thing! I was wondering what fur you used..

I did think about dog hair!!! But when the Mrs questioned the I was doing with the hair clippers and why Cody (our dog) was cowering in the corner I kind of came to my senses... but the cat... well hes old... hes cant have long to go!!!!!!

Does that make me a bad person....

 
So, I dug up a few more pics of my Taun. Looking at it some more I guess it's not really finished but it still ok. Not really screen accurate but I like it.I did it back in late 07 so it isn't up to the "amazing" bar Dorgs has set but it's a start. I'll have to revisit it and do some upgrades. It is a big project and I would love to do one again but time is my enemy( not enough of it). I'll try to post a tutorial sometime soon.
 
So, I dug up a few more pics of my Taun. Looking at it some more I guess it's not really finished but it still ok. Not really screen accurate but I like it.I did it back in late 07 so it isn't up to the "amazing" bar Dorgs has set but it's a start. I'll have to revisit it and do some upgrades. It is a big project and I would love to do one again but time is my enemy( not enough of it). I'll try to post a tutorial sometime soon.

Yes, a turtorial will be great, i would love to do this as well.
 
Tutorial , Tutorial Deathstalker !! I'm planning the same for my Tauntaun , but I cant find fur suitable . I got some which looked the perfect colour , but was too "thick" to work with . Share your knowledge , wise one .:D
 
If any one is after a Tauntaun, Jedimike has one for sale and its a good price... Wish I could afford another one!t
 
Sean, just use a clear drying Tacky Glue like Elmers. Not their normal school type stuff. Usually available at craft of hobby shops.

What's the difference between the two glues? (the school glue and the stuff you're referring to?) How long ago did you do this? Is the adhesive still holding up (I ask because Elmer's type glues don't work well with plastic- I'm afraid over time it may come loose).

Sean
 
There's Elmer's School glue, and Elmer's Glue All, and wood glue, and some thing like the glue all that comes with a brush to apply it. I assumed he meant the Glue All

I wouldnt worry about it not sticking to much as the Tauntaun sculped seems to have a lot of crevasses for the glue to grab, I would just resist the urge to play with it in the snow and get it wet.:D

The bonus with using this glue would be that it you wanted to redo something or messed up its easy to remove.

Theres another glue called Weldbond that will glue any material to any thing you want and has the consistency of Elmer's and still cleans up with water when wet, but takes a while to dry, but once it does it's permanent.
 
Last edited:
Sean,
I meant Elmers Tacky Glue. That's what it says on the bottle. It doesn't run as much when using it and holds very well when dry. If you really pull on it hard you can get it off but that should not be a problem unless you let a 6 year old play with it. I'd still give a light rub down with sandpaper.It makes it easier. I've had some figures for over 5 years now with no degradation. This is the glue I use on all my Chewbacca too that you see all over the board.I'll probably do a tutorial after the new Year. I just haven't had enough time of late. Holiday season is toooo busy and time is short unfortunately.
 
Ill have to check that stuff out, I haven't come across that yet. I was gonna try the Weldbond because its a bit less runny than the standard Elmer's but I don't think I'd be able to remove it if I screwed up.
 
Got to get me some hair!!!! Really want to have a go at this.

One quick question Mark... do you think it will work on me??? I could do with a little fur on top LOL.

Got to start looking for fur!! Really exciting and thanks for the tutorial mark.

Mark
 
Not totally happy with the head repaint, but a humble beginning.
DSC00803-1.jpg

I can't believe how good this looks, it came out awesome, all from a Hasbro sculpt? It really is an accurate looking Luke.

Unreal job you've done.:rock
 
Mark,

It may work but you"d have to use Shoe Goo. It's really sticky to handle but it's much more durable, water-proof and flexible when dry.

-Mark
 
I can't believe how good this looks, it came out awesome, all from a Hasbro sculpt? It really is an accurate looking Luke.

Unreal job you've done.:rock

CaptnRex, thanks for the kind words! Feedback is always appreciated.

Please forgive typos, I'm a notoriously bad typist. Hope this makes sense and helps on some future custom Taun projects..
First off ,prep the figure. You can either sand him down just a bit or go over him quickly with the sanding drum from a dremel. Just be careful with the dremel as he isn't too thick and you could make a hole in him very quickly if you are not careful. After that paint him up where you think he needs it. Points that you want to leave exposed. His horns, claws and such. Next you start hairing him up. You"ll want want some type of fabric hair. I get the stuff that comes on notebook paper sized sheets. The hair itself ranges in length from an 1.5 inches to 2 inches. You"l also need a very good sharp pair of scissors and some Elmers Tacky Glue. The first thing you do is cut the hair. You just basically cut the hair off the sheet, almost like a barber giving a haircut.You can either cut off the bits of hair as you use them or cut off a bunch and carefully put them to the side in bunches. Just be careful because the hair is light and you could easily move and blow the hair all over the place. Either way, it does get messy and you'll have hair bits all over the place. Next you start hairng. Start at the bottom and work your way up. Put a generous bit of glue around the first leg, You basically work your way up in rings. you then attach the hair. You put the hair in place on the glue( basically what was the root of the hair on the sheet is pressed into the glue. Don't worry,you will see plenty of glue through the hair. It dries clear and all will be good. Once you put the first ring on you just put another glue ring on and then hair that as well. Until you get better at it I would only do a couple glue rings at a time as the Taun is heavy and hard to handle and the more you do the more you can mess up should your hand slip.( You"ll basically push all the hair out of place, smearing it. You then have to pull it off and start over. )Once it dries though you are good to go. ......Hope that all makes sense. Your basic starting points to hairing are the feet, the tail ends and the front paws(hands). The hands
are easy as the just end at the body. The legs also end at the body near the saddle, On both ,hair as close as you can to the articulation without restricting movement. You do not want the hair is rubbing or touching ot the artic points. The tail continues on through the entire body. For it and everywhere else just follow the flow of the from to place the hair in the direction you want it to flow. At some points you may want to redirect or reposistion the hair to hide some articulation point or something. Still hair as normal just slightly redirecting the hair . You can do this by the way you place it on or by using some sort of instrument to move the hair slightly just after you put it on. I use a cheap plastic putty knife. You just keep going as described till it is all done. You do have some maneuvering and reposistion to do around the face area and it's just a do as you go type of thing. When you get to the end, say by the eyes or the horns, just hair as close to them as you can and once it dries it should look good. after it"S all dry go over it with a babies hair brush to get out any loose hairs. You can also do this step as you are hairing as each section you do after it dries 100% . Once you do all that an additional thing I do is Vaccum over the entire body using an extension to get any more loose hairs. You'll know you did a great job if you passs this stage.. After all this you have your nice long hair shaggY Taun Taun. Get out you scissors and go at it. Once the haircut is done dab him up a bit with some white acrylic gesso to make it look like a bit of packed snow.. You can also but a dab of gel on him and spread it around to just "style his overall look. You can work it around with a bit( very little bit ) of water. Just use a fine mist spray bottle and give him a shot or two and ther you go. Hope this makes sense and hope this helps. Looking forward to seeing what you all produce.
Deathstalker ( Mark)

Thanks for the detailed instructions! Look forward to trying this, just having a difficult time finding the fur. For now I'm going to see how the Taun Taun looks just painted.
 
Back
Top