Making Felt Hats

Collector Freaks Forum

Help Support Collector Freaks Forum:

This site may earn a commission from merchant affiliate links, including eBay, Amazon, and others.

Itchybitz

Super Freak
Joined
Apr 10, 2010
Messages
490
Reaction score
0
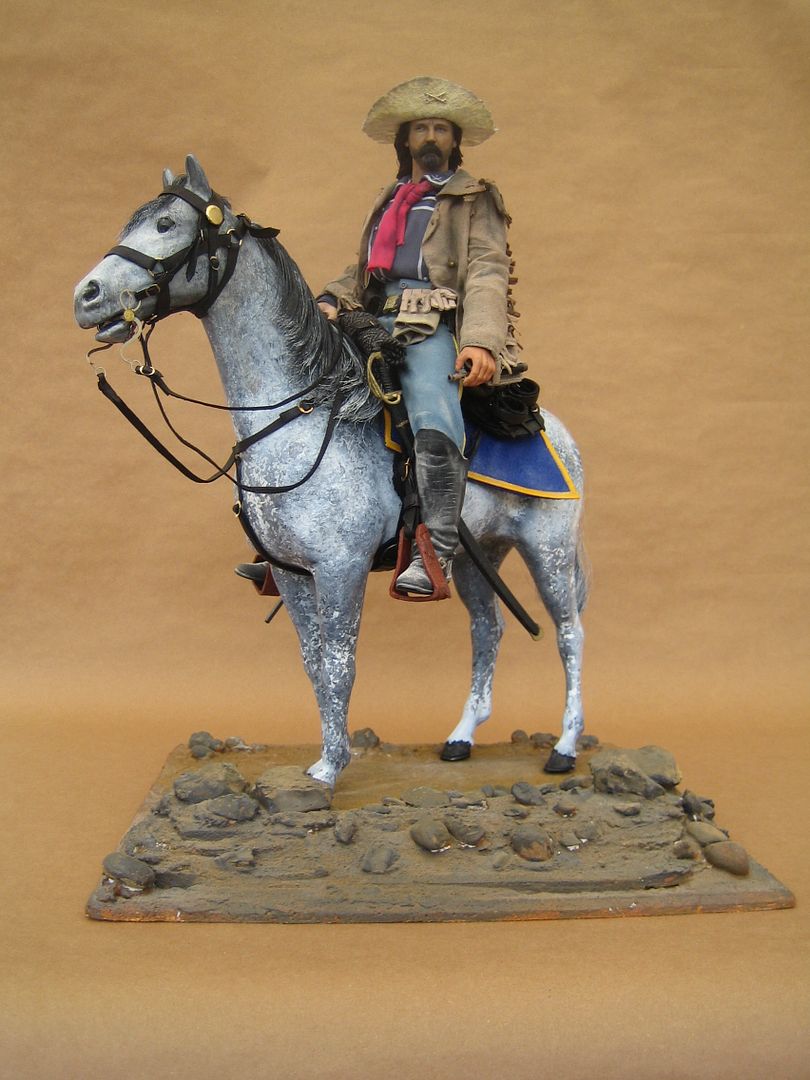
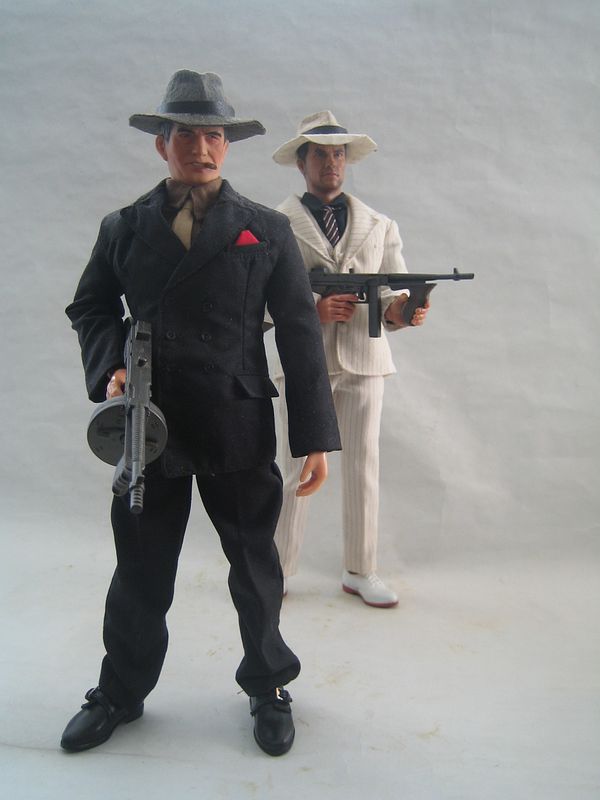
I posted this some time ago in the general custom's board but thought it wouldn't hurt to place it here too. I learned from a tutorial by Tony Barton and this is my version:

I started by making a block for forming the hats out of Fimo, the first one was all wrong as I hadn't tapered it and it was a bit too big.

block-01.jpg


block-02.jpg


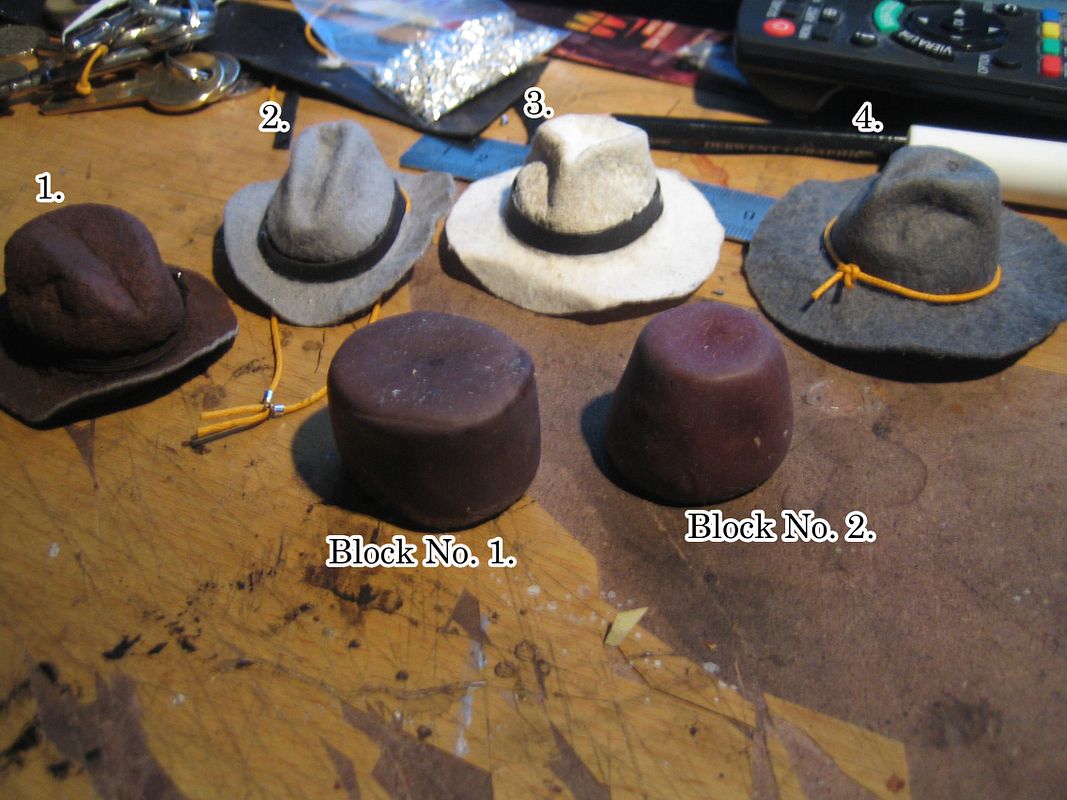
It took a lot of trial and error to end up with a passable one sixth hat and I put my own ideas into Tony's excellent tutorial.

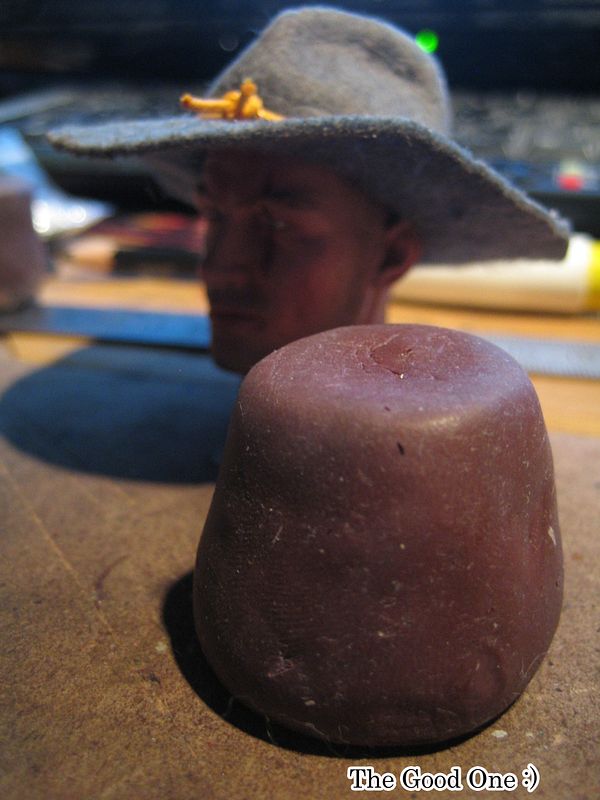
For my fifth hat I decide to photograph the process so I might pass on the little I've learnt.

Now I don't profess to be any kind of an expert but for what it's worth here's my attempt at a tutorial...

hm-01.jpg

First boil your felt in water and let it cool until you can handle it.

hm-02.jpg

Now place over the block and , placing one hand firmly on top pull down hard on the edges but try not to rip it. It will help if you do it on the edge of a table. (That's what she said!)
 
hm-03.jpg

Now you can push the tube on to it. Then hold on to it pressing down while holding it and pull the edges outwards until it will lay flat without wrinkles.

hm-04.jpg

Then give it a good Iron and it should look something like this.

hm-05.jpg

At this point I like to flip it over and spray the underside of the brim with extra hold hairspray. This helps to keep the hat's size.

hm-06.jpg

Then when it's dry enough (leave it a good few hours) pull off the tube.

hm-07.jpg

Now you'll need something to draw out the shape of the brim. This will, of course, vary depending on the style of hat.

hm-08.jpg

I've found the best way to cut this is with a knife but then again you may be way better with scissors than I am.

hm-09.jpg

Now you can remove the hat from the block for shaping. I'll start with the brim which is already quite firm and push up the sides or, in this case, snap it down at the front. Then I gently push in the top of the crown with my finger and pinch the front between thumb and forefinger. At this point it's a good idea to put it on a head, get it just right and give it a damn good spray with the hairspray.

hm-11.jpg

Once it's set, very carefully, run a ligter over the hat (it doesn't take much) to get rid of the fuzzies and...

Voila!


hm-10.jpg


Questions are welcome:)
 
Awesome!! Thanks for sharing! The end results looks perfect!
I have an idea that may be an alternative(and less scary) way of eliminating the 'fuzzies'...

I recently used a mix of 'Yellow Label Matt Mod Podge'(its a white glue based sealant) and water to eliminate the 'fuzzies' on some rope for one of my projects and it worked flawlessly.
 
GREAT work!
Thanks man:)
I'm experimenting with felt hats and superglue... Stay Tuned. :D
I am intrigued
Awesome!! Thanks for sharing! The end results looks perfect!
I have an idea that may be an alternative(and less scary) way of eliminating the 'fuzzies'...

I recently used a mix of 'Yellow Label Matt Mod Podge'(its a white glue based sealant) and water to eliminate the 'fuzzies' on some rope for one of my projects and it worked flawlessly.
Thanks for the tip, I will have to give this a try:)
And I just made a plasti-felt hat. :D
Cool, can we see it?
 
Making Seth Bullock from Deadwood's hat in felt was not easy but, although it's not screen accurate (I was unable to replicate the edge of the brim), I think it still conveys the general look of, what was known in the late 18th century as, the Dakota. At least I hope it does:pray:

Sorry about all the lint on it, I need to run some tape over it. You can't really tell until you see the image blown up on the screen.

deadwood-20_zpscdf28e1d.jpg
246_seth_214.jpg
 
Back
Top