- Joined
- Nov 10, 2007
- Messages
- 1,400
- Reaction score
- 23
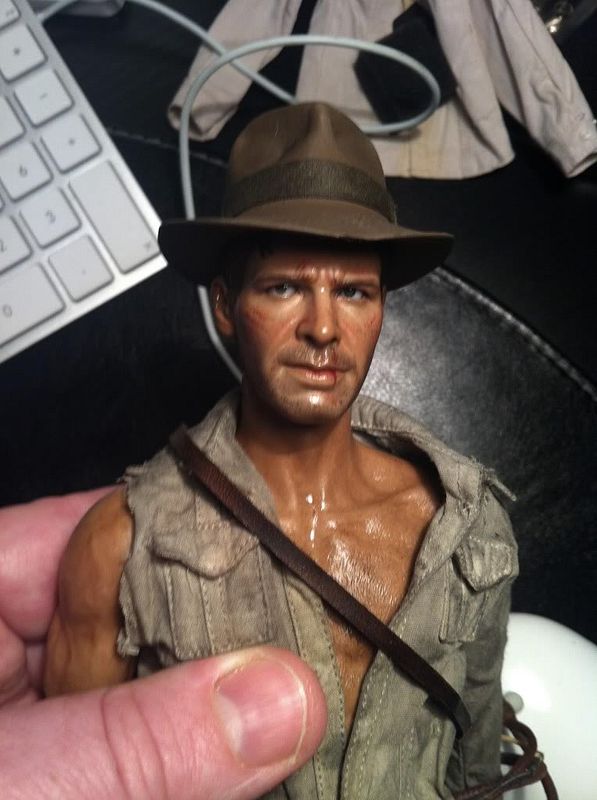
Damn elvis... very well done !


Damn elvis... very well done !
")

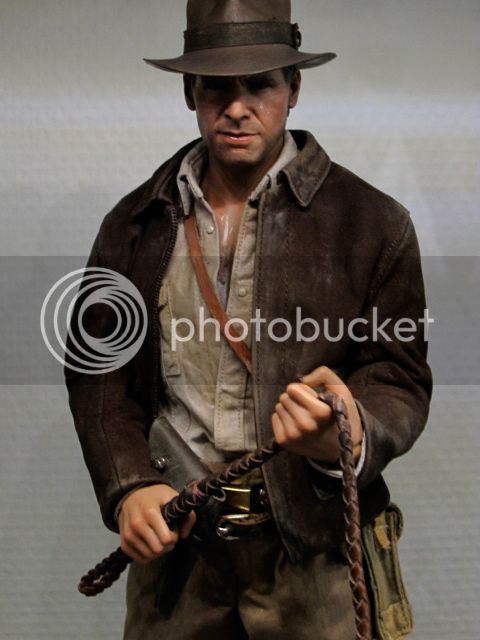
Indeed yes I made everything on that custom

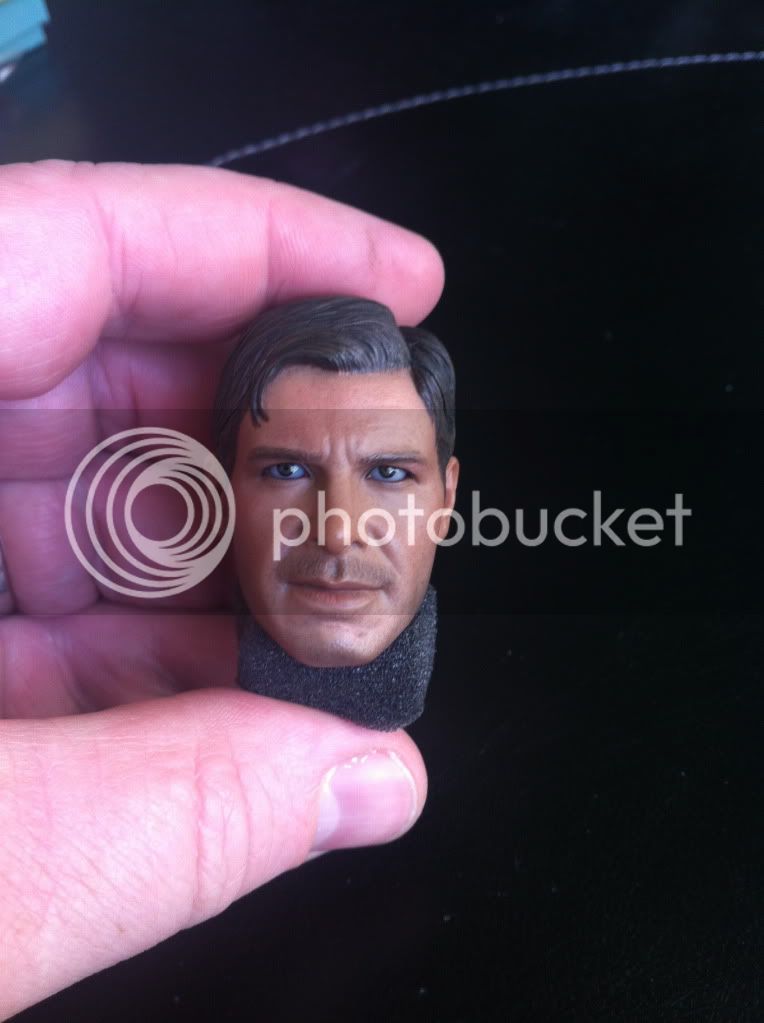
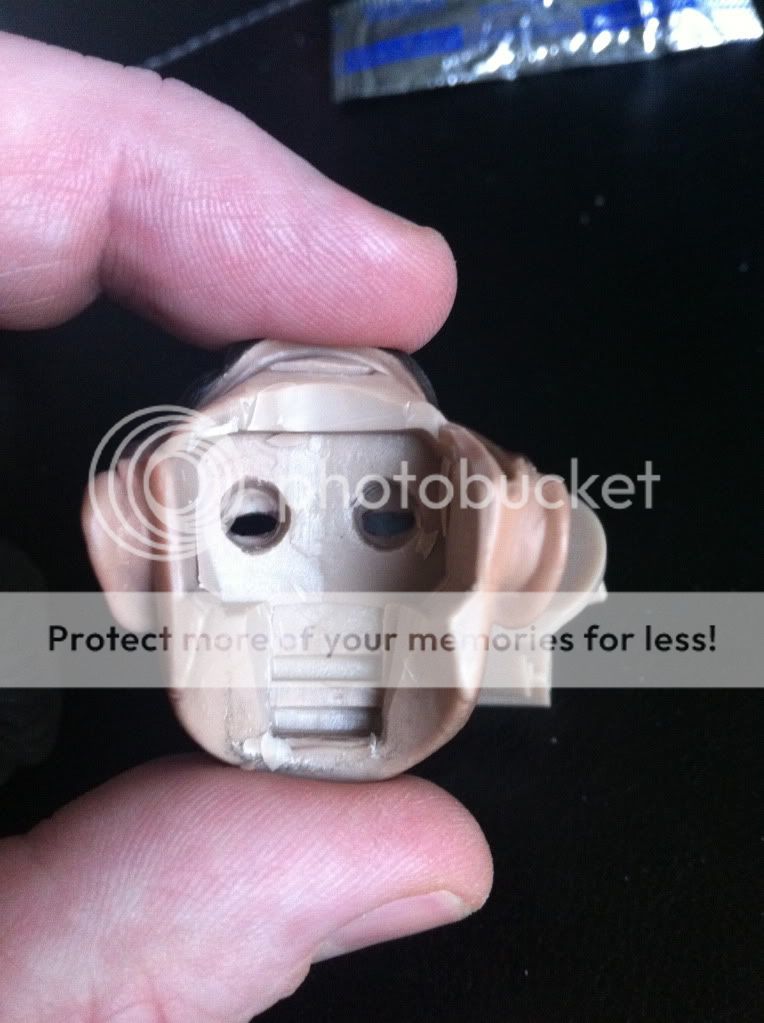
AFTER SURGERY (WIP on right, no added paint, just cutting, bending):
I'm trying to sort out what you did here. Are you dremeling or shaving the thickness of the bottom "eyelids"? Can you better explain your plan, the execution and the outcome? And what's the 'bending'?
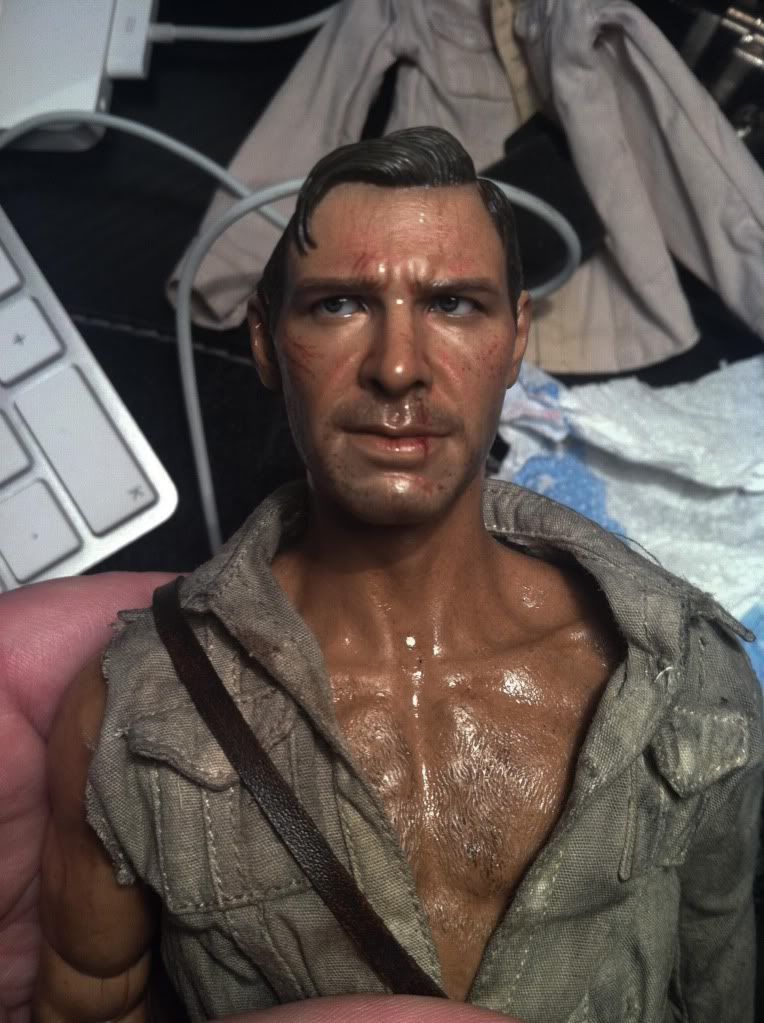
And this is where I leave it for today!:

Hey man, here's what I did step by step:
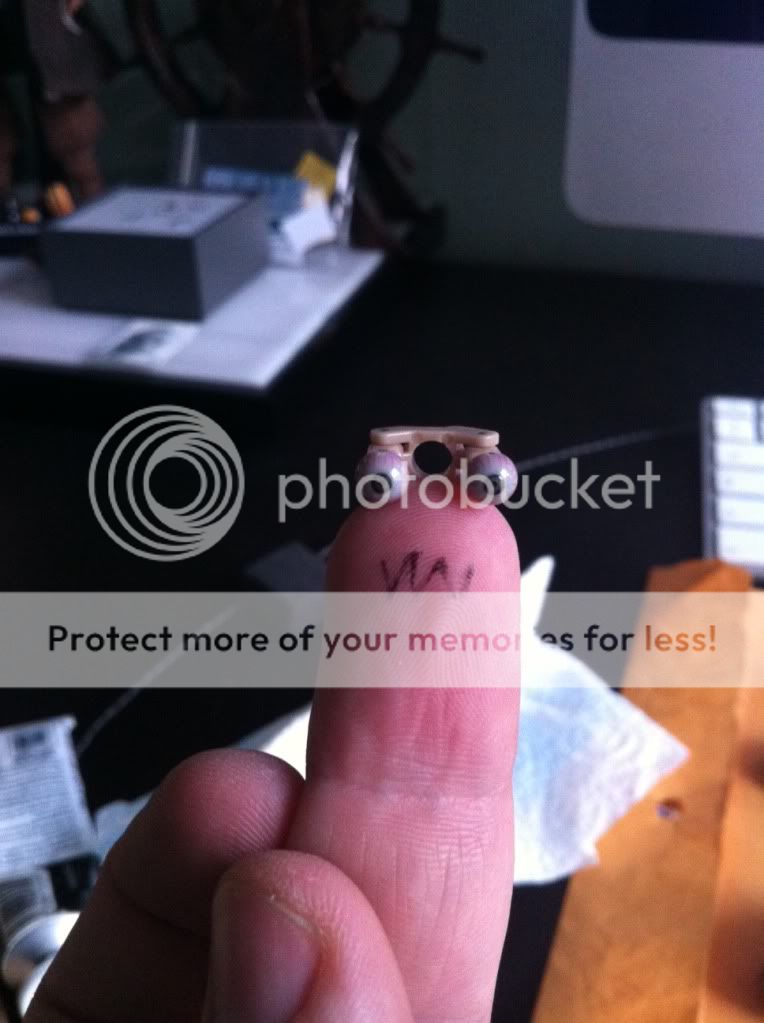
1: take out the PERS box (it's only barely superglued in).
2: take out the PERS themselves (see pic above).
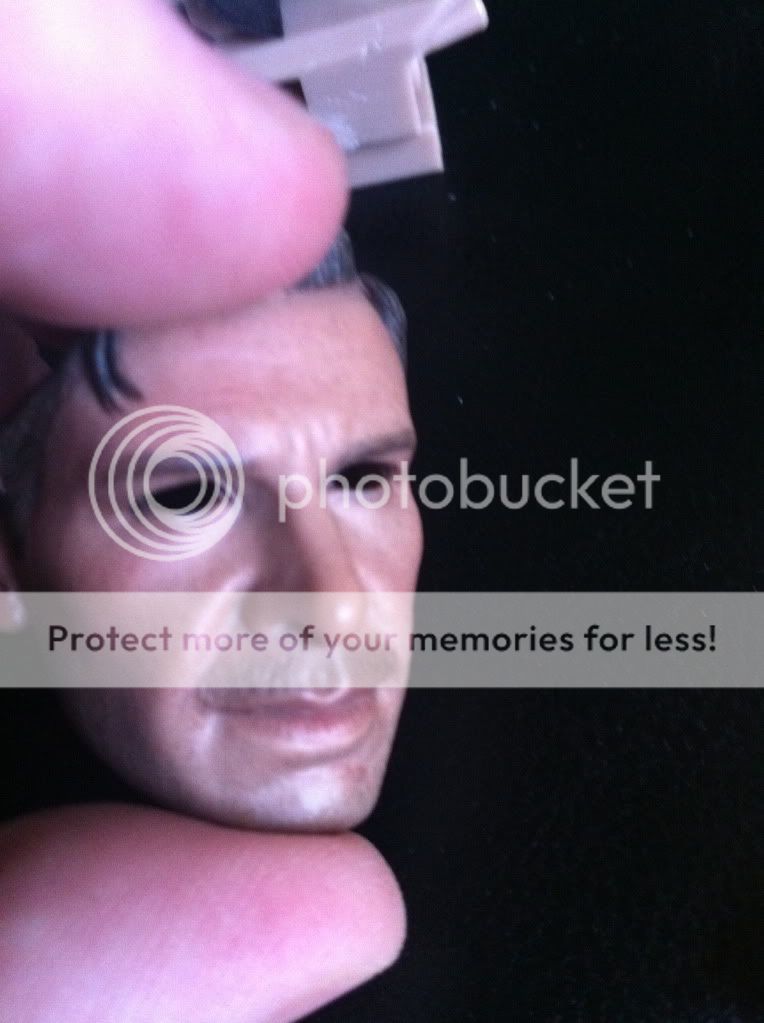
3: Shave down the PERS box, especially the chin section. I shaved mine back with a really sharp scalpel. The more you take off the smaller it is and the more room you have to push the soft face sculpt around.
4: I gently shaved off the inside of the eyelids with the too of the scalpel, from the back. It's actually easy enough, but you need a sharp scalpel blade.
5: Then I shaved out the inside of the face itself, this is very soft and easy to do.
6: Heat the face with a hairdryer, it becomes like rubber very easily and is quite malleable. Dip into cold water to set it.
Amazing work Rory, I would have bought that
PERS...


MAAAAAAAAAAAAAN this sculpt looks 100 times better than HT's one!
No worries man, yeah I did something similar to my first Indy head but a lot simpler, I learnt a lot from doing my Raiders custom and thought I could do a lot better. I had two main goals, restructure the jaw to make it more like Ford, and to try and make the eyes better. I have a problem with the dept of the eyeballs and the thickness of the bottom eyelids. So this time I decided to take the whole lot out. The eyelid issue is only necessary if you really hate the current lids. I was looking at the other DX releases and noticed how fine the lids and distance of the pupils were on those. So I shaved the inner lids. You have to be careful not to remove the back edges of the eyeholes as these keep the PERS in.
I would absolutely recommend fixing the jaw though. And it's a much easier fix. Look at that first pic of the head compared to the later ones. I think your head looked pretty good though. Just take out the box and look how it fits. The goal is to create some negative space in the head for you to squeeze the jaw in.
It's when you take out the box, you realise how messy the inner structure if the head is. I just shaved back the left and right side of the inner head, this is really easy as the head is very soft, a sharp scalpel can easily slice off the edges and lumps inside the head. The other thing that helps is cutting back the piece of the PERS box that supports the chin, this is harder plastic, I shaved about 2-3mm off either side of it, this creates a gap which allows the face to be squeezed in when heated. I will try and take a couple of pics for you tomorrow, as I know it's hard to visualise when described.
But it's a lot hardier than it looks, so don't be too concerned about ____ing it up!
Hope this helps.

Hey man, here's what I did step by step:
1: take out the PERS box (it's only barely superglued in).
2: take out the PERS themselves (see pic above).
3: Shave down the PERS box, especially the chin section. I shaved mine back with a really sharp scalpel. The more you take off the smaller it is and the more room you have to push the soft face sculpt around.
4: I gently shaved off the inside of the eyelids with the too of the scalpel, from the back. It's actually easy enough, but you need a sharp scalpel blade.
5: Then I shaved out the inside of the face itself, this is very soft and easy to do.
6: Heat the face with a hairdryer, it becomes like rubber very easily and is quite malleable. Dip into cold water to set it.
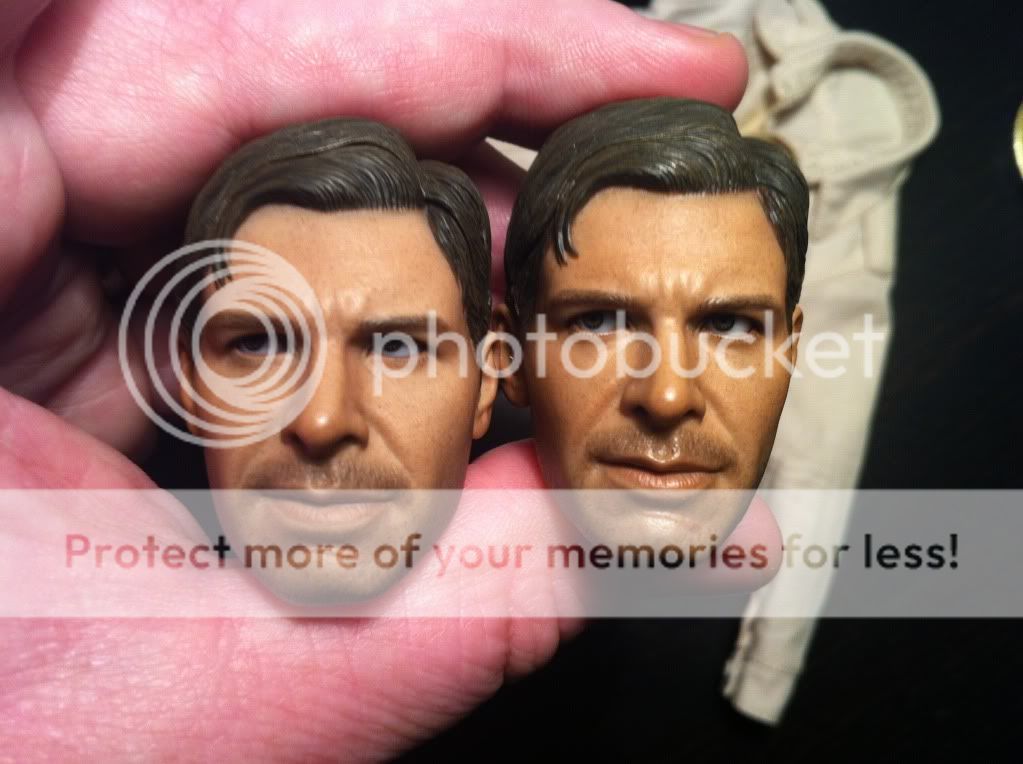
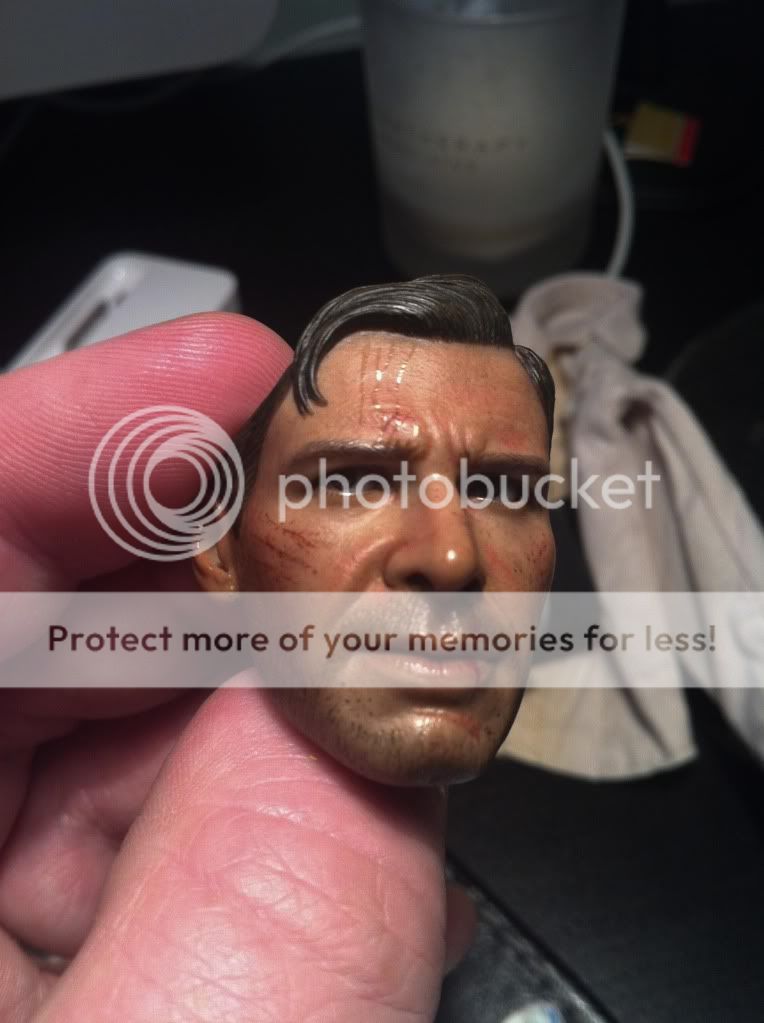
The difference really is amazing, here are some WIP painting pics. The iPhone doesn't really do it justice, makes all the colors go too bright and burn out. I will have my camera back tomorrow and try to take some better pics..
This is where I started a few hours ago (note the eyes and shape/structure of face):
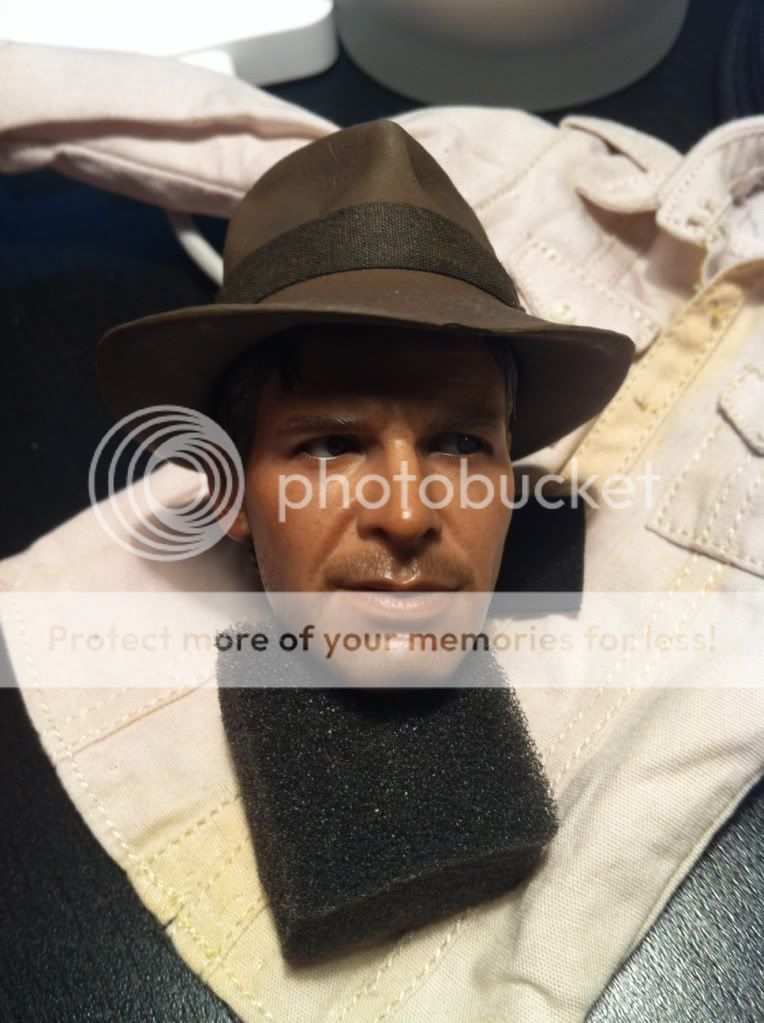
And this is where I leave it for today!:


Sorry, I used to be on the down with the HT Indy, but honestly, at least it looks human compared to the SS stuff. I can't believe SS still gets that much money for those figures. They aren't that much better than Hasbro to be charging that much.

Enter your email address to join: