You are using an out of date browser. It may not display this or other websites correctly.
You should upgrade or use an alternative browser.
You should upgrade or use an alternative browser.
Natedog's figure bashes and customs - Deathstar Diorama=Complete
- Thread starter Natedog
- Start date

Help Support Collector Freaks Forum:
This site may earn a commission from merchant affiliate
links, including eBay, Amazon, and others.
Natedog
Super Freak
Re: Natedog's figure bashes and customs - Update! Ahsoka Tano Page 26
Thanks man! Yeah, the body is the right size and it comes completely apart (nice for painting) but its not that realistic looking. Then again this is cartoon character so... Oh and yes the body is painted. We'll see how long it lasts. Its airbrushed on thin and the stand doesn't grab tight, so that should help.
Thanks man! Yeah, the body is the right size and it comes completely apart (nice for painting) but its not that realistic looking. Then again this is cartoon character so... Oh and yes the body is painted. We'll see how long it lasts. Its airbrushed on thin and the stand doesn't grab tight, so that should help.
Natedog
Super Freak
OutLander
Super Freak
Re: Natedog's figure bashes and customs - Update! Scout Trooper Page 20
Nice job Nate, great figure
Too bad the show was canceled.
Well... here she is. I need more practice painting eyes, but otherwise not too bad. Not sure how Im going to pose her yet. Right now I have her with her hand on her hip in a "what are you looking at" pose and I kind of like it, I'll just take out the blade and and put her saber on her belt. What do you think?
[/URL]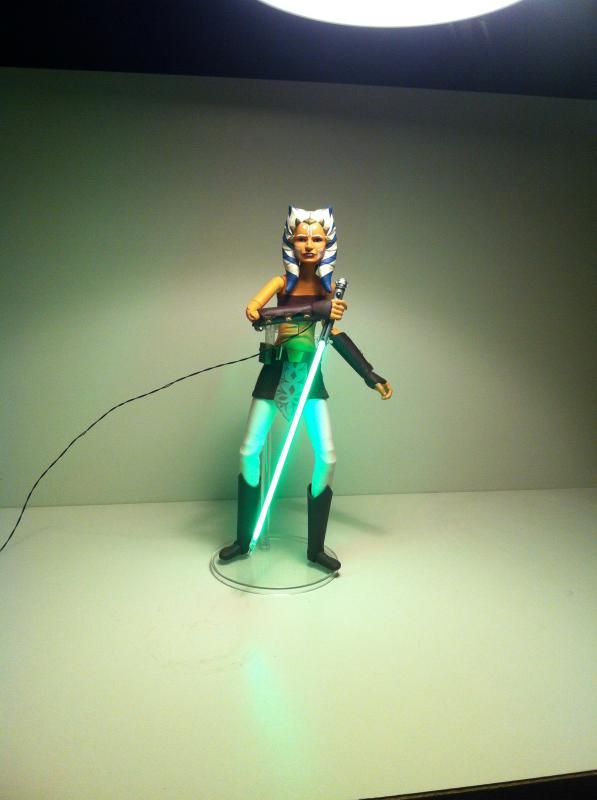
Nice job Nate, great figure

Too bad the show was canceled.
Natedog
Super Freak
Re: Natedog's figure bashes and customs - Update! Ahsoka Tano Page 26
Thanks outlander. I agree it was a great show. Rebels doesn't even come close,,,yet anyways.
Thanks outlander. I agree it was a great show. Rebels doesn't even come close,,,yet anyways.
Spudtrooper
Super Freak
Re: Natedog's figure bashes and customs - Update! Ahsoka Tano Page 26
Yeah I really miss it. Although Rebels has surprised me. The introduction of familiar characters like 3PO and R2 makes me all warm and fuzzy inside thinking who else they could bring into it. And the soundtrack alone is so awesome. Just that classic Star Wars feel that gives you chills. I have more hope for the show than I originally did for sure.Thanks outlander. I agree it was a great show. Rebels doesn't even come close,,,yet anyways.
Re: Natedog's figure bashes and customs - Update! Ahsoka Tano Page 26
@Natedog- Dude you make amazing customs, and I'm wondering if I could commission you for some Knights of the Old Republic ones. Revan, Bastella, Malak, Zayne, Jarael, even Gryph and Rohlan? Please left me know.
Thanks - Ryan
@Natedog- Dude you make amazing customs, and I'm wondering if I could commission you for some Knights of the Old Republic ones. Revan, Bastella, Malak, Zayne, Jarael, even Gryph and Rohlan? Please left me know.
Thanks - Ryan
Natedog
Super Freak
Re: Natedog's figure bashes and customs - Update! Ahsoka Tano Page 26
Thanks Ryan!
I don't take commissions though. This is just a hobby and that would make it work. I have enough of that
Thanks Ryan!
I don't take commissions though. This is just a hobby and that would make it work. I have enough of that
Natedog
Super Freak
Spudtrooper
Super Freak
Re: Natedog's figure bashes and customs - Update! Ahsoka Tano Page 26
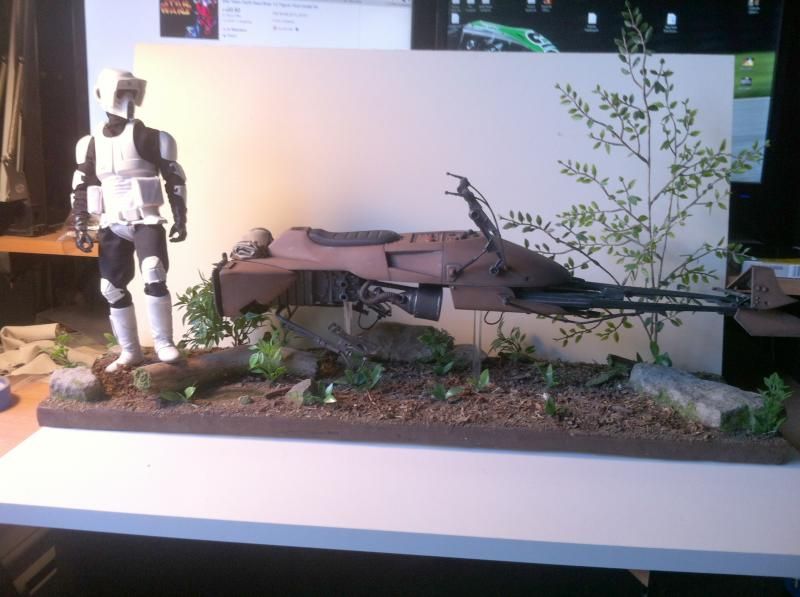
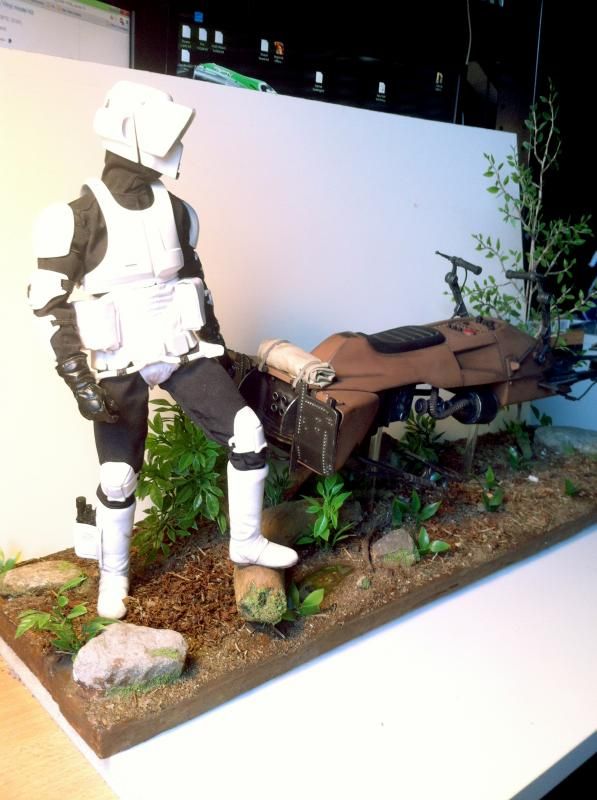
I'm guessing a diorama for a speeder bike and biker scout?
I'm guessing a diorama for a speeder bike and biker scout?
Natedog
Super Freak
Re: Natedog's figure bashes and customs - Update! Ahsoka Tano Page 26
Maaaaaaybe
Maaaaaaybe
Spudtrooper
Super Freak
Re: Natedog's figure bashes and customs - Update! Ahsoka Tano Page 26
Hahahaha
Hahahaha
Natedog
Super Freak
OutLander
Super Freak
Re: Natedog's figure bashes and customs - Update! Ahsoka Tano Page 26
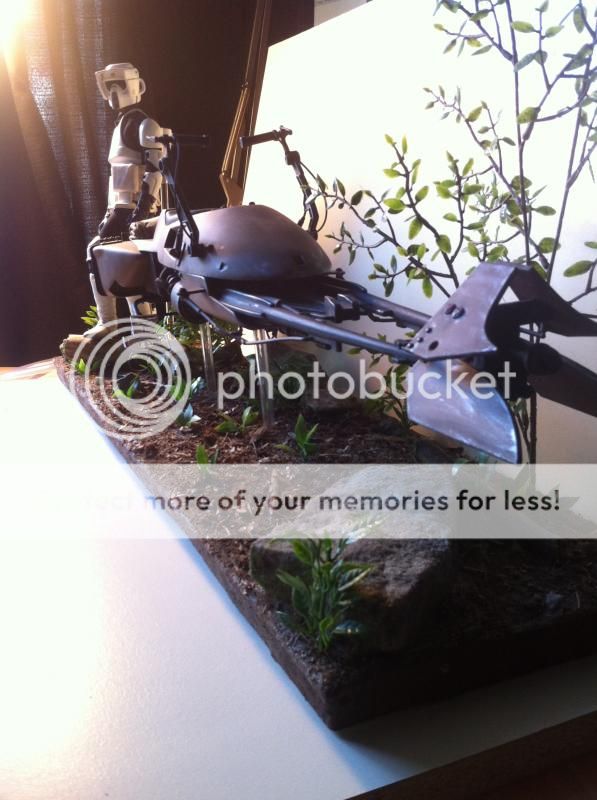
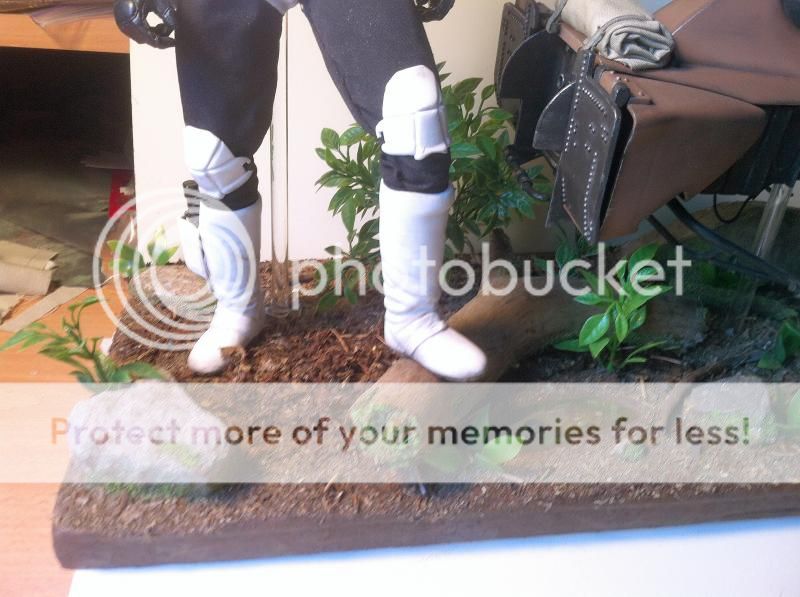
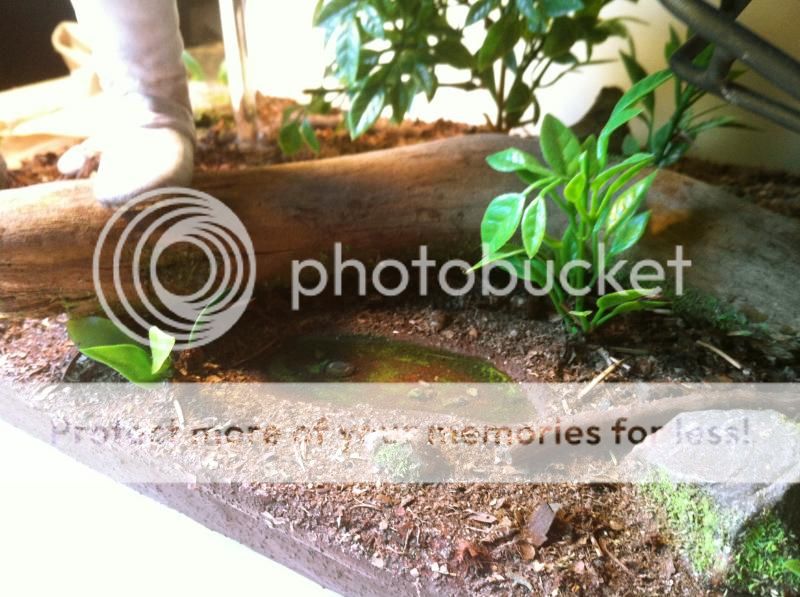
Looks amazing Nate.....especially the wood log and the moss on the rocks.
Looks amazing Nate.....especially the wood log and the moss on the rocks.

Natedog
Super Freak
Chakaman
Super Freak
Re: Natedog's figure bashes and customs - Update! Ahsoka Tano Page 26
That's looking great. Nice attention to detail. This reminds me of the days when I would build landscape scenery for my dad's model railroad.
Good stuff Nate.
That's looking great. Nice attention to detail. This reminds me of the days when I would build landscape scenery for my dad's model railroad.
Good stuff Nate.
Natedog
Super Freak
Re: Natedog's figure bashes and customs - Update! Ahsoka Tano Page 26
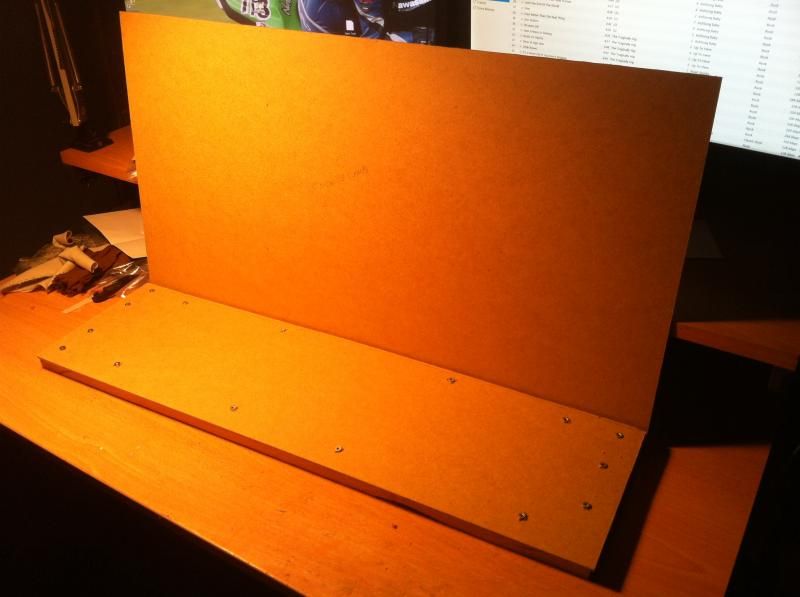
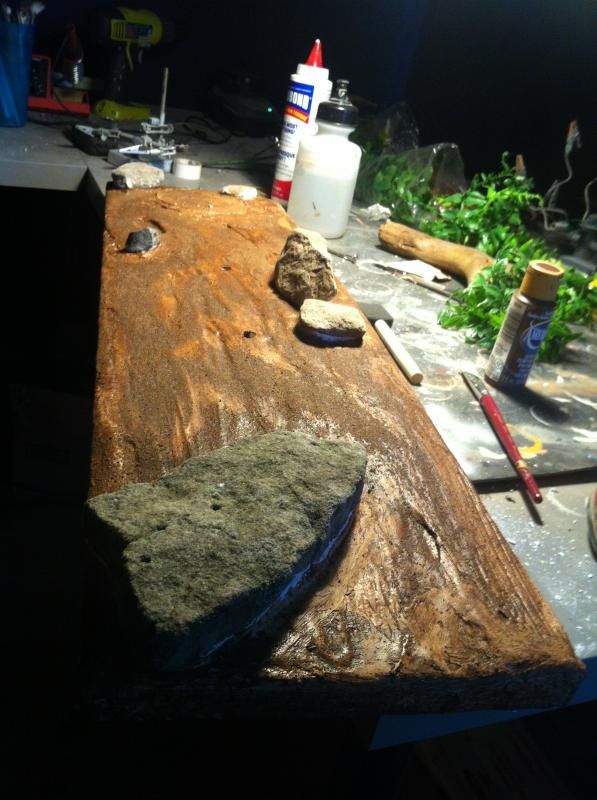
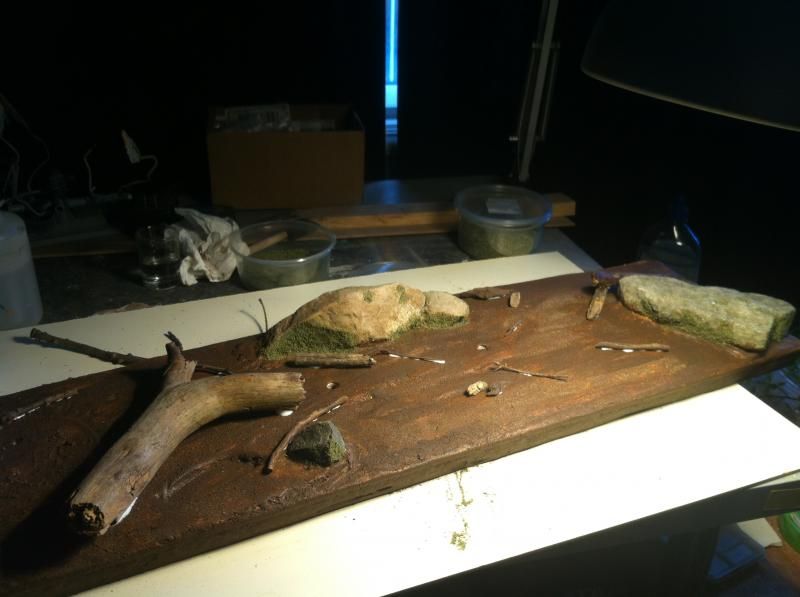
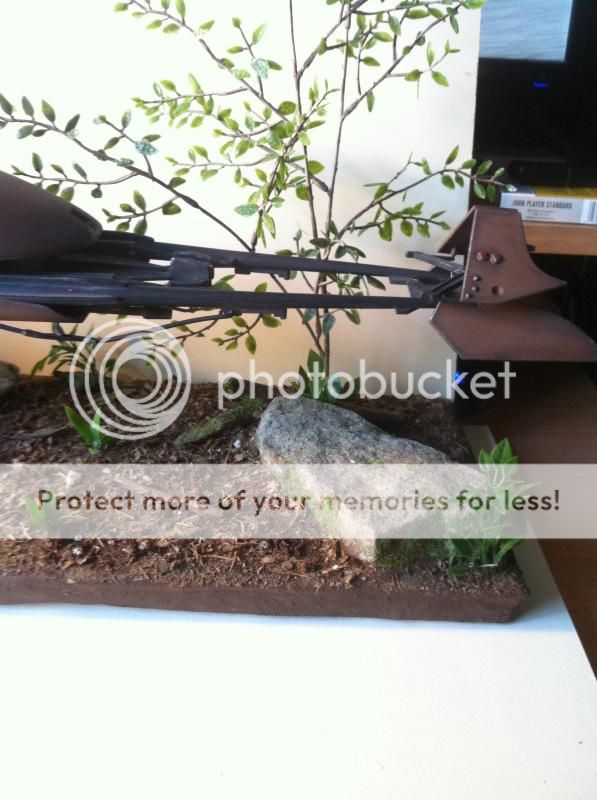
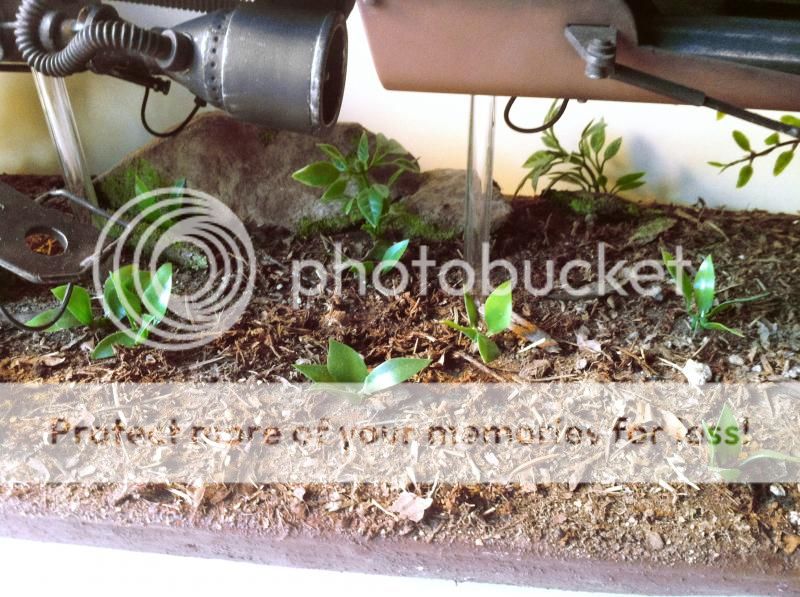
The process I used is:
1) build frame with 1x2s then screw an MDF board on top
2) Plaster to cover everthing
3) Place rocks while plaster is still wet
4) apply 1st coat of burnt umber to the ground
5) apply mixture of PVA glue, water, burnt umber paint and fine gravel
6) glue down any large debris you wish to use
7) for moss I used a bag of dollar store "reindeer moss" and ground it up really fine.
8) apply watered down PVA glue to any area you want moss and sprinkle it on.
9) The spring is just a planned indentation in the plaster with a few stones inside, a bit of green paint and topped off with some clear (read=amber) resin
10 The sapling tree is from the dollar store too. I painted the trunk and branches since it comes all green. Drill a hole and glue it in place.
11) I removed a few branches from the small bush and drilled/glued them in various places then drilled/glued the bush in place.
12) the short leaves sticking out are from a dollar store tropical type plant that I used scissors to trim the leaves to a more accurate size and simply drill/glued in place
13) The ground cover is a mixture of natural materials including dead leaves ground up, dirt, pine needles broken up. I also used some of the ground up reindeer moss and mixed it with some raw siena. Once dry that was thrown in the mix. To apply just brush on more watered down glue and sprinkle on. Several layers are required. In some places I actually mixed the the debris and glue together in a bowl and spread on like mud.
That's about it. The hardest part was probably grinding and preparing the moss and ground debris since it needs to be ground up pretty fine. It wasn't all that difficult but did take some time. I think it turned out pretty well.
If anyone has any questions, don't hesitate to ask.
menlojames
Super Freak
Re: Natedog's figure bashes and customs - Update! Ahsoka Tano Page 26
That is fantastic!!! Beautiful work!!!
That is fantastic!!! Beautiful work!!!
Hewer
Super Freak
Re: Natedog's figure bashes and customs - Update! Ahsoka Tano Page 26
Nice work very cool
Nice work very cool
Spudtrooper
Super Freak
Re: Natedog's figure bashes and customs - Update! Ahsoka Tano Page 26
Nice looking dio dude!
Nice looking dio dude!
Similar threads
- Replies
- 9
- Views
- 4K
- Replies
- 8
- Views
- 639
- Replies
- 7
- Views
- 1K
- Replies
- 12
- Views
- 3K


