You are using an out of date browser. It may not display this or other websites correctly.
You should upgrade or use an alternative browser.
You should upgrade or use an alternative browser.
Hot Toys: 1/4 Official Boba Fett Collectible Figure
- Thread starter MagnumOpus
- Start date

Help Support Collector Freaks Forum:
This site may earn a commission from merchant affiliate
links, including eBay, Amazon, and others.
Egrass21
Freakzoid
- Joined
- Feb 6, 2016
- Messages
- 94
- Reaction score
- 0
Still loving him...
View attachment 243633
Nice pic
egel
Super Freak
Do you guys think the helmet is a bit oversized?
Nope, to me all the other Fett figure helmets are too small.

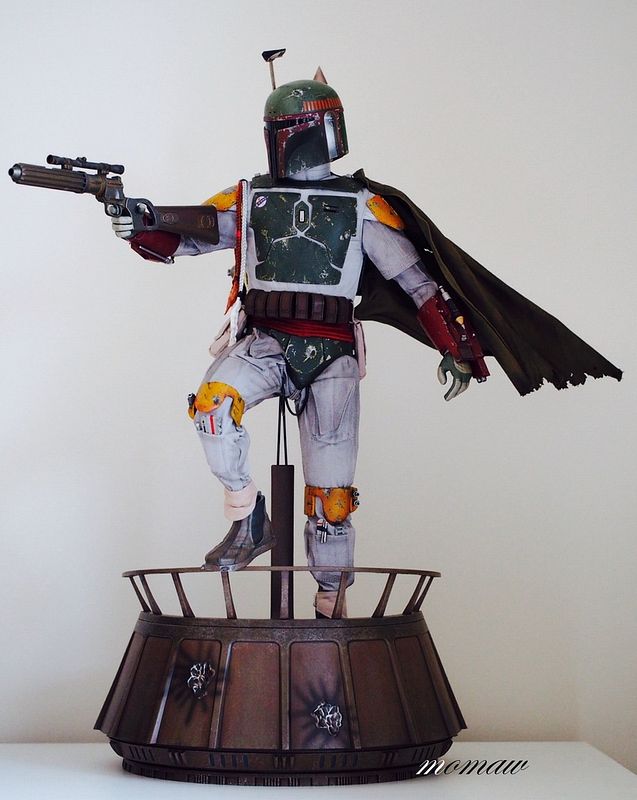
My attempt to a "classic" pose:

One question: any other people also underwhelmed by the paint job on the helmet ? The scratches don't really look like scratches and don't shine enough IMO, it doesn't look weathered in the end. I am disappointed after seeing so many good prototype pictures
Final Boba helmet:

Prototype pictures:


One question: any other people also underwhelmed by the paint job on the helmet ? The scratches don't really look like scratches and don't shine enough IMO, it doesn't look weathered in the end. I am disappointed after seeing so many good prototype pictures
Final Boba helmet:

Prototype pictures:

Kosika
Freaked Out
There were a couple of encouraging posts  so I'll add some more pics of my repaint.
Big thanks to Rubio for giving me tips on how the figure comes apart. It made painting so much easier!
I began by disassembling most of the figure into its main components. Here are the unaltered pieces.
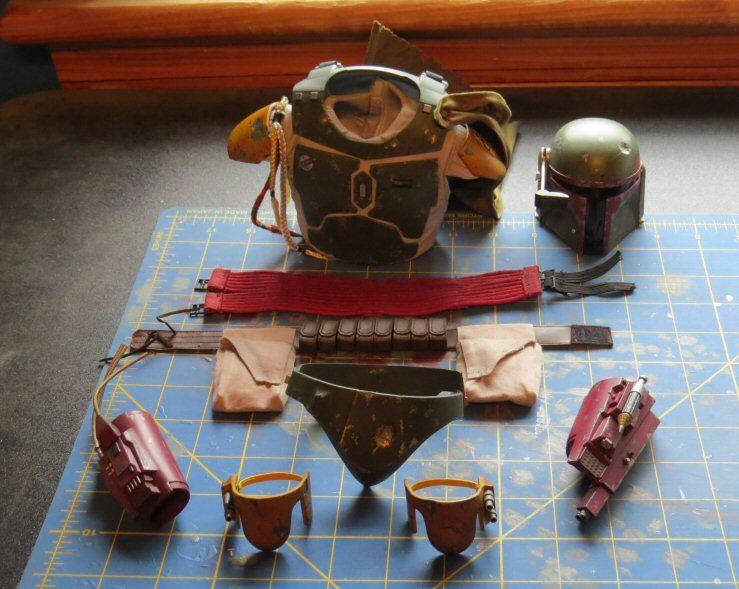
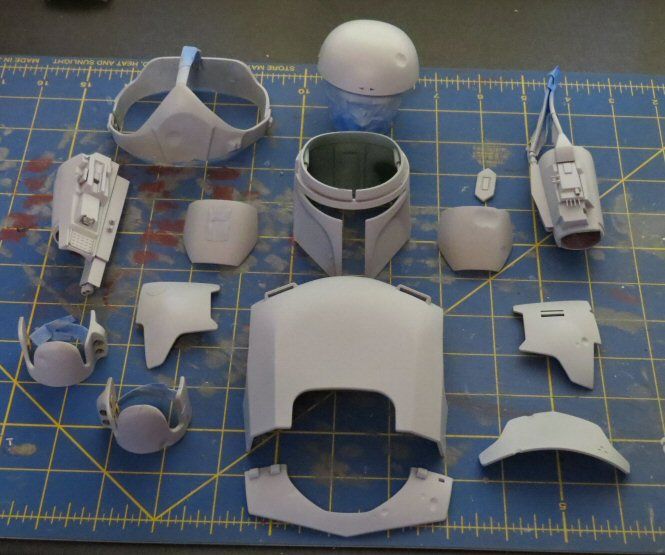
After that, I went a bit further and removed the torso armor from the vest. This is a more permanent mod,
as the pieces have to be glued back on. I also disassembled the helmet. It's really amazing how many pieces
go into this figure! Even the dark "lens" on the left chest plate is removable. I gave everything a nice coat
of Tamiya fine surface primer.
Since I'm a prop guy, I have a lot of nice quality Polly Scale paints, many of which were the colors used on
the original props. I mostly used those colors for my palette, along with a handful of other brands. Here are
some pics of the finished figure.
I airbrushed the base colors on, using light coats to build up the color and leave things a bit uneven. Details
were added using a couple of light shades of colored pencils. I even added the black spatter seen on the green
armor parts using a very thinned down mix of flat black.
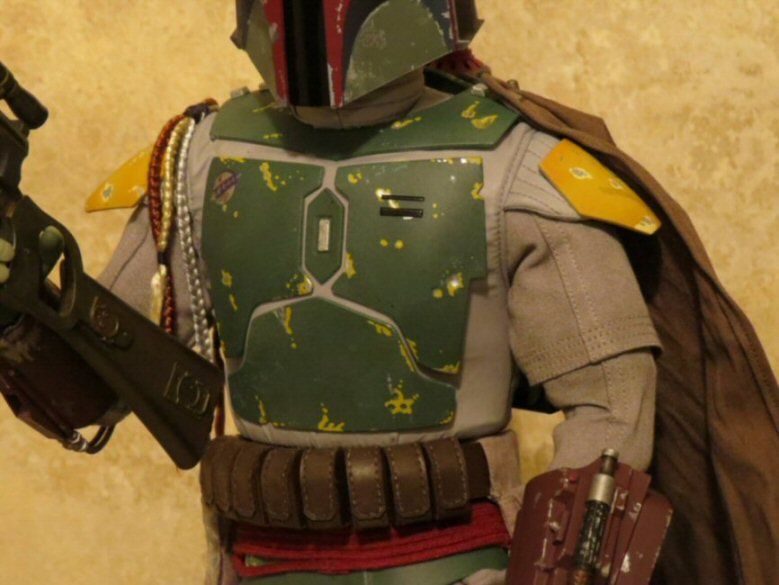
Here's a closer look at the spatter, including some that I dotted on with a 10/0 brush.
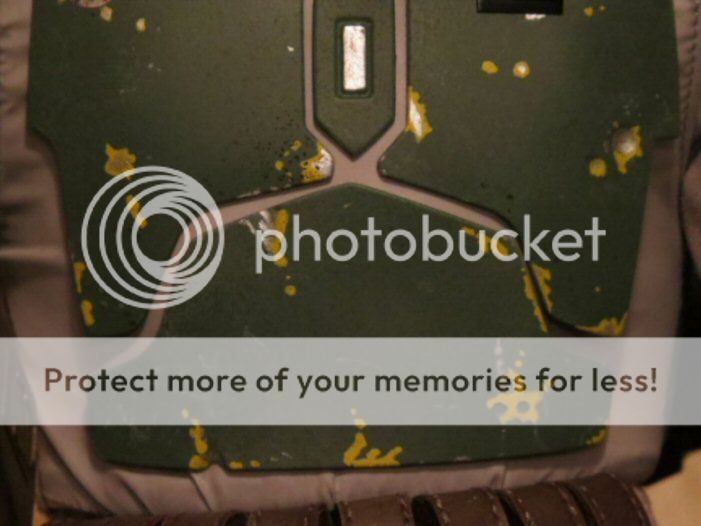
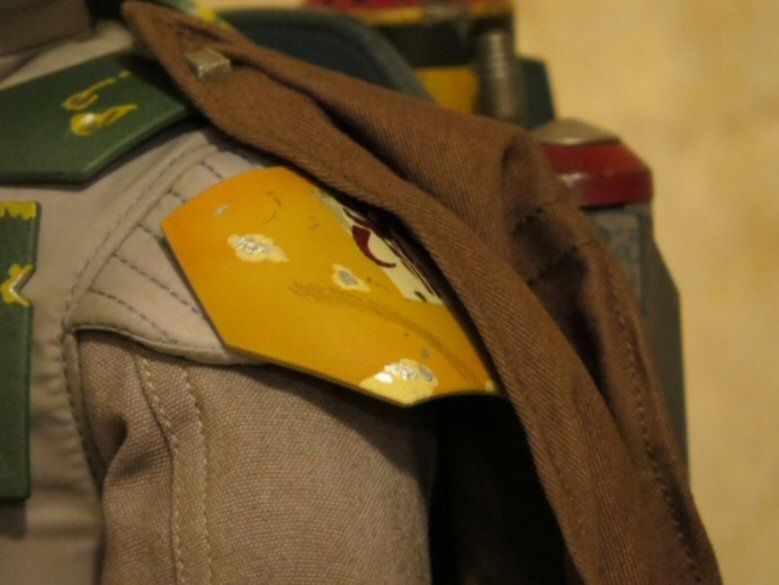
On all the parts, I got things as close as I could to the reference photos I have of the ROTJ suit instead of
the more "impressionistic" paint job that Hot Toys went with. Here are a couple of shots of the knee and
shoulder armor. The stains and darker spots were done with colored pencils.
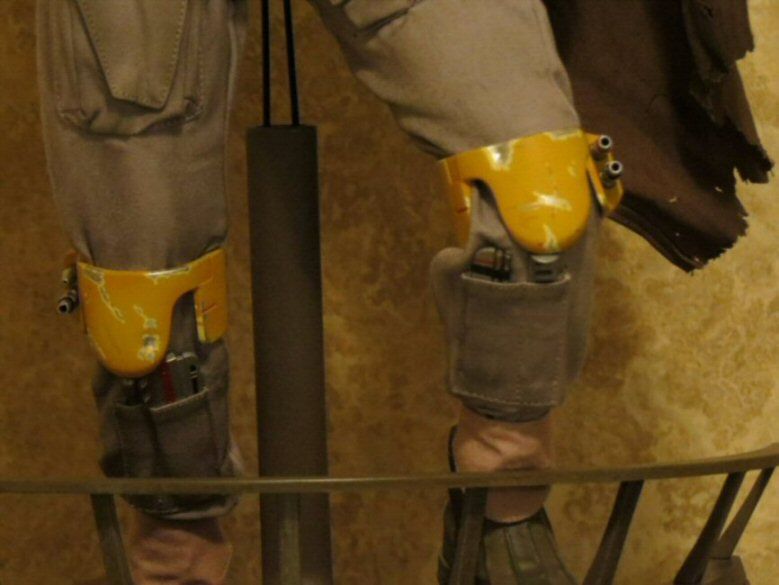

I even added the colored rings on the knee darts.
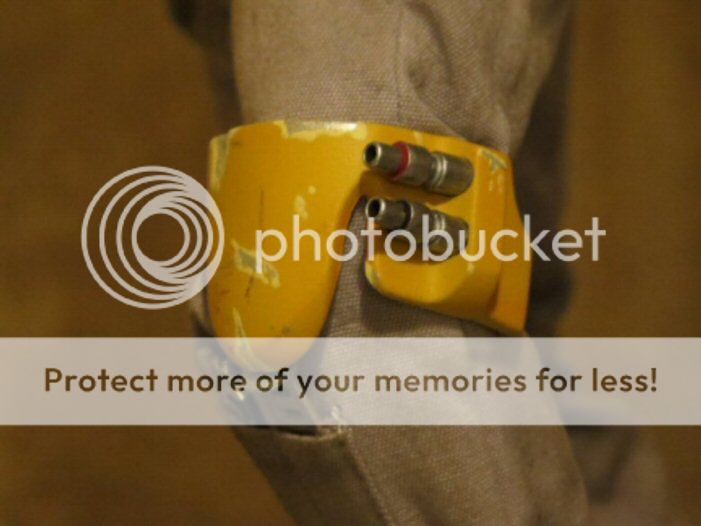
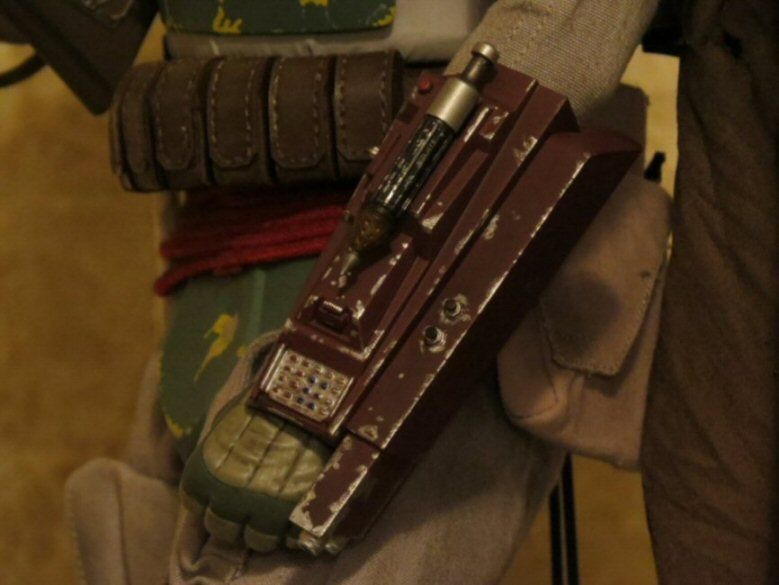
The gauntlets received a dark wash, then the silver damage.

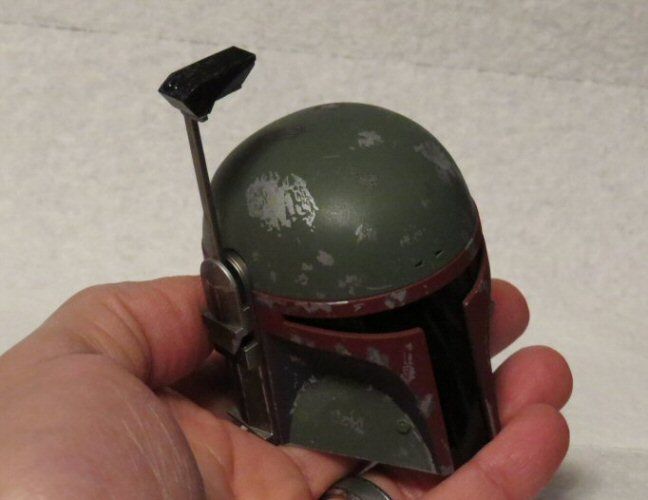
Another couple of shots of the helmet. This was really challenging to paint! Everything is so small, LOL.
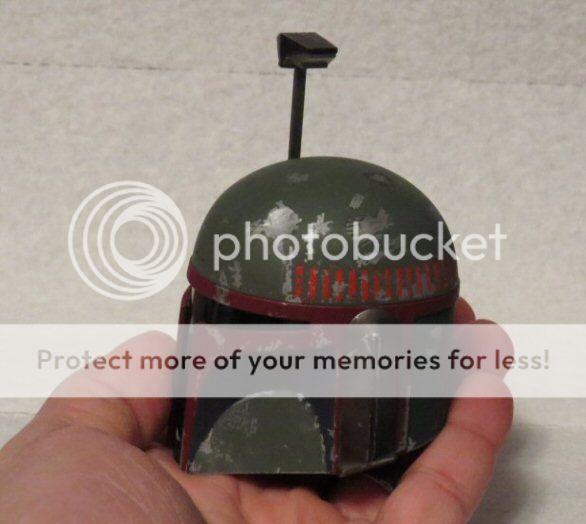
So that's my mod! It's a great figure to begin with and makes a really impressive part of my collection. I just
wanted things to look more like ROTJ than a stylized version. Thanks for looking.
Big thanks to Rubio for giving me tips on how the figure comes apart. It made painting so much easier!
I began by disassembling most of the figure into its main components. Here are the unaltered pieces.

After that, I went a bit further and removed the torso armor from the vest. This is a more permanent mod,
as the pieces have to be glued back on. I also disassembled the helmet. It's really amazing how many pieces
go into this figure! Even the dark "lens" on the left chest plate is removable. I gave everything a nice coat
of Tamiya fine surface primer.

Since I'm a prop guy, I have a lot of nice quality Polly Scale paints, many of which were the colors used on
the original props. I mostly used those colors for my palette, along with a handful of other brands. Here are
some pics of the finished figure.
I airbrushed the base colors on, using light coats to build up the color and leave things a bit uneven. Details
were added using a couple of light shades of colored pencils. I even added the black spatter seen on the green
armor parts using a very thinned down mix of flat black.

Here's a closer look at the spatter, including some that I dotted on with a 10/0 brush.

On all the parts, I got things as close as I could to the reference photos I have of the ROTJ suit instead of
the more "impressionistic" paint job that Hot Toys went with. Here are a couple of shots of the knee and
shoulder armor. The stains and darker spots were done with colored pencils.


I even added the colored rings on the knee darts.

The gauntlets received a dark wash, then the silver damage.


Another couple of shots of the helmet. This was really challenging to paint! Everything is so small, LOL.


So that's my mod! It's a great figure to begin with and makes a really impressive part of my collection. I just
wanted things to look more like ROTJ than a stylized version. Thanks for looking.
kazar123
Super Freak
- Joined
- Jul 8, 2012
- Messages
- 1,578
- Reaction score
- 342
I think I'll be getting one of these dudes in a week or so when my tax returns hits the bank. Very nice figures.
- Joined
- Jul 8, 2012
- Messages
- 1,578
- Reaction score
- 342
I wanna know one thing before I pull the trigger. Does the visor look better in hand? Some of these figures seem to have better visor shape than others (meaning: like it looks in the film). Is it the angle? I can't tell. I figured at this scale and price it would be damn near perfect. What say you?
- Joined
- Dec 31, 2009
- Messages
- 15,216
- Reaction score
- 157
No. Looks like it does in the pics unfortunately.
Sweet pose, momaw. 
Just got me excited for the 1/6 Boba.

Just got me excited for the 1/6 Boba.
Master1983
Freaked Out
- Joined
- Oct 11, 2014
- Messages
- 149
- Reaction score
- 0
Hi everyone,
i got my HT Boba Fett some days ago and i think its really a great piece.
But i have one thing im not sure if its normal or not. The chest armor on the right side (looking from the front of the figure) has a gap.
On the other side it fits perfect.


Would be great to get some feedback if this is normal or not.
i got my HT Boba Fett some days ago and i think its really a great piece.
But i have one thing im not sure if its normal or not. The chest armor on the right side (looking from the front of the figure) has a gap.
On the other side it fits perfect.


Would be great to get some feedback if this is normal or not.
Similar threads
- Replies
- 0
- Views
- 271
- Replies
- 94
- Views
- 7K
- Replies
- 0
- Views
- 308
- Replies
- 21
- Views
- 2K
Latest posts
-
-
-
InArt: The Lord of the Rings - Aragorn 1:6
- Latest: ObiGlennKenobi
-
Mars Toys - Gus Fring Breaking Bad 1/6 figure.
- Latest: mcautographs
-
-
-


