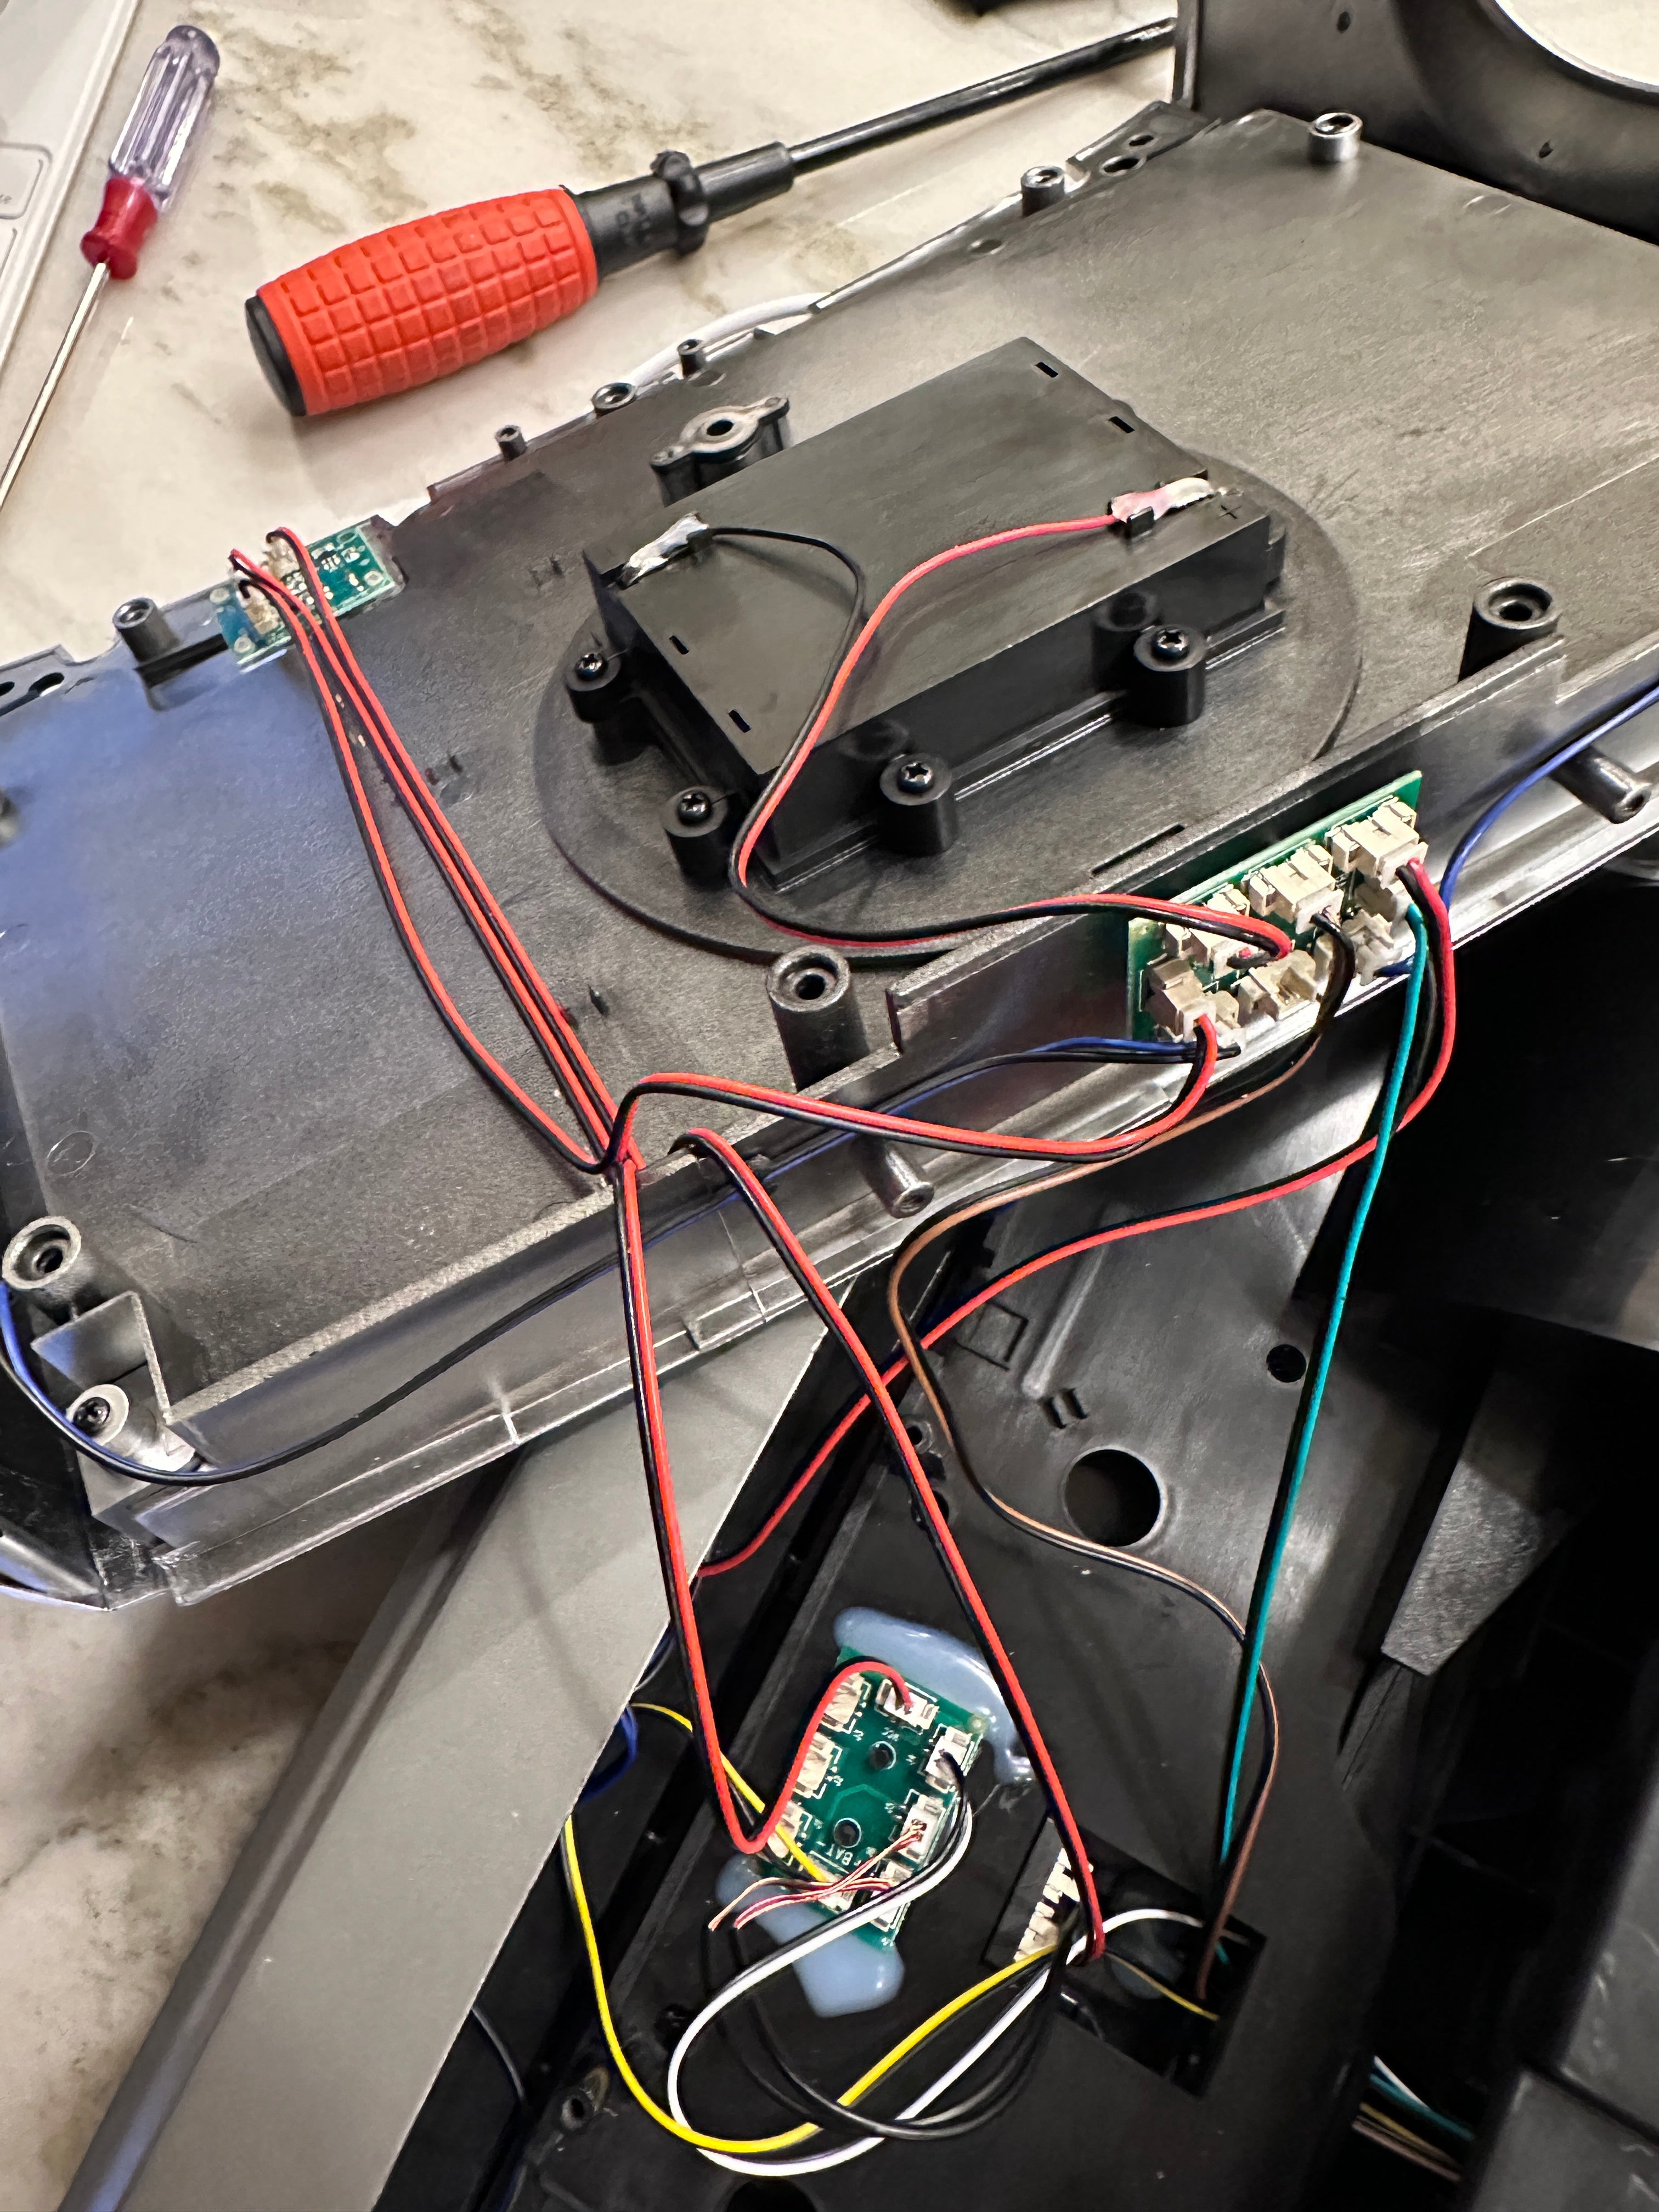
Hello! I was trying to make the modification to swap the LED1 and LED2 jumpers. Perhaps when I pulled the hood area up, something got disconnected. The problem I have now is when batteries are in, the headlights/turn signal lights come on automatically, before I have pushed the switch. Pushing the switch does turn on and off the hover lighting, but never turns off the above lights.
Could someone check my wiring here to see if I plugged something in the wrong spot? Perhaps I sent the power cable to the wrong board? Attached are two photos.
Thank you!
Eric