ghilbertit
Super Freak
- Joined
- Aug 2, 2011
- Messages
- 289
- Reaction score
- 71
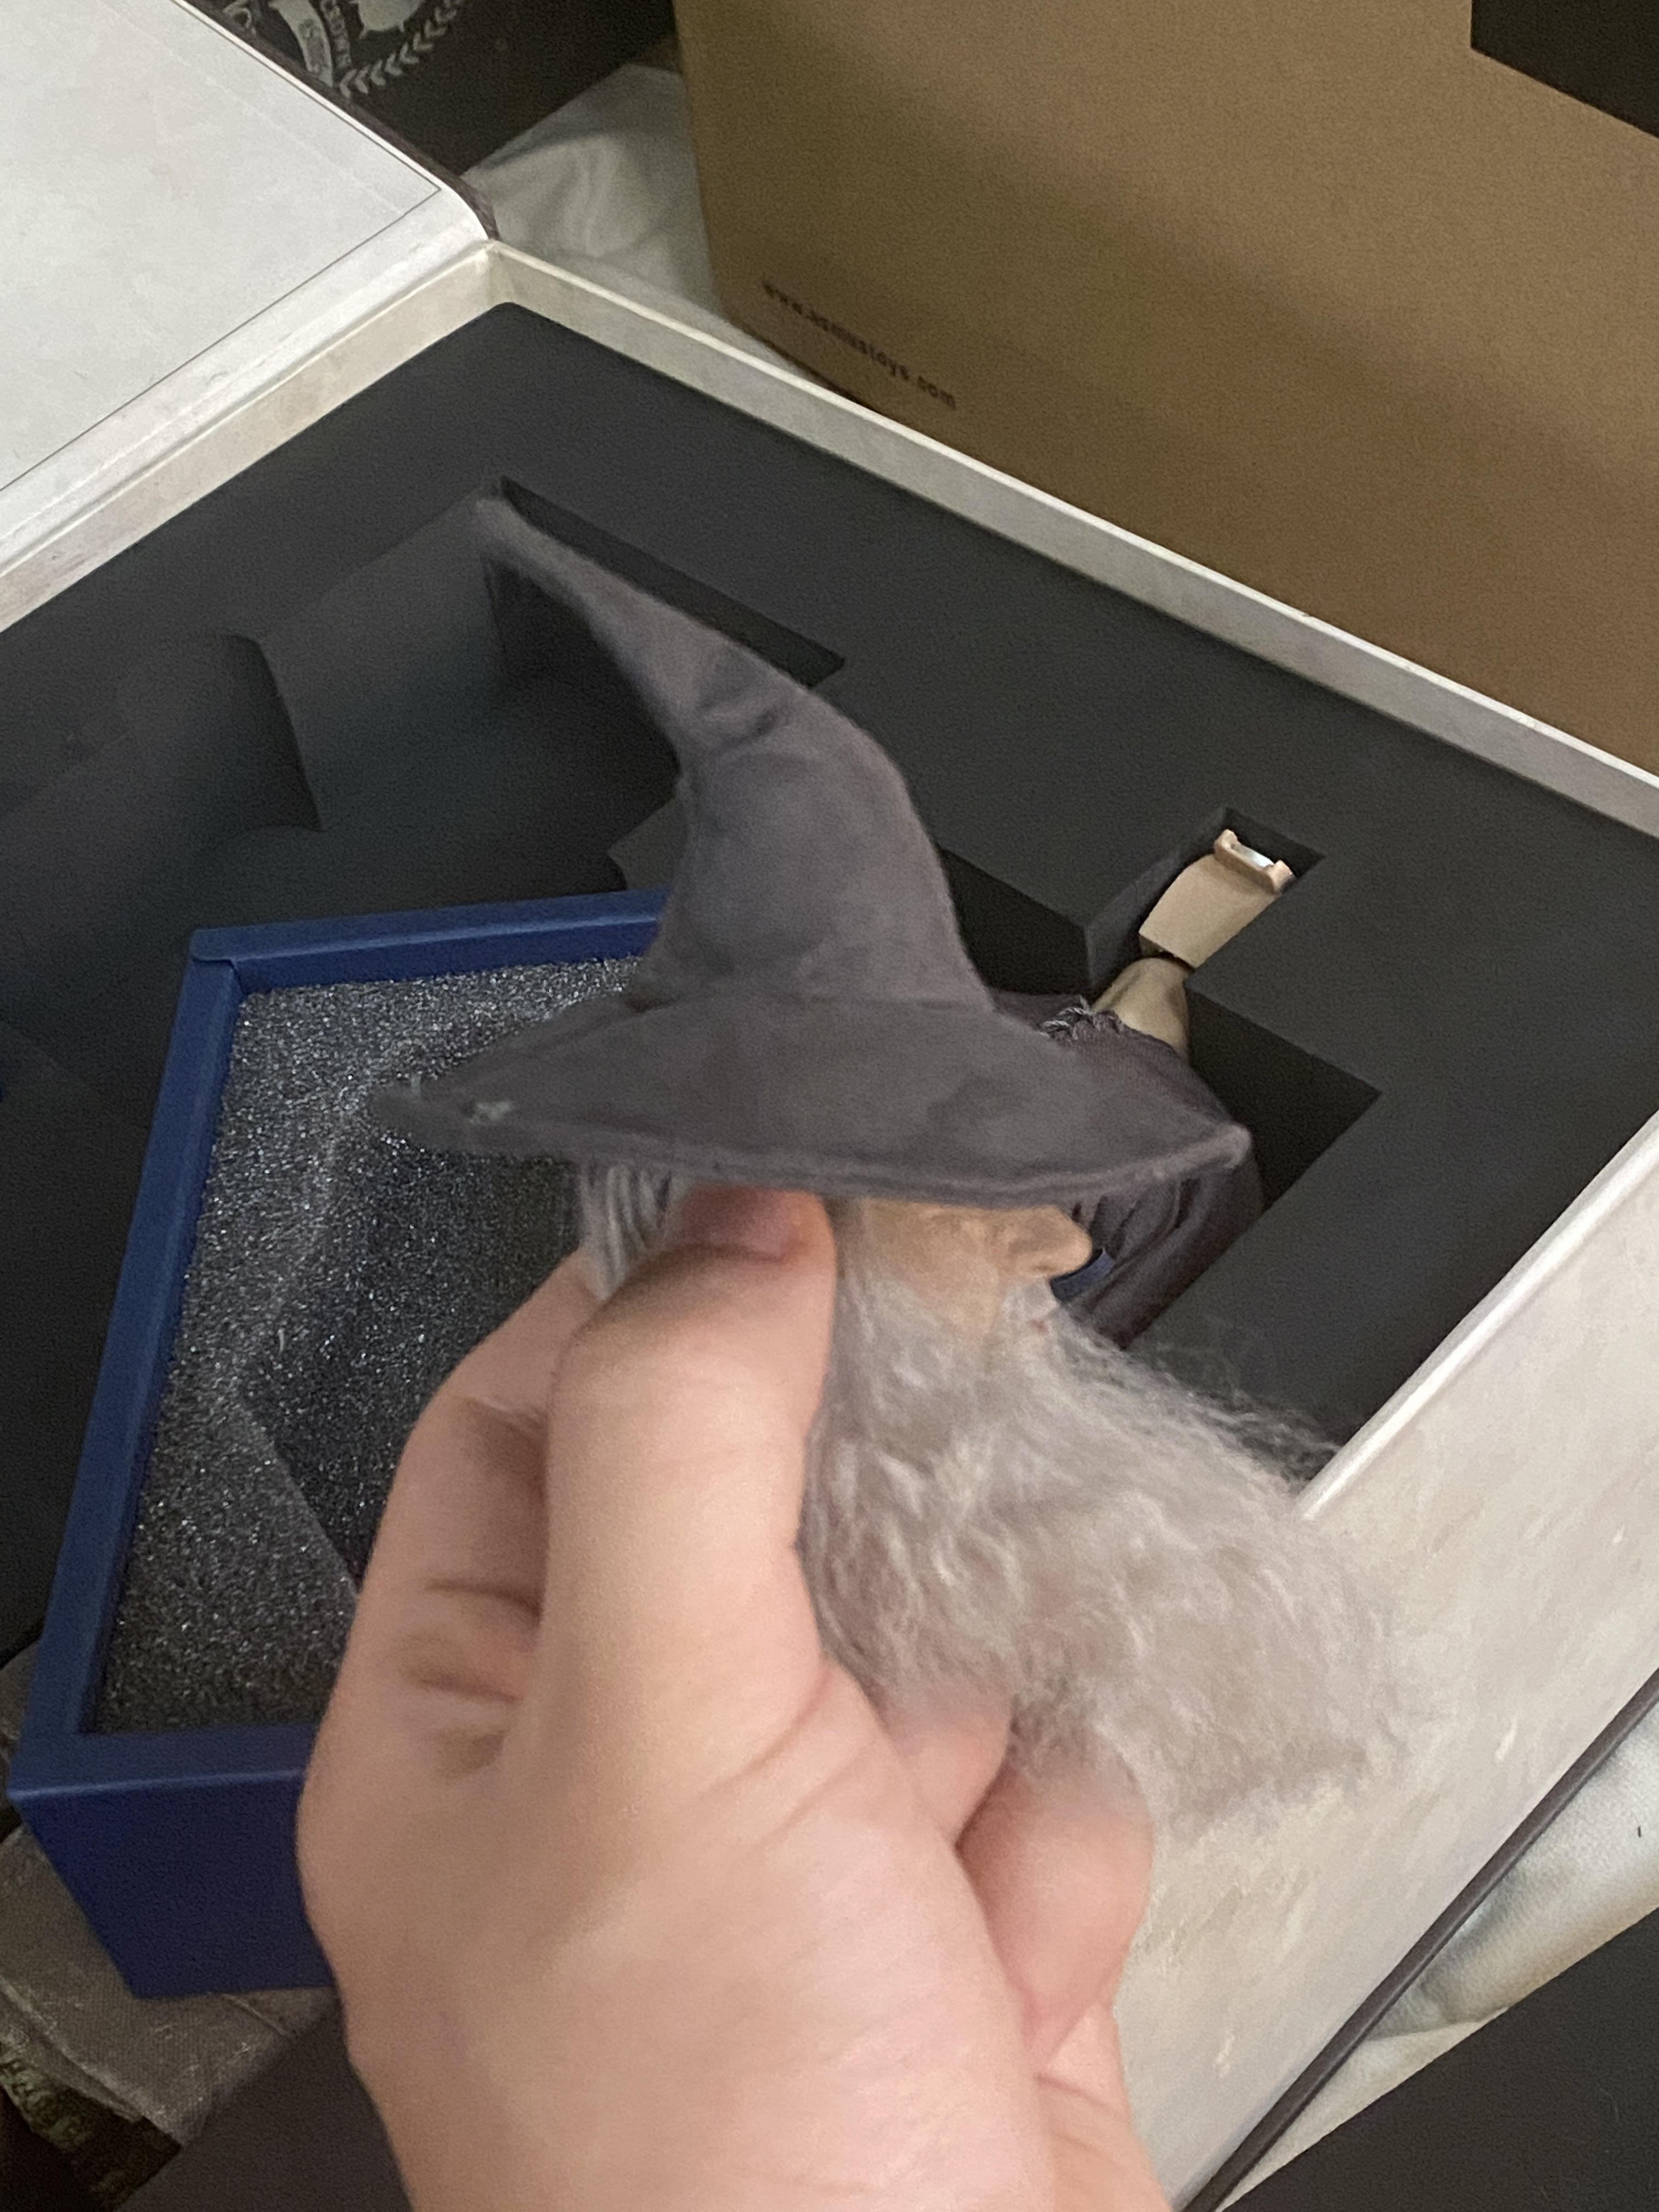
this is my gandalf with modded hat... very easy to achieve... only a couple of minutes of work...


Last edited:


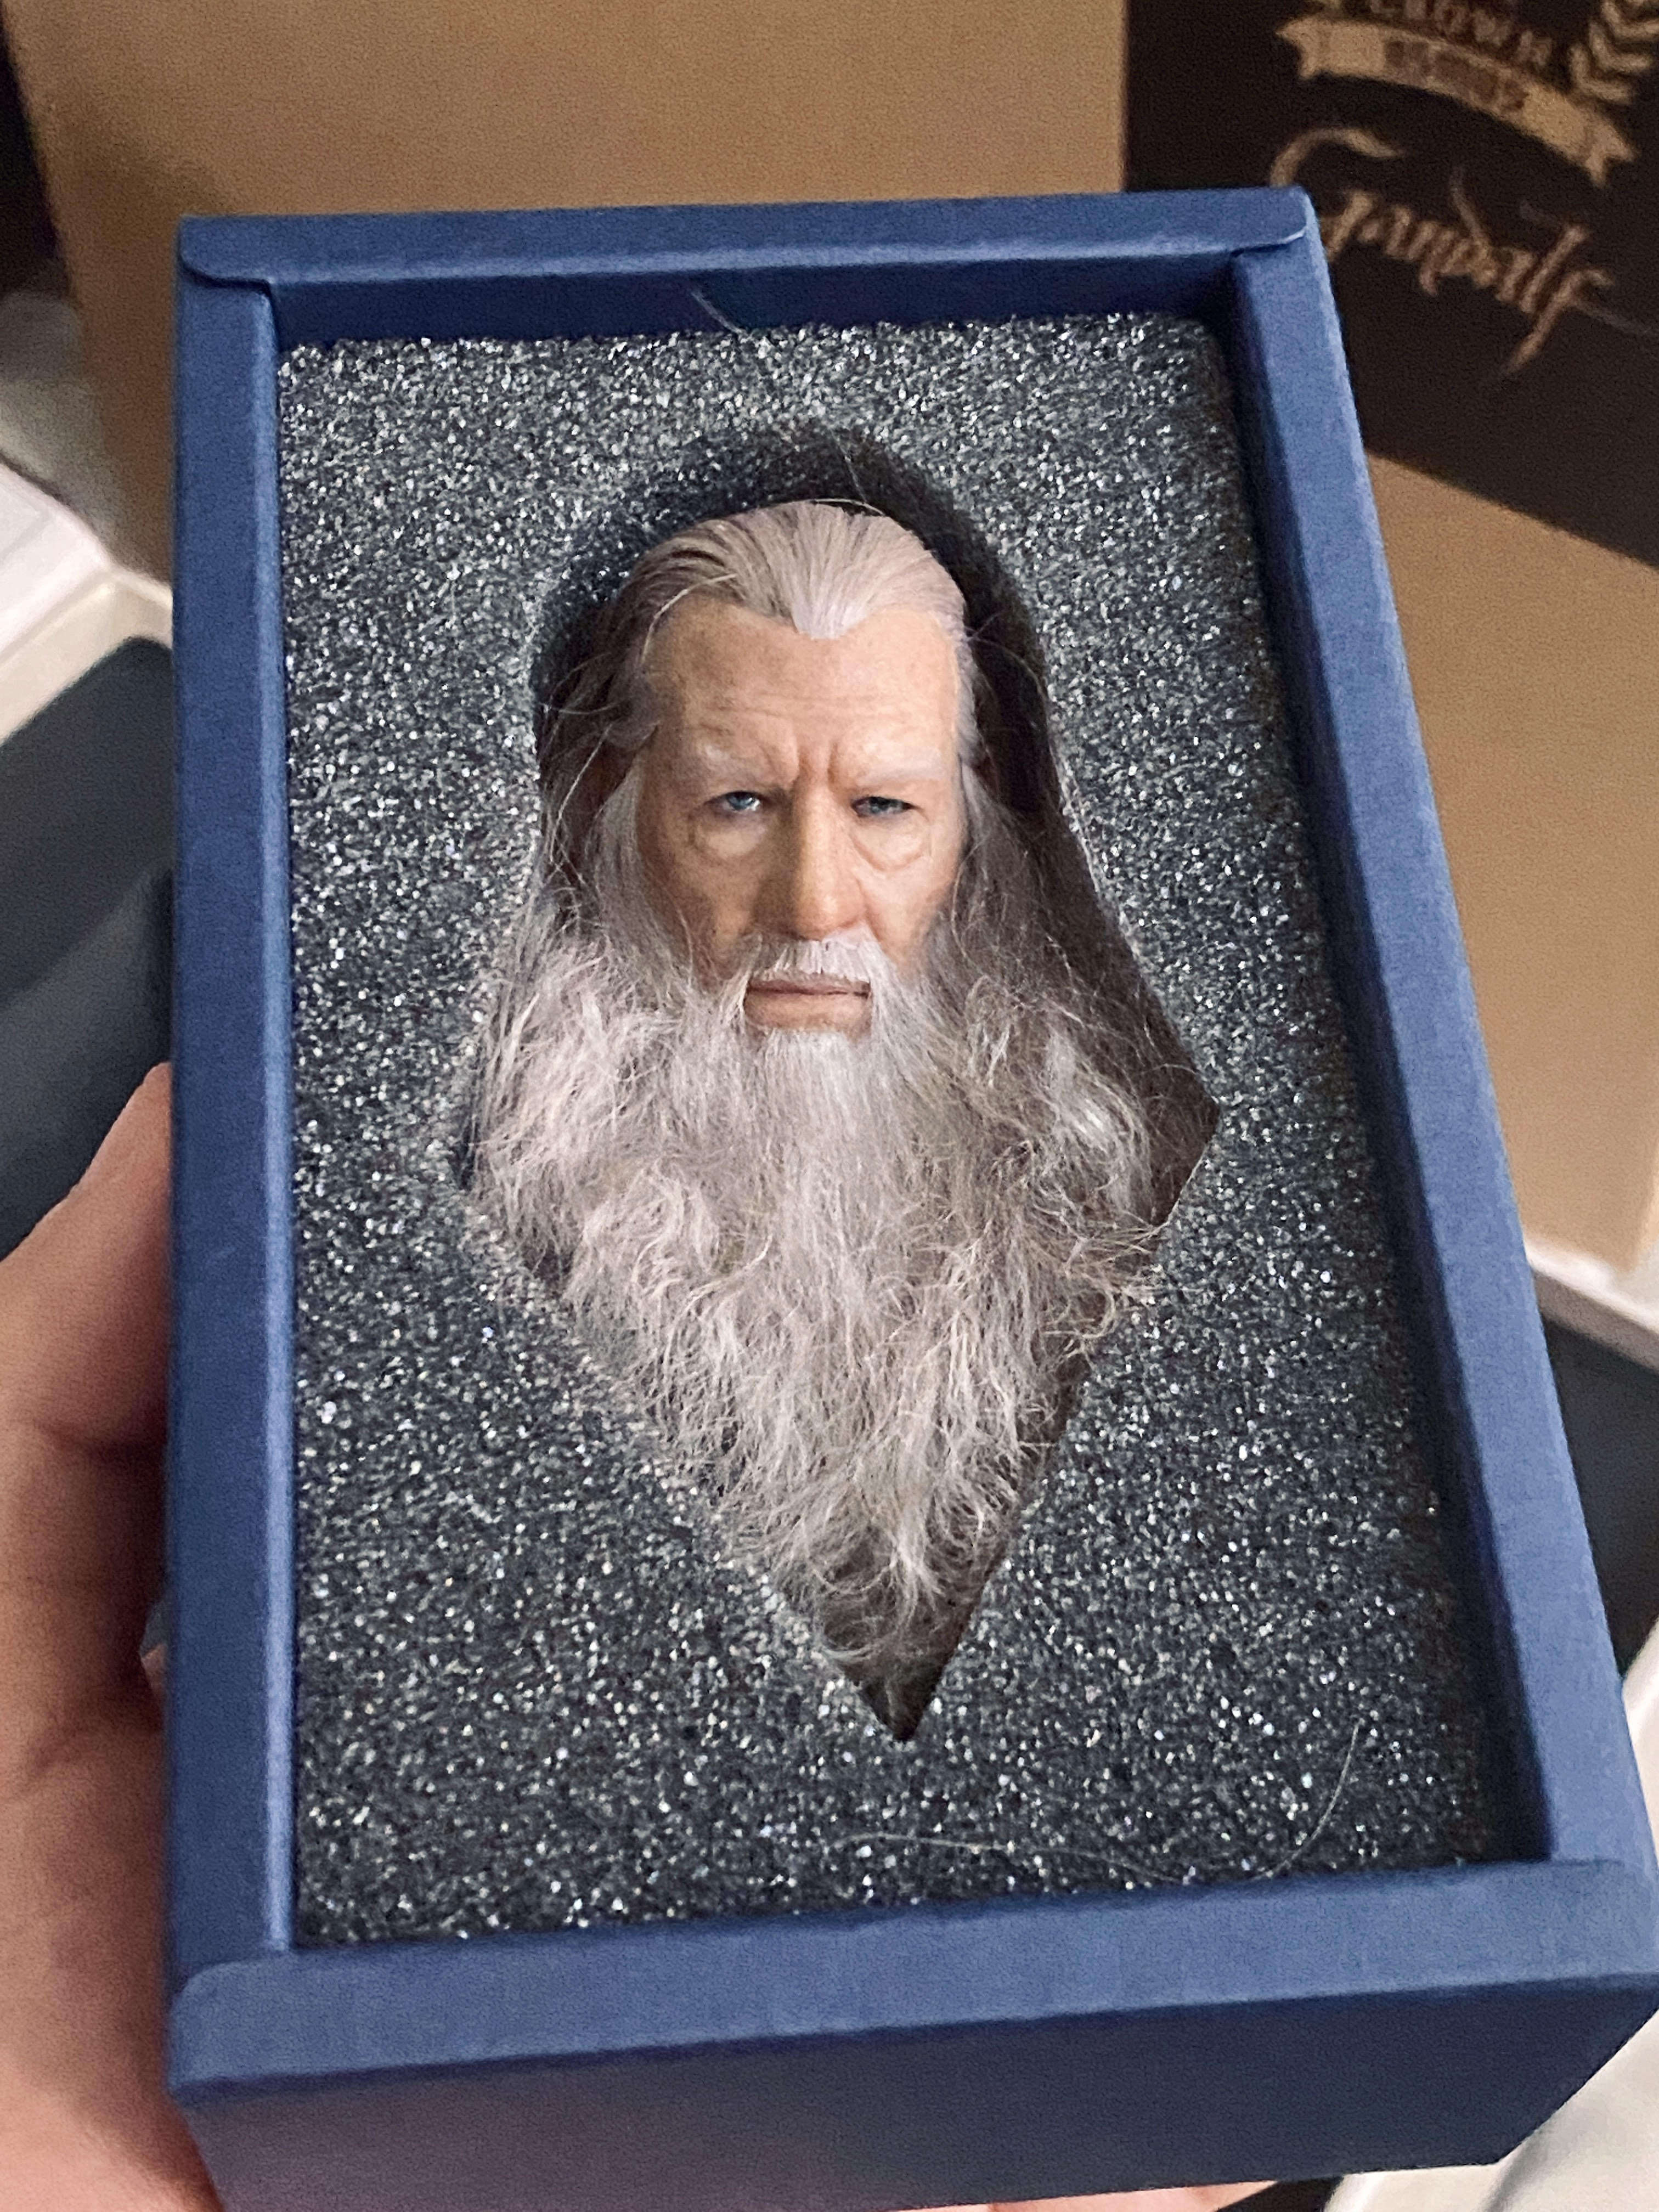
You have it looking great there! Lighting seems to play a big part in getting those eyes to look acceptable.Here a shot of mine. I futzing him for about 20 min for this shot, putting on the sword etc. Didn't use any water or product on the hair yet, this was just using my fingers.
I would definitely recommend picking him up if you're a fan of the character!
Knowing your quality standard in figures, I do think he needs some work to get him to an A+ figure, but which figure doesn't need that (HT included)? Some weathering, serious futzing, adding real eyebrows etc. and he will be up there with the best. Davejames' version will be my benchmark once I start working on him, his work on Gandalf is truly amazing and shows the potential.
")
Congrats, you'll definitely enjoy him.You have it looking great there! Lighting seems to play a big part in getting those eyes to look acceptable.
There's definitely more pros than cons as it's looks a beautiful piece overall, and like you say with a little bit of TLC this should look great on display.
Anyways i just couldn't pass this up so i went and ordered one
I follow the guidelines posted from shadowguardian on this forum...Nice work ghilbertit...what wizardry did you use to fix the hat?
but instead of use aluminium foil, i use some of theseNo not quite! I should have taken step by step pictures but honestly it isn't too complicated.
1. Remove the hat patch.
2. Remove the foam and magnet. Set aside foam, discard magnet.
3. Using your fingers, go around the hole and carefully tug on it to stretch it out a bit. Be gentle. If you have an extra 1/6 head it helps to shove that in there (I had a terrible 1/6 Jared Leto Joker head from a knock off that I used) to widen it.
4. Grab some aluminum foil and stuff about half of the hat with it. It may be easiest to make a small aluminum foil cylinder to stuff into the very tip, then adding in more behind that. It may take a little trial and error. You want to pack it in pretty good. You can then pose/form the hat in the shape you'd like.
5. Take the foam piece and shove it back in, ideally in a way that will cover the foil completely while also pushing the whole foil area back a bit.
6. Carefully place the hat onto the head, be gentle and get it so the brim comes down just above the eyes.
Also thanks for all the kind words everyone, I'm glad you enjoy the pictures!


Yes, but the schedule of headsculpt selling has not confirmed yet. Kindly wait for further info in the near future. Thank you.At the risk of sounding redundant- Gandalf head sold on its on still? soon? no? yes?
Yep totally agree. My hair out of the box was an absolute nightmare. Like they'd put him in the box with wet gel and then getting it out with beard all to one side. Just with some wet fingers I teased it out straight in about 15 minutes and let it dry accordingly. Perfect !!There are three things this figure has taught me.
1) The "in hand" effect is a real thing. There are aspects of this sculpt you just cannot capture on a camera. No matter how hard I try
2) People lack the patience to set up their figures properly and then complain about it
3) This is not a perfect figure, but it is a tremendous piece.
To be fair, I did get one that was glued eell. With that out of the way, I am over the moon with this. You all had really gotten me a little worried but in hand, this piece is great. Just like 99% of this hobby, you've gotta work the illusion. This is not me saying there aren't problems; the hat is bunked, the staff isn't drilled, and I think the accessories are still too soft. But this is easily in the 90%+ score. You really can tell a lot of love went into this.
It took me about an hour to free the hair up the way I wanted it. I just grabbed a new, soft toothbrush (perks of dentistry) and distilled water, and just worked the hair free and flaked it out. It takes time, reference, and patience. But you can do it.
but definitely one of the best applications of rooted hair I have seen. Would never have been as good as this with sculpted hair. Shows there are cases for any against. Usually depending on length and fibres used.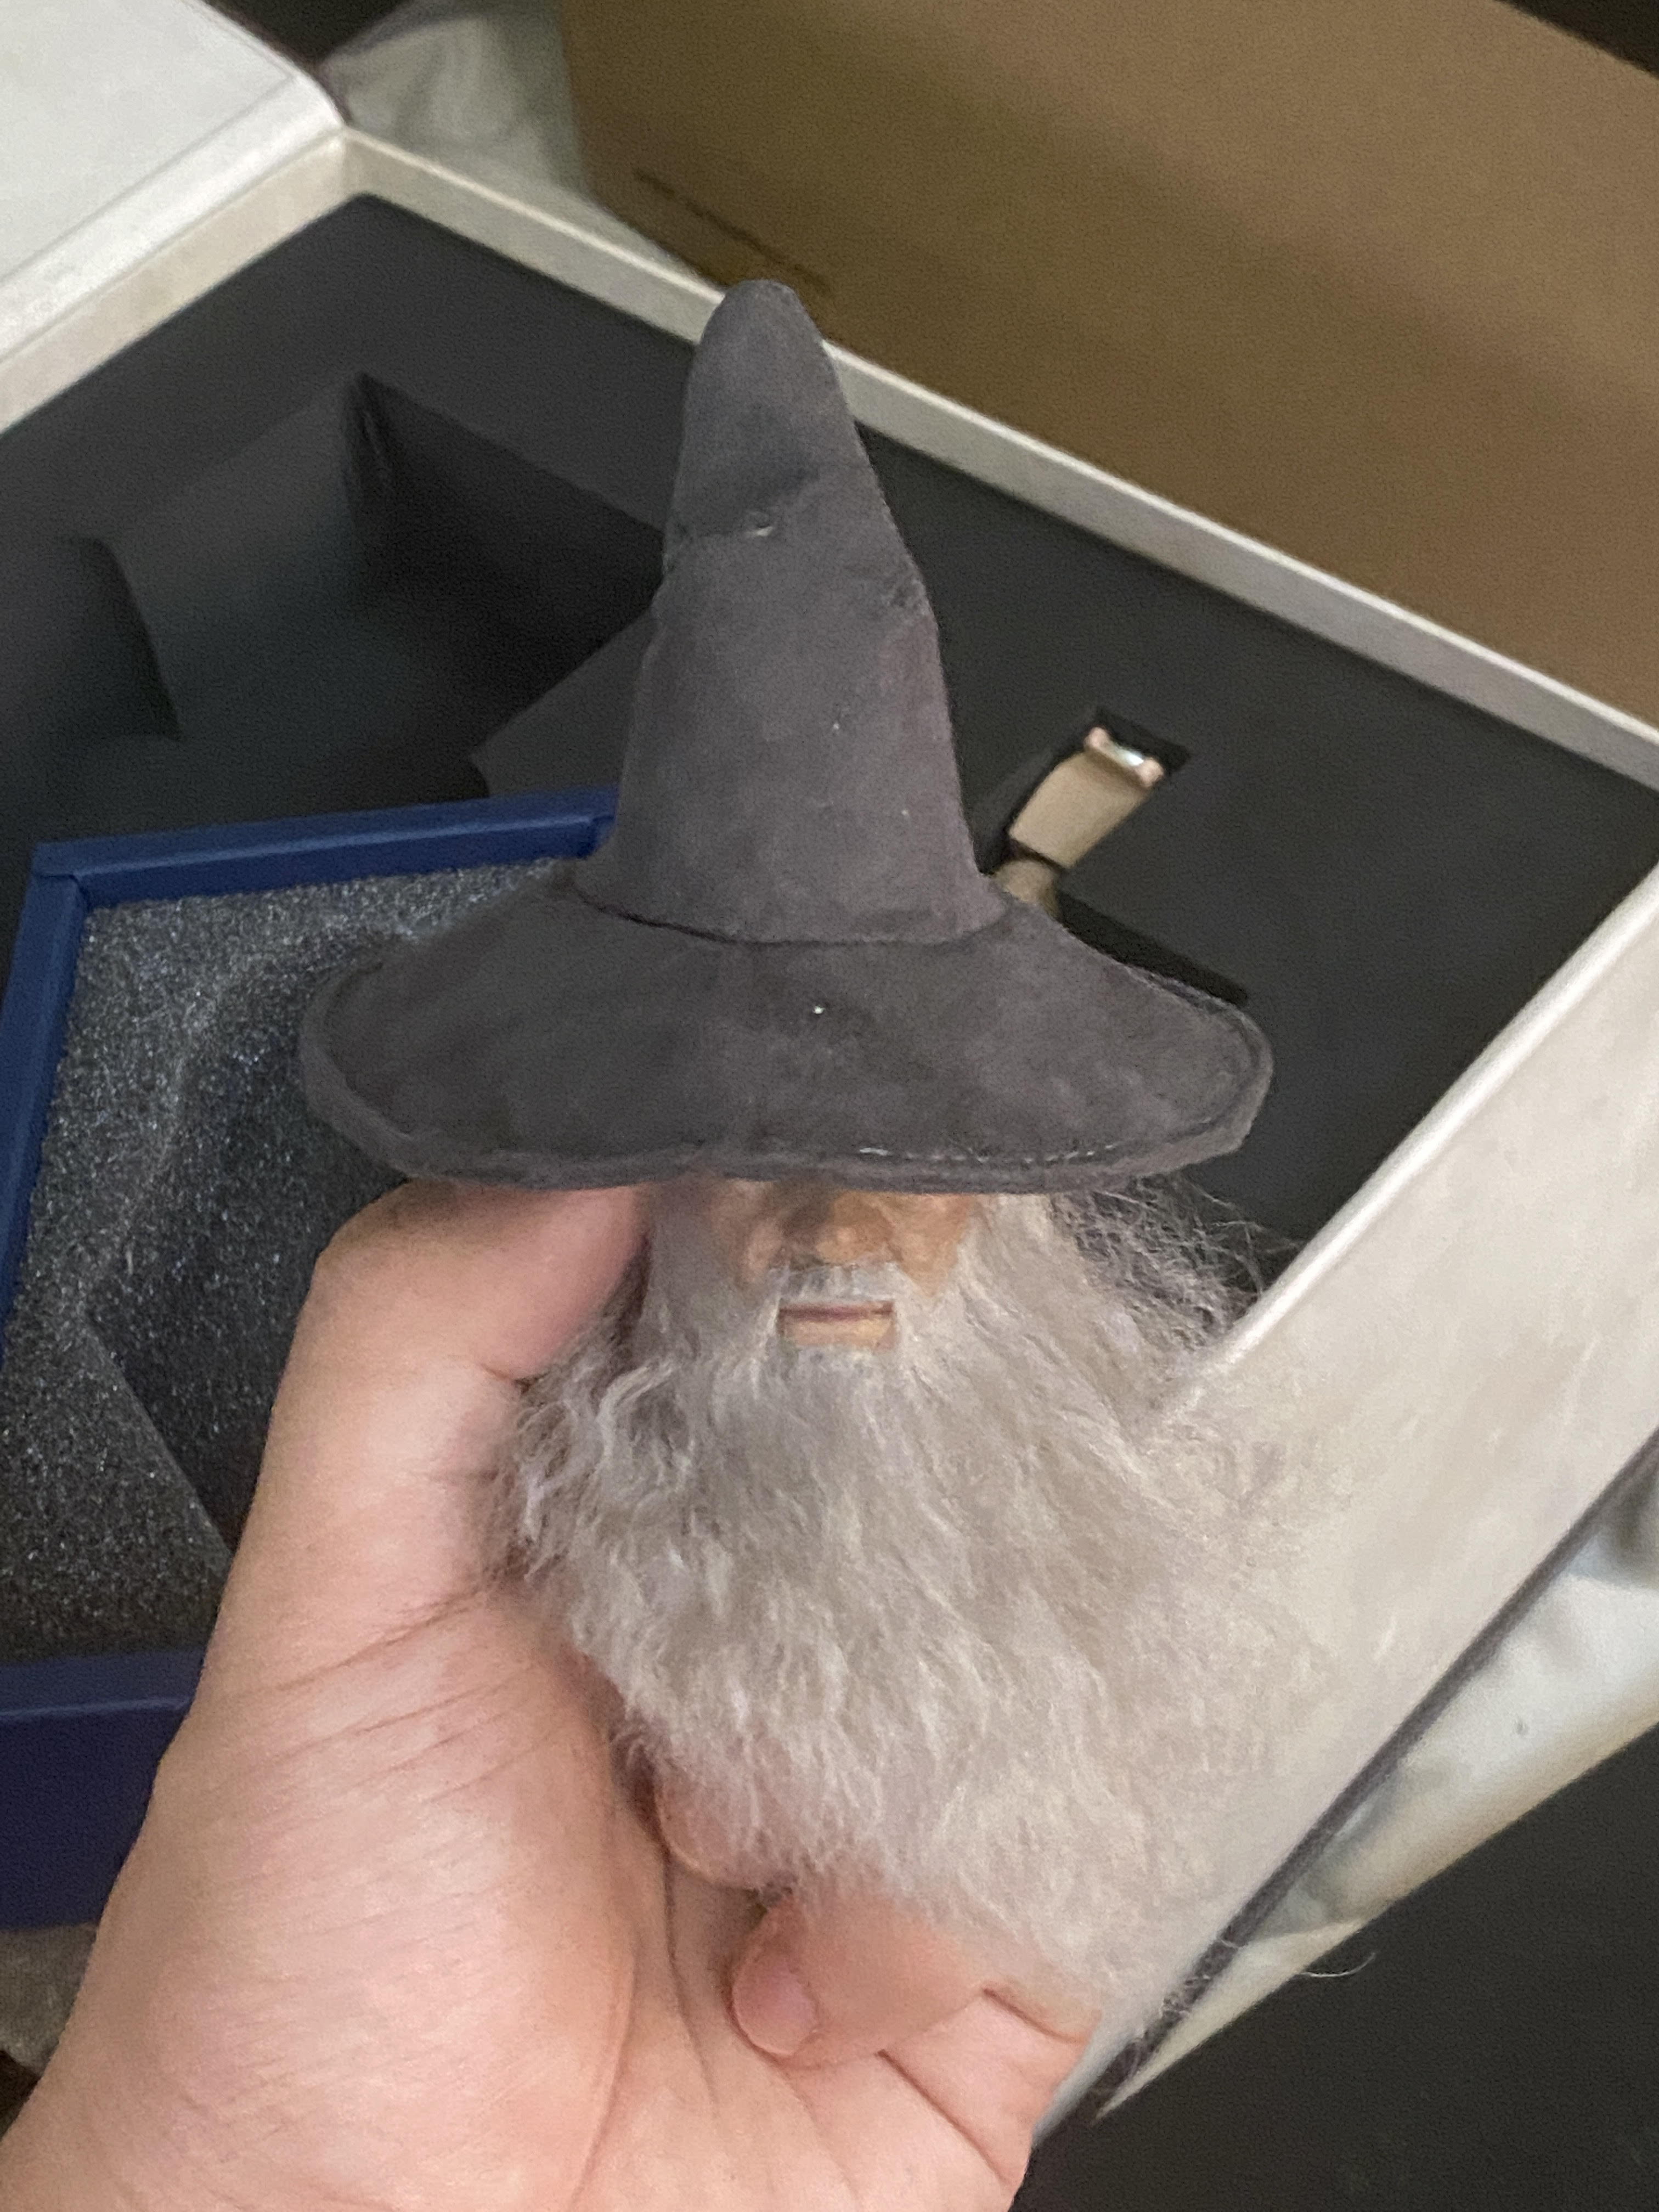
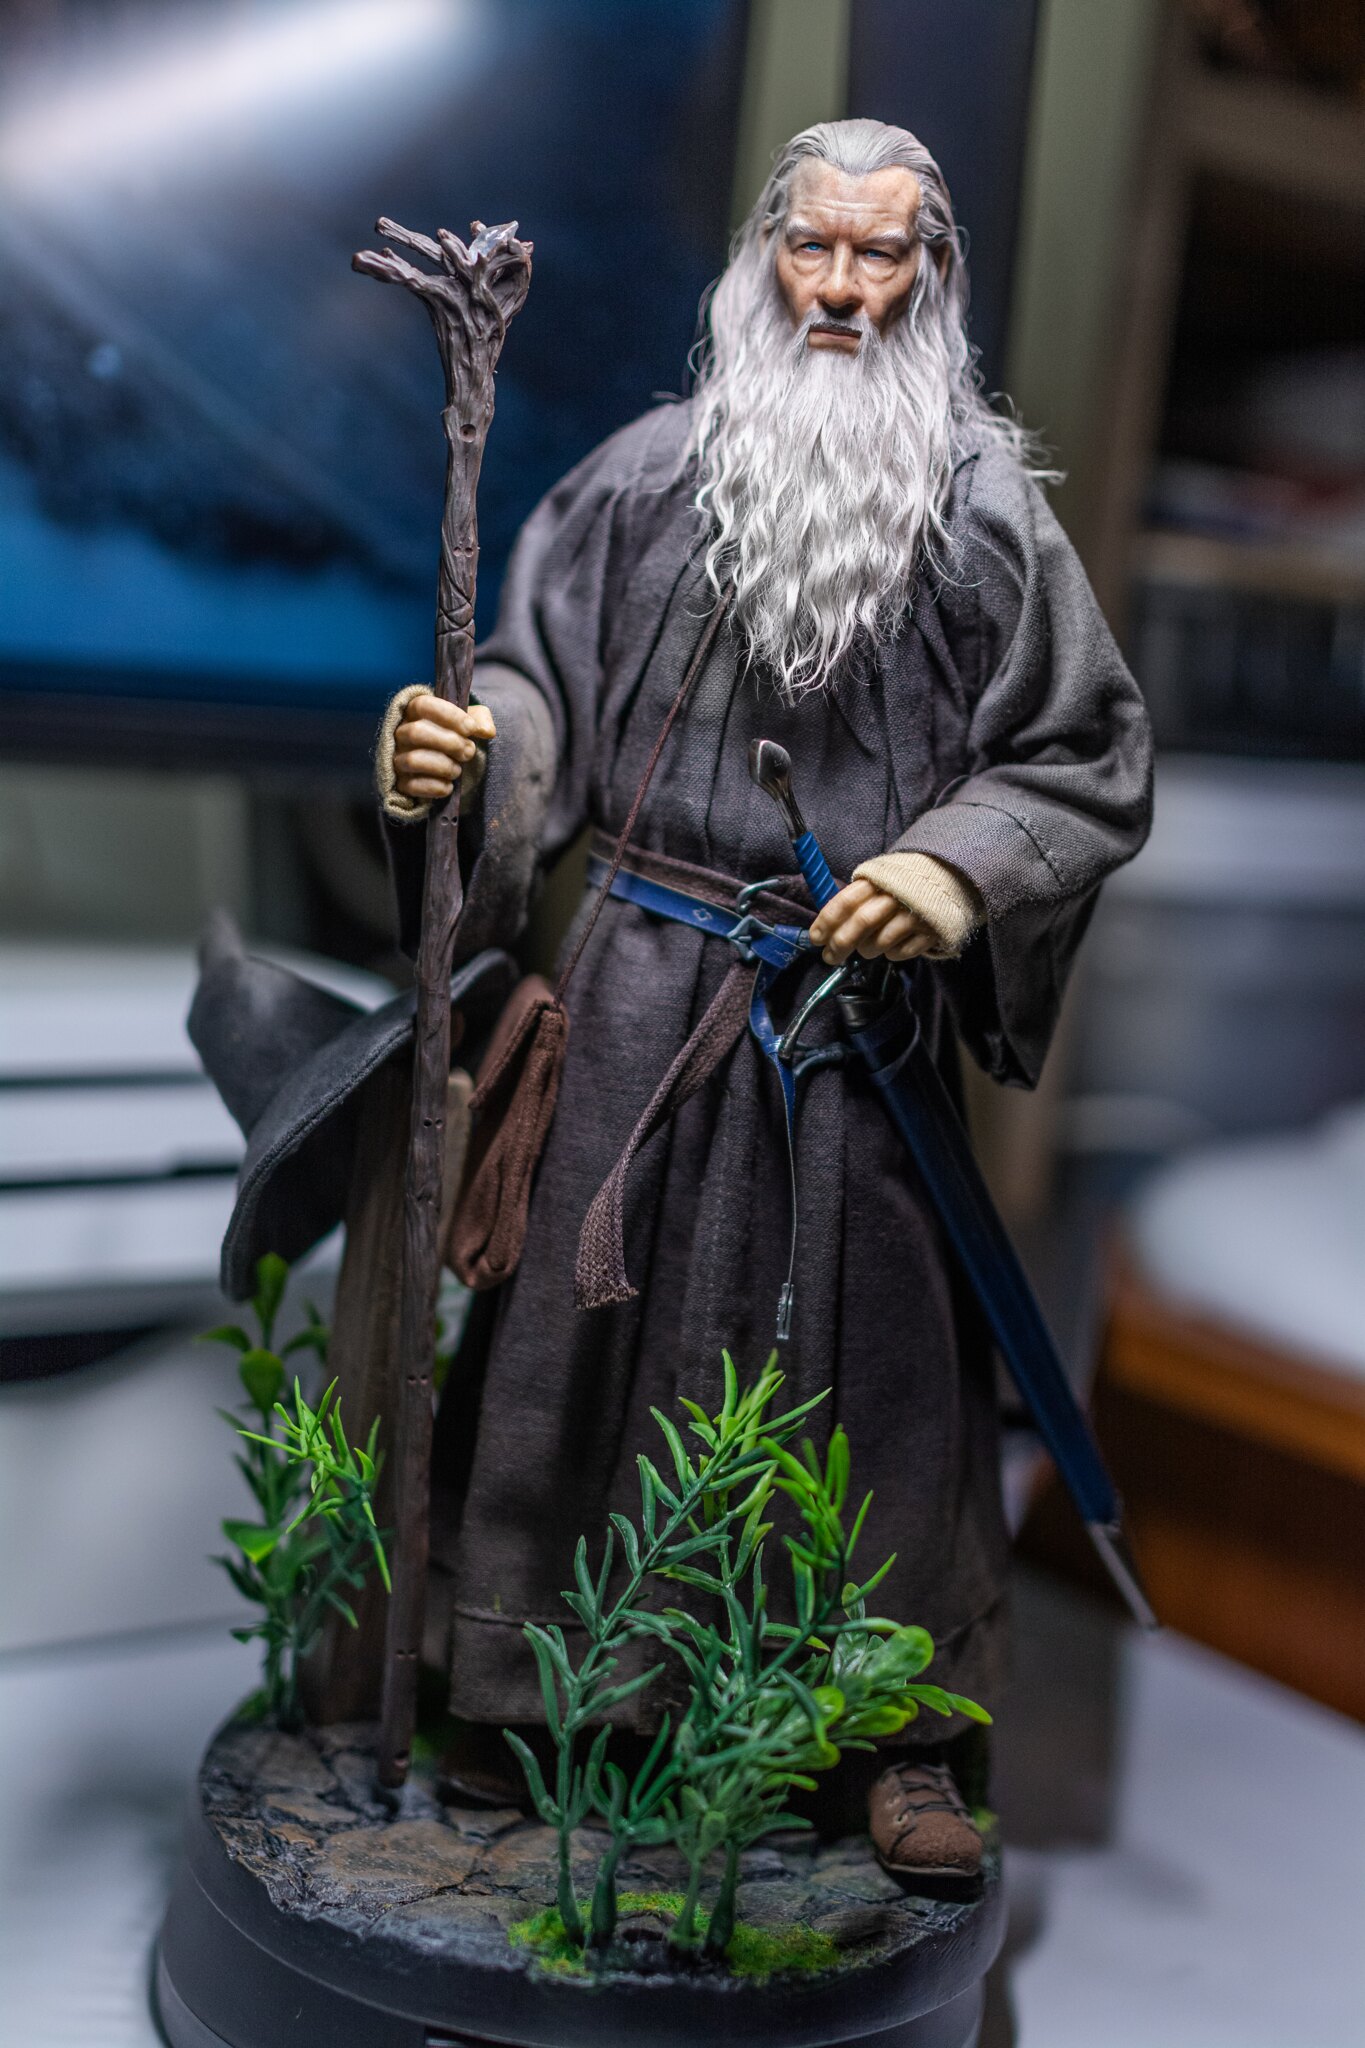
It is really amazing after your futzing process. Like this photo!Quite happy with where I have him at the moment. Still need to throw the cloak on him and water treat that but here's where I have him after messing with him for a bit today.
Enter your email address to join:

