1/6 INART (Queen Studio) - The Dark Knight - Joker Collectible Figure

Collector Freaks Forum

Help Support Collector Freaks Forum:

This site may earn a commission from merchant affiliate links, including eBay, Amazon, and others.
facepalm-really.gif
Yeah. Go easy on our figure-bro. These figures aren't cheap. These manufacturers should take care to send them out literally perfect. We're not talking about a 30 NECA or Mego. I'm very anal about the out of box condition. I totally understand.
 
Were yours more extreme though? Do you just have to remove the four little screws and then you can adjust each eye or is there more to it?

You undo the 4 screws, and then there's a little piece that connects the two eyes together. I removed that and you're left with the two eyes on sticks

This is what mine looked like when I got it.
 

Attachments

  • IMG_20230313_140059.jpg
    IMG_20230313_140059.jpg
    1.4 MB · Views: 0
Hey guys, i neeed help.

I received the InArt Joker too, great figure but i think that i have somes issues on it :confused:

Can you check and tell me if it's normal or if it's defects please?

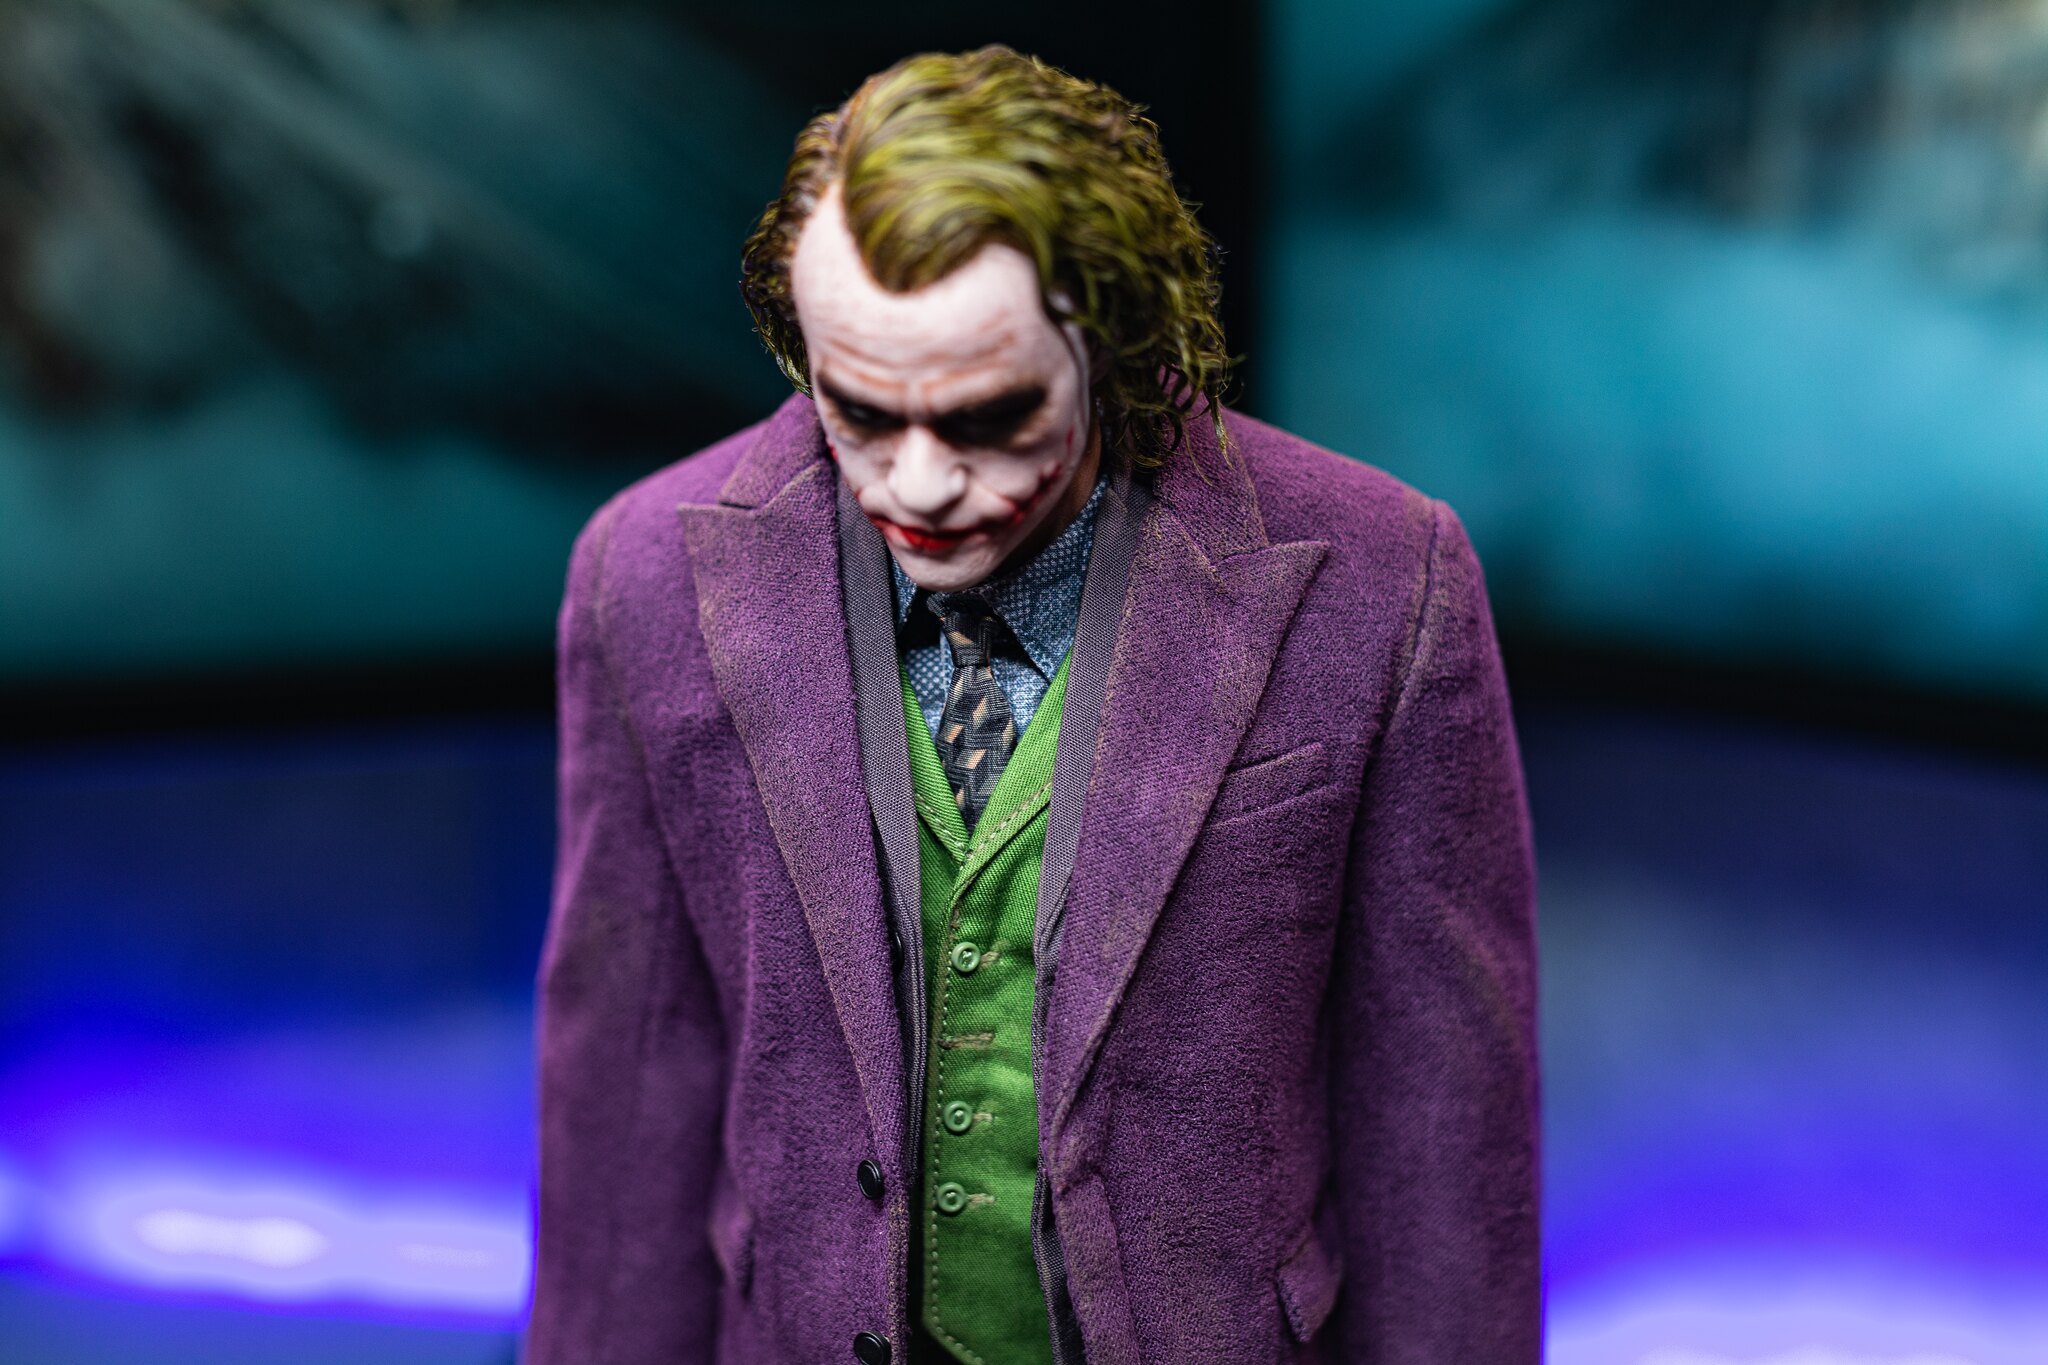
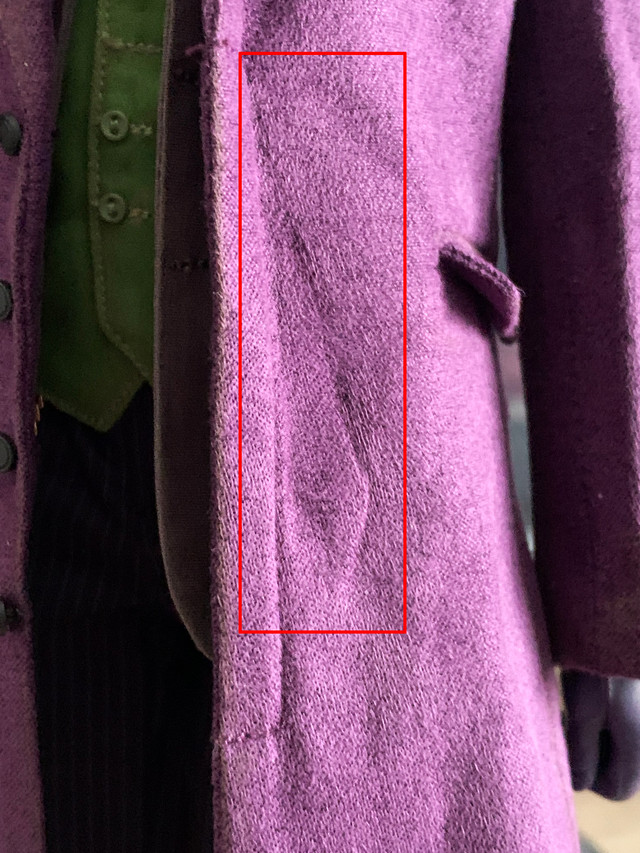
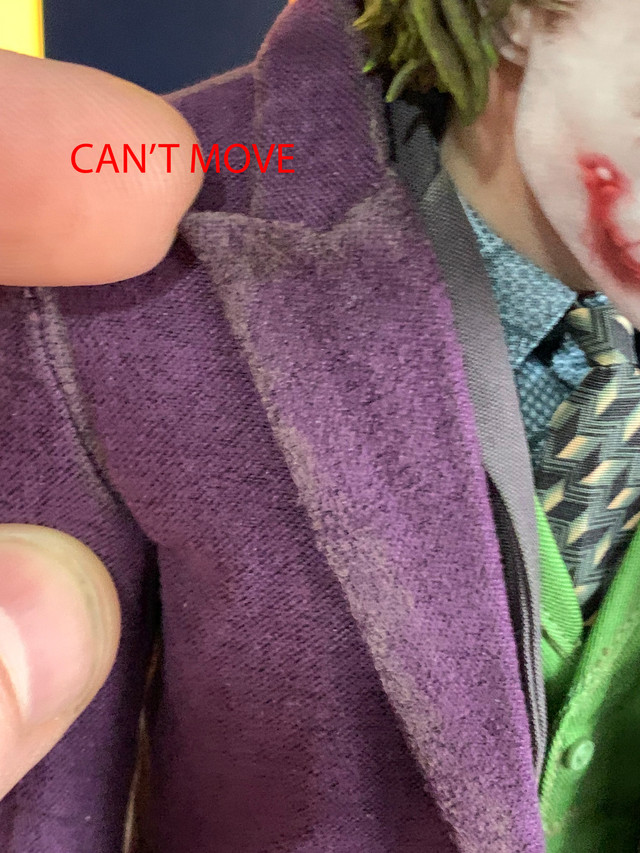
First the jacket, it's the thing that we see the most.
I have a kind of fold, or it's a claw i'm not sure but it doesn't go away.
I'm pretty sure it's a defect because the other Jokers i've seen don't have that, and it's in front so it's visible...


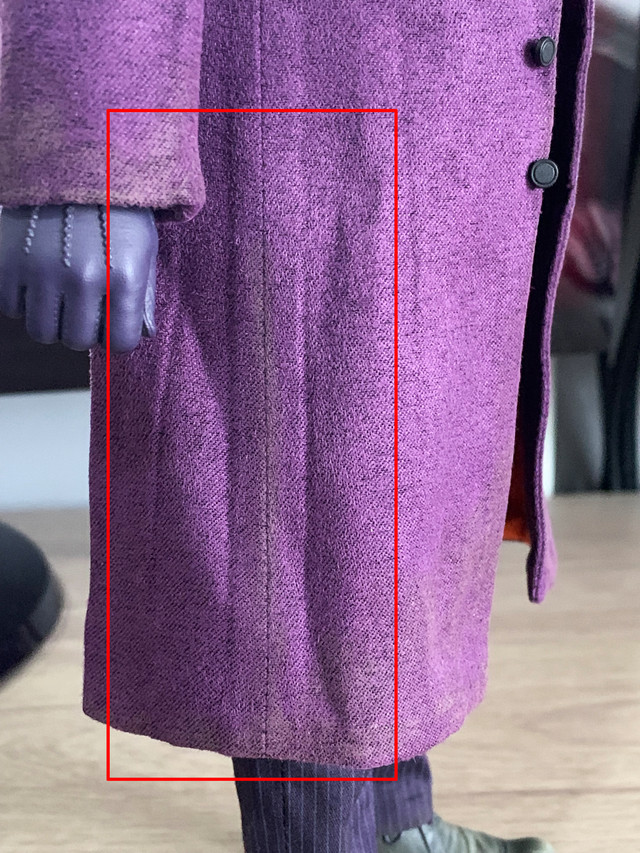
On the right side I also have some kind of vertical lines, is it normal?


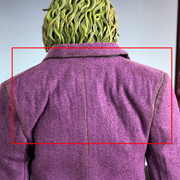
And behind the shoulders, it's all crumpled


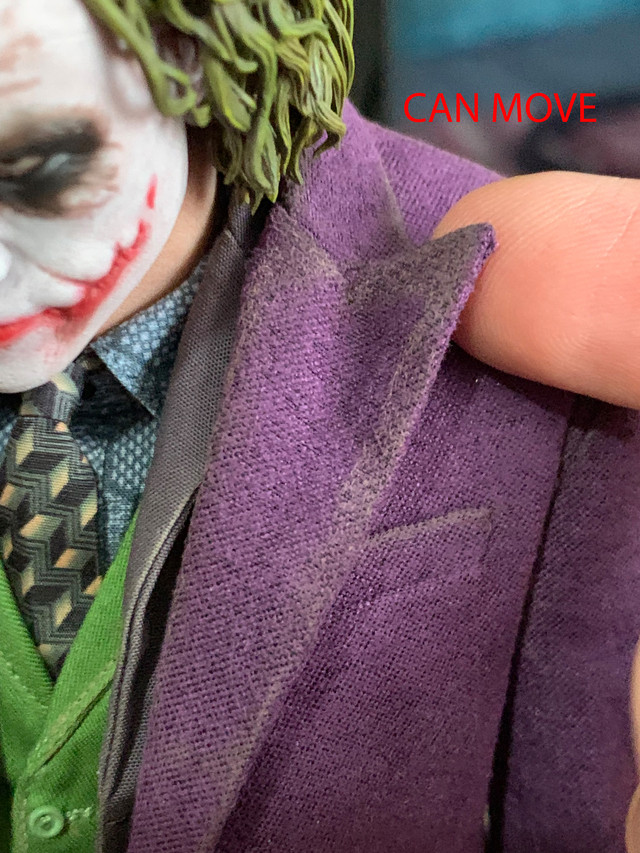
The collar of the jacket, I can move one side but not the other, which is sewn or glued I do not know


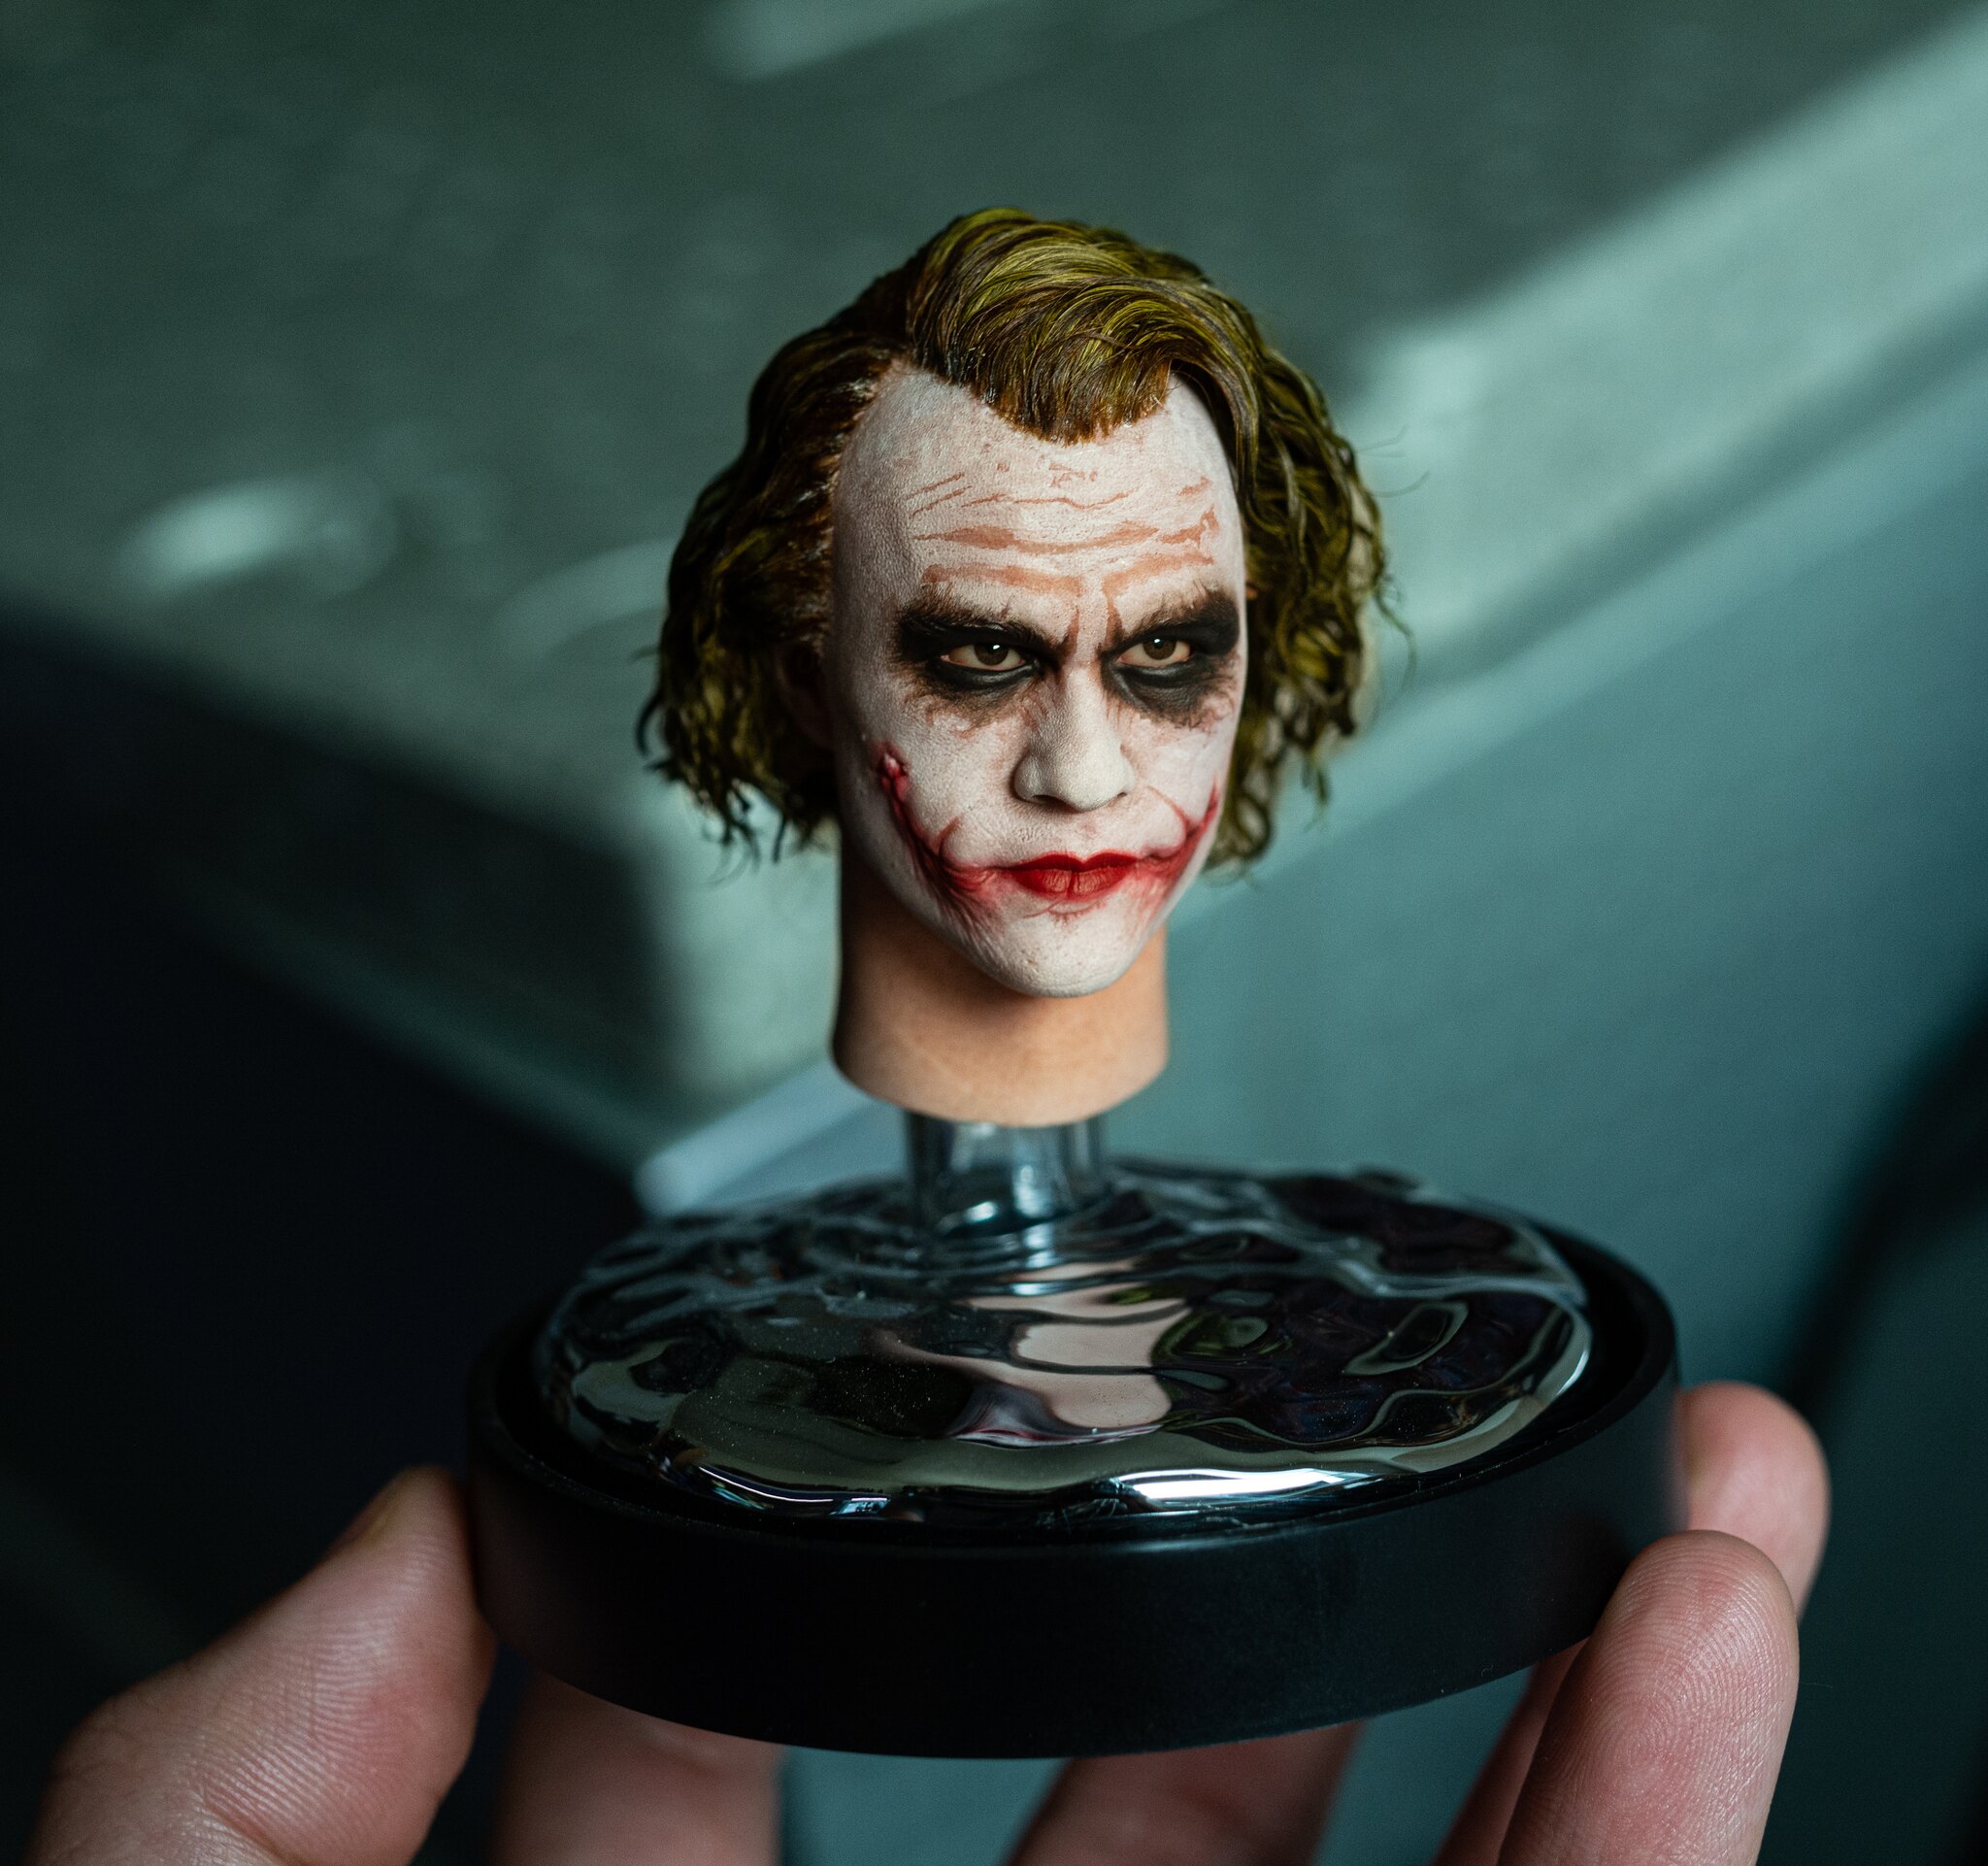
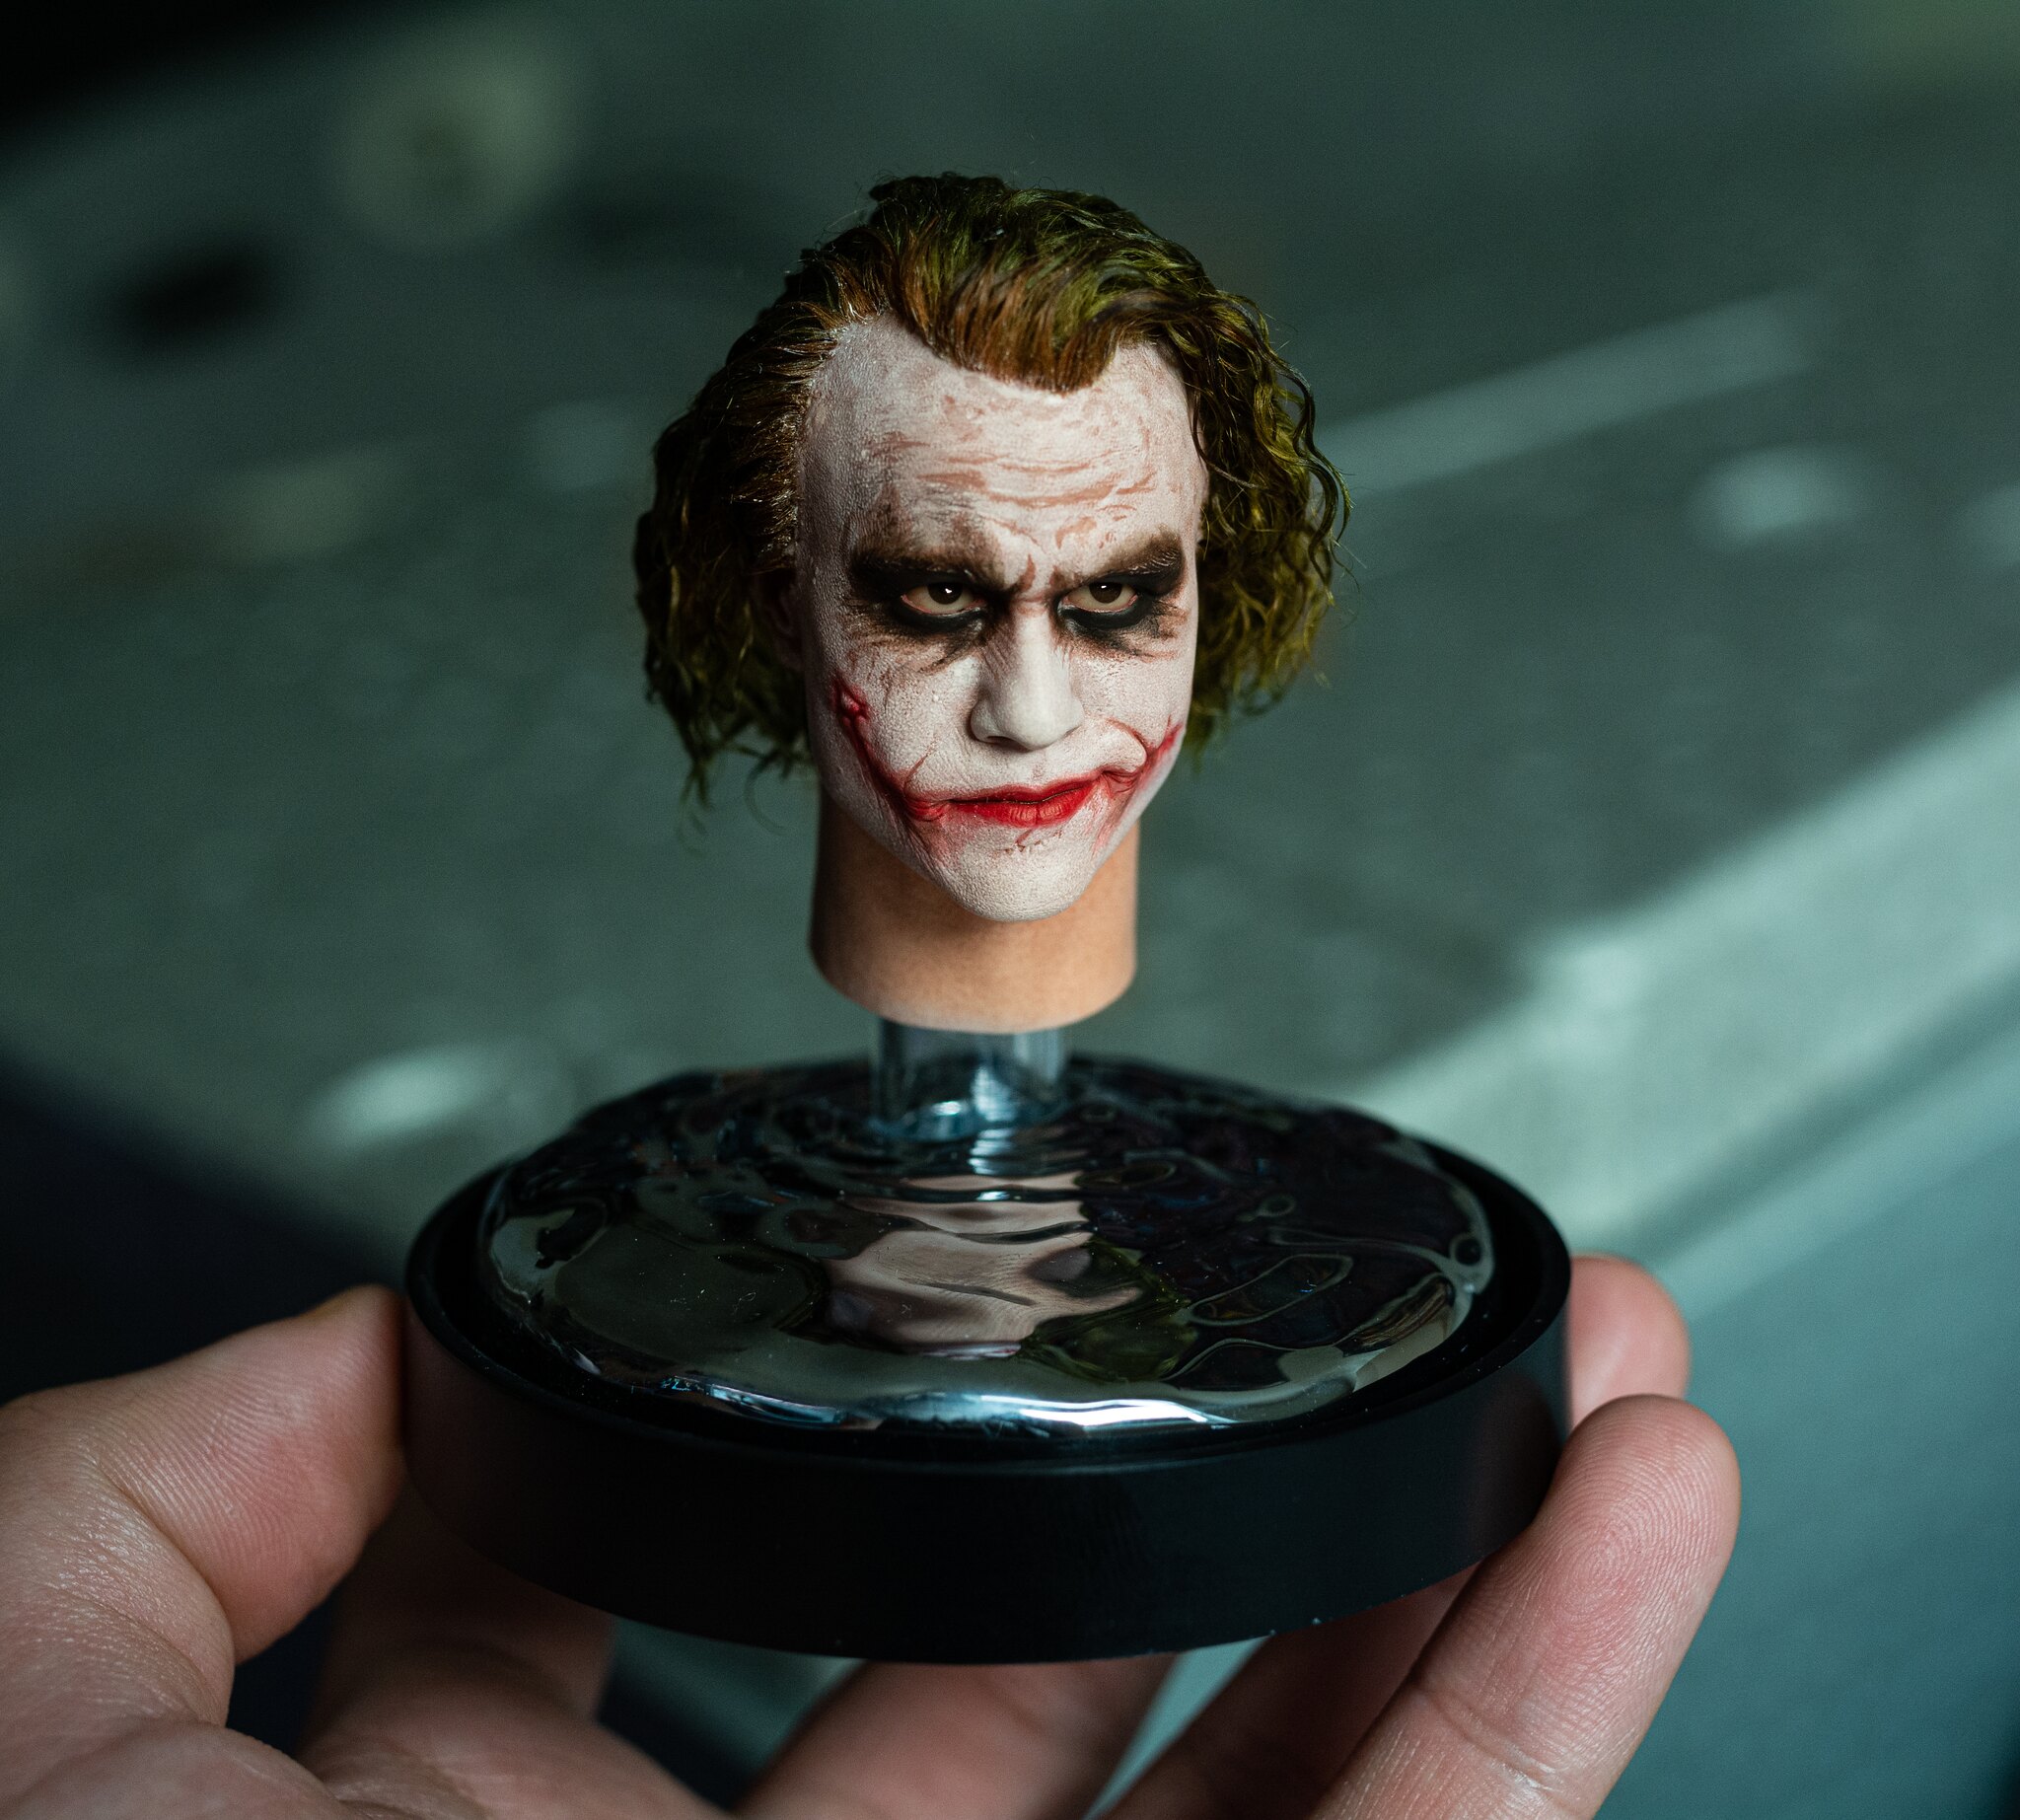
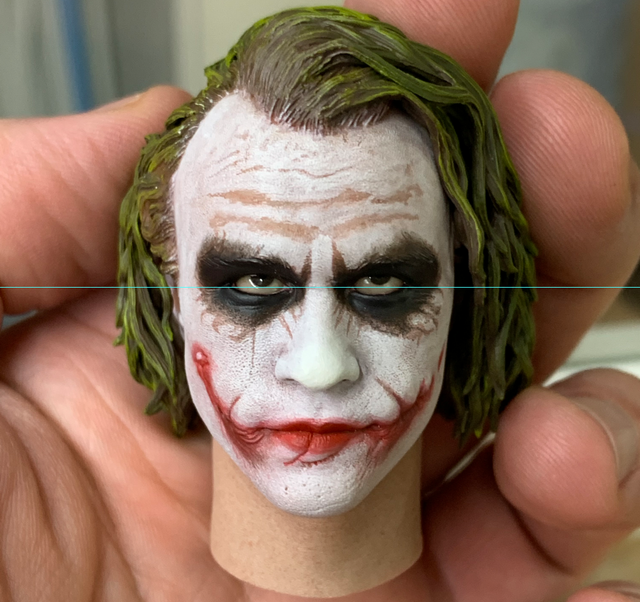
Now the HS, I noticed a lot of spots (i don't know how to tell that in English) that look like warts... there's even one in the black area above the eyes.


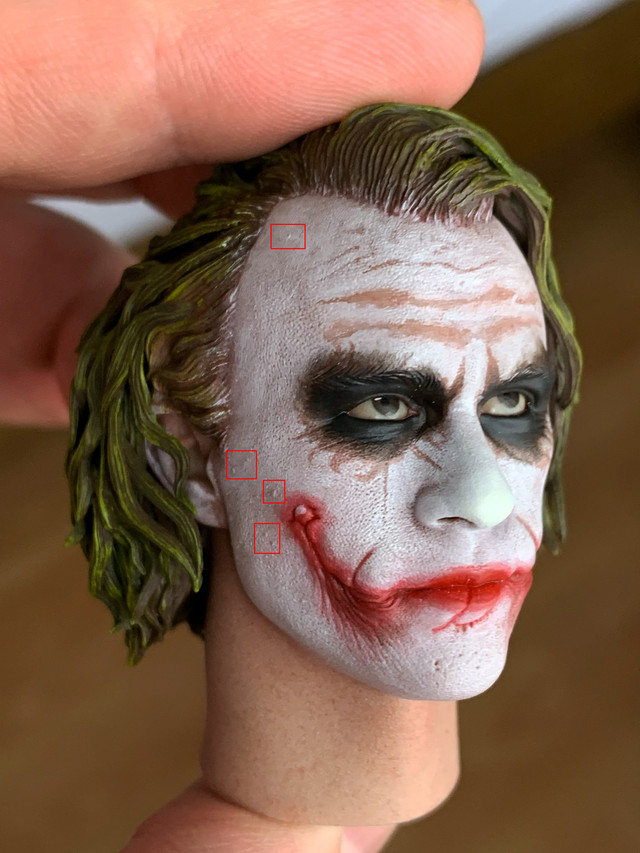
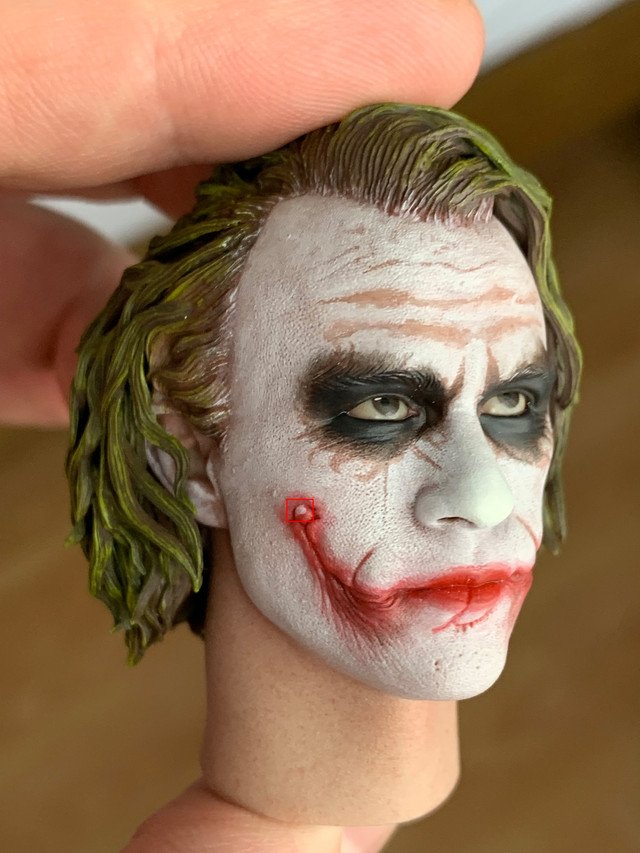
A piece of red paint is missing here


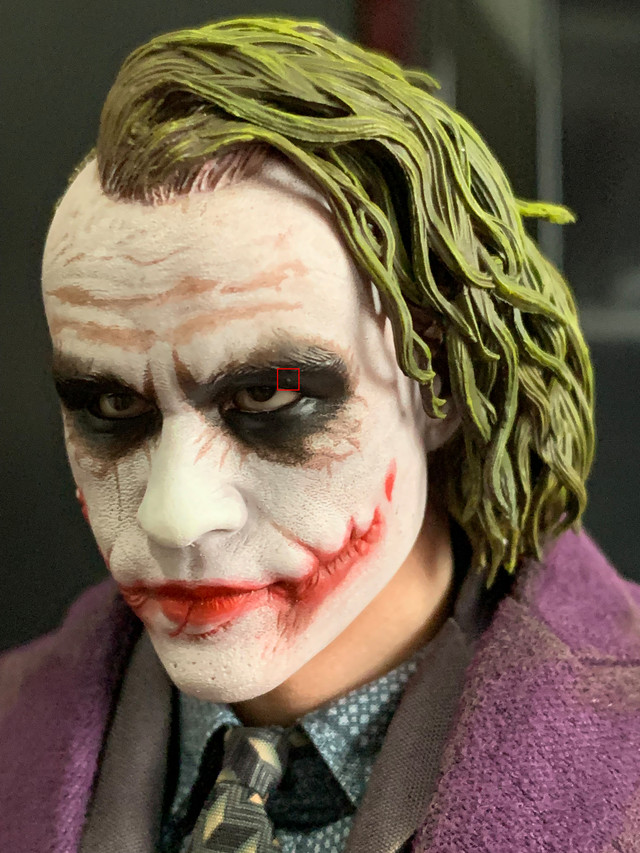
For the hollow of the eyes, is it normal that it is not painted in black here?


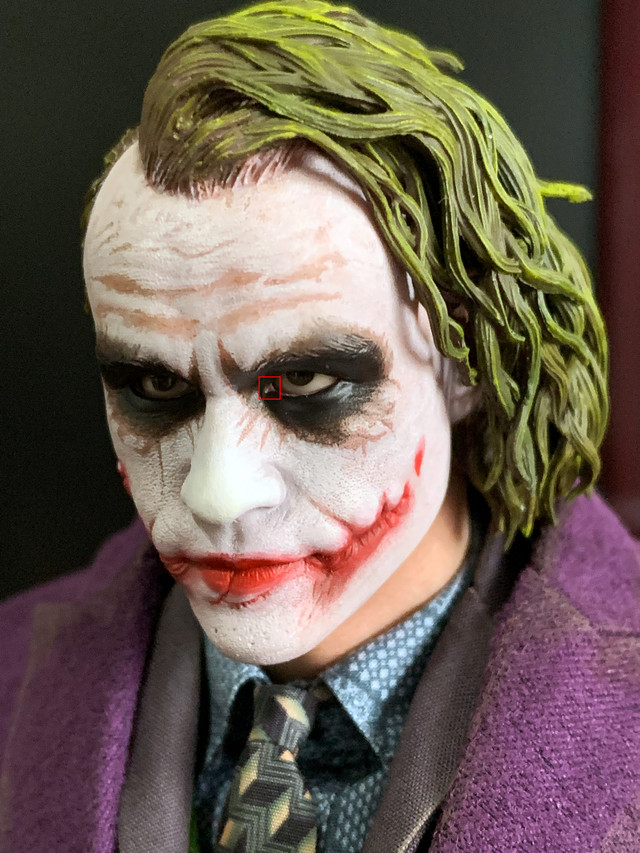
The eyes are not aligned... :banghead


I think that's a lot of flaws for a "premium" brand, and it prevents me from appreciating this Joker at its true value so i wait your analyse to see what i will do 😫
I have nearly all the same things on mine as well. I wouldn’t worry too much about them.
 
I was bothered by how the grenade rig caused the front of his coat to puff out and not lie flush, with all it's leather straps etc, which just made it look lumpy at certain angles. So initially I just carefully removed the rig all together, thinking I could find an extra coat, so I'd have both options. Lol, joke's on me cuz no one is parting with their coat on ebay or Facebook.

So I decided to sew in some low profile metal snaps, allowing me to snap the rig on and off. Giving me either option with a single coat. Now I can get the nice svelt drape that I was looking for. Granted, I could've just used some small safety pins, but that would have been destructive over repeated use. This is much safer for the coat lining and rig.


Here he is without the grenade rig attached. I get a much more flush sitting coat than before.

DSCF4739-0.jpg


Here's the low profile metal snaps sewn into the coat. I used metal snaps since the tabs on the male side won't break from use like the cheap plastic ones.

DSCF4677-0.jpg


Here's the rig snapped in. The male side of snaps are sewn onto the backside of the rig.

DSCF4675-0.jpg


It was careful work, because the straps and metal hook had to be removed to detach the rig from the coat, initially. So those straps had to be sewn back onto the rig once it was detached.

DSCF4671-0.jpg
 
Last edited:
Rory that was a ballsy move…and successful! Looks amazing!
Yeah man, I was apprehensive. Removing the rig intact was straighforward, but sewing in the snaps was something I hesitated on. Fortunately, the lining is open at the sleeves, so I was able to get in behind it easy enough to do a clean stitch. The rig was easy since it was detached. In the end, it was no harder than sewing a button.
 
Last edited:
I was bothered by how the grenade rig caused the front of his coat to puff out and not lie flush, with all it's leather straps etc, which just made it look lumpy at certain angles. So initially I just carefully removed the rig all together, thinking I could find an extra coat, so I'd have both options. Lol, joke's on me cuz no one is parting with their coat on ebay or Facebook.

So I decided to sew in some low profile metal snaps, allowing me to snap the rig on and off. Giving me either option with a single coat. Now I can get the nice svelt drape that I was looking for. Granted, I could've just used some small safety pins, but that would have been destructive over repeated use. This is much safer for the coat lining and rig.


Here he is without the grenade rig attached. I get a much more flush sitting coat than before.

View attachment 632923


Here's the low profile metal snaps sewn into the coat. I used metal snaps since the tabs on the male side won't break from use like the cheap plastic ones.

View attachment 632920

Here's the rig snapped in. The male side of snaps are sewn onto the backside of the rig.

View attachment 632921

It was careful work, because the straps and metal hook had to be removed to detach the rig from the coat, initially. So those straps had to be sewn back onto the rig once it was detached.

View attachment 632922
Man some people are so skilled and then there is me
 
It's their very first figure into the market so it's not really surprising that they tried to go all out with it and tried to do more than what we've been seeing for years from other licensed 1/6 figure companies. Outside of Hot Toys, I don't think we've really seen any other company (Sideshow, StarAce, Threezero, Blitzway, etc) do rolling eyes? Unless if I missed a few dime a dozen releases that had it.

Inart's rolling eyes aren't up to Hot Toys latest but it also took Hot Toys up until the past year or so to improve their PERs game. I don't doubt that Inart can get there in time. The quality of the sculpt and tailoring is undeniably there. I'm just hoping that they continue to improve as they move along.

I also quite like that they actually weathered the outfit for this. Way too many pristine and spotless outfits for characters that should show some wear and tear. It's nice to see some dust/dirt all over the coat and vest.

52791523537_7ebb8a2cb9_k_d.jpg
52791635501_1fea2576a1_k_d.jpg

52802669664_39515e005c_k_d.jpg
If there is anything about this figure that just blows away Hot Toys normal quality by a mile. It's 100% the tailoring and body proportions.
 

I was bothered by how the grenade rig caused the front of his coat to puff out and not lie flush, with all it's leather straps etc, which just made it look lumpy at certain angles. So initially I just carefully removed the rig all together, thinking I could find an extra coat, so I'd have both options. Lol, joke's on me cuz no one is parting with their coat on ebay or Facebook.

So I decided to sew in some low profile metal snaps, allowing me to snap the rig on and off. Giving me either option with a single coat. Now I can get the nice svelt drape that I was looking for. Granted, I could've just used some small safety pins, but that would have been destructive over repeated use. This is much safer for the coat lining and rig.


Here he is without the grenade rig attached. I get a much more flush sitting coat than before.

View attachment 632923


Here's the low profile metal snaps sewn into the coat. I used metal snaps since the tabs on the male side won't break from use like the cheap plastic ones.

View attachment 632920

Here's the rig snapped in. The male side of snaps are sewn onto the backside of the rig.

View attachment 632921

It was careful work, because the straps and metal hook had to be removed to detach the rig from the coat, initially. So those straps had to be sewn back onto the rig once it was detached.

View attachment 632922

Great work, rory!

Do you have a comparison picture before surgery?
 
Great work, rory!

Do you have a comparison picture before surgery?

No, I was dumb and didn’t think to take one before I removed the rig. However you can see on lots of existing photos around here how much that rig created bulk under the coat. Little things like that drive me nuts when posing.
 
Does anyone have any tips or tricks to keep the figure on the stand? He's fallen off a couple of times after staying on for over a day even though he's posed correctly.

Has anyone noticed any soft/non-magnetic areas on the stand? I'll pose him a certain way and he'll adjust to another area where the magnet is stronger.
 
Just make sure his shoes are completely attached to the stand. Mine has been posed at an angle for weeks now without falling over - inside a wobbly detolf.
 
Does anyone have any tips or tricks to keep the figure on the stand? He's fallen off a couple of times after staying on for over a day even though he's posed correctly.

Has anyone noticed any soft/non-magnetic areas on the stand? I'll pose him a certain way and he'll adjust to another area where the magnet is stronger.
I've had my purple coat version free standing on it for a few days now with no issue. Zero movement or falling over.

Here's where the feet are sitting on my base if it helps.

bDfQoSn.png
 
Back
Top