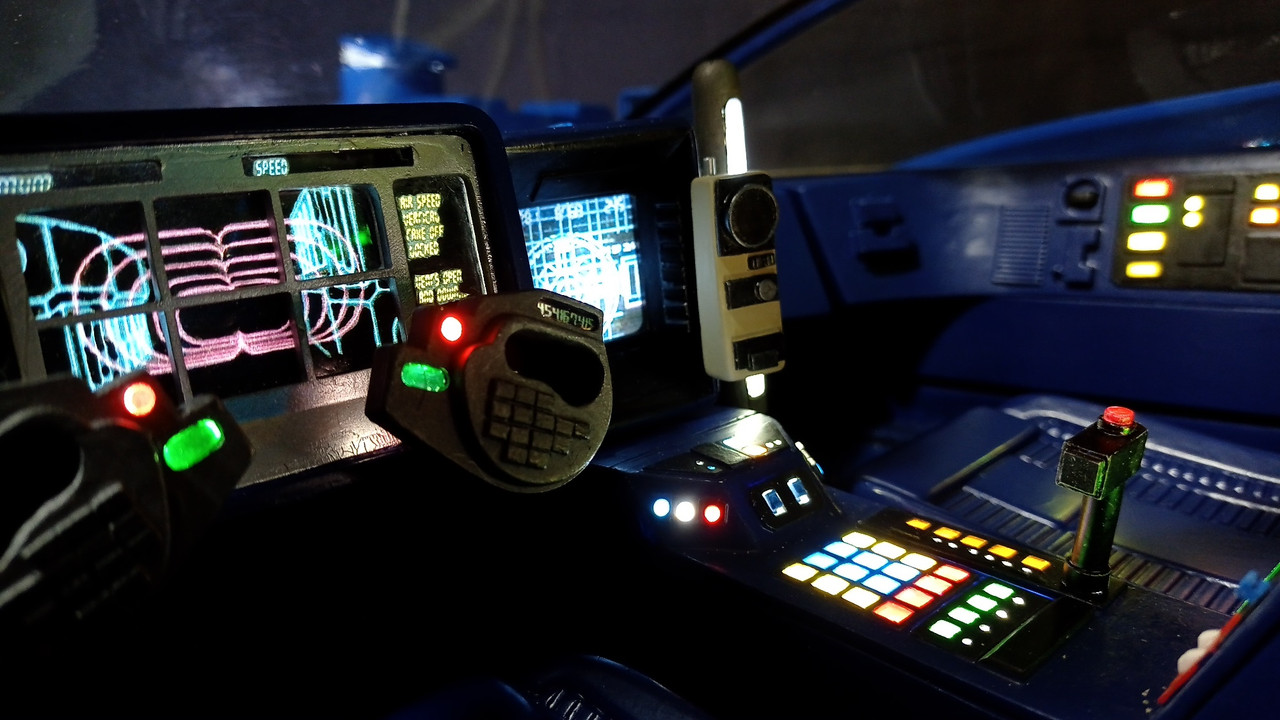
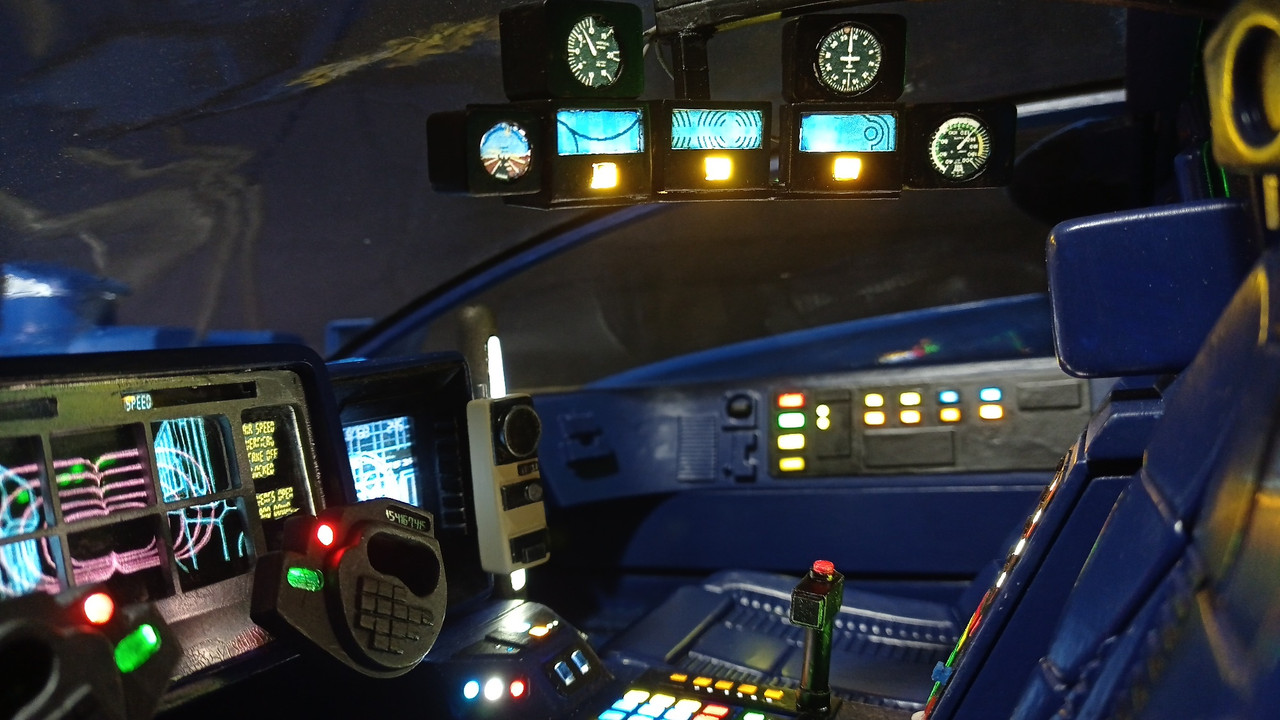
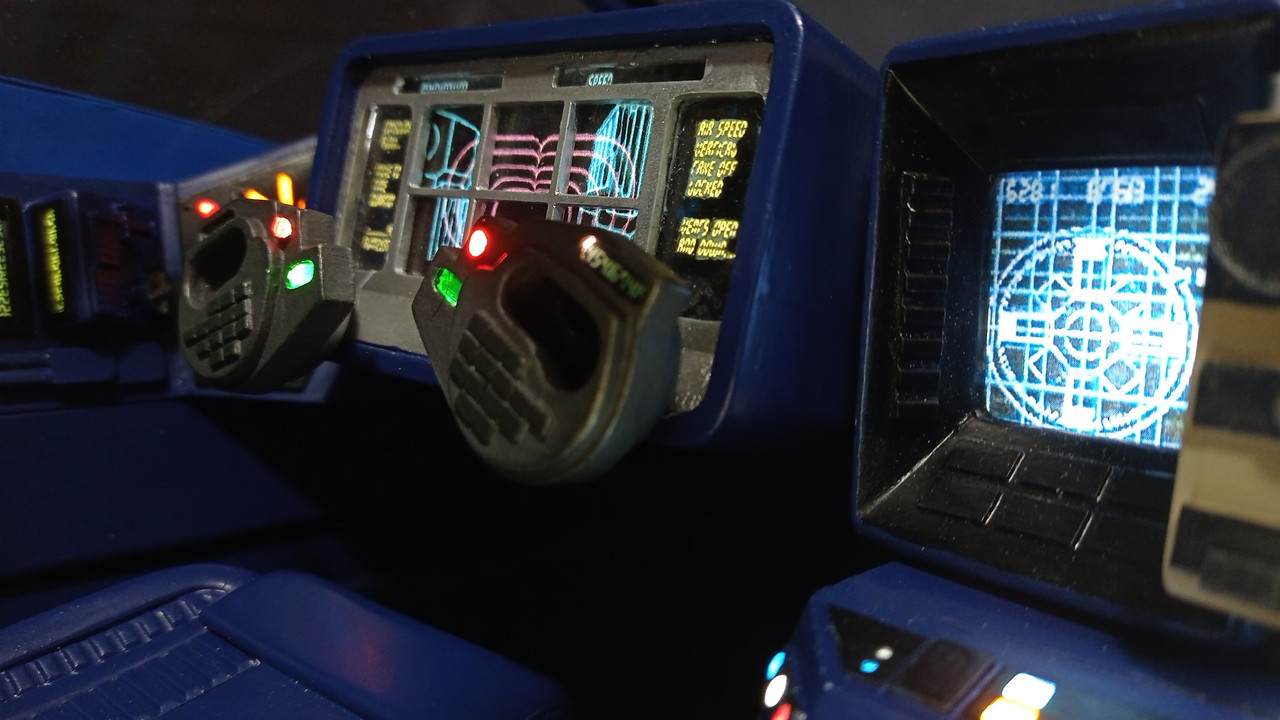
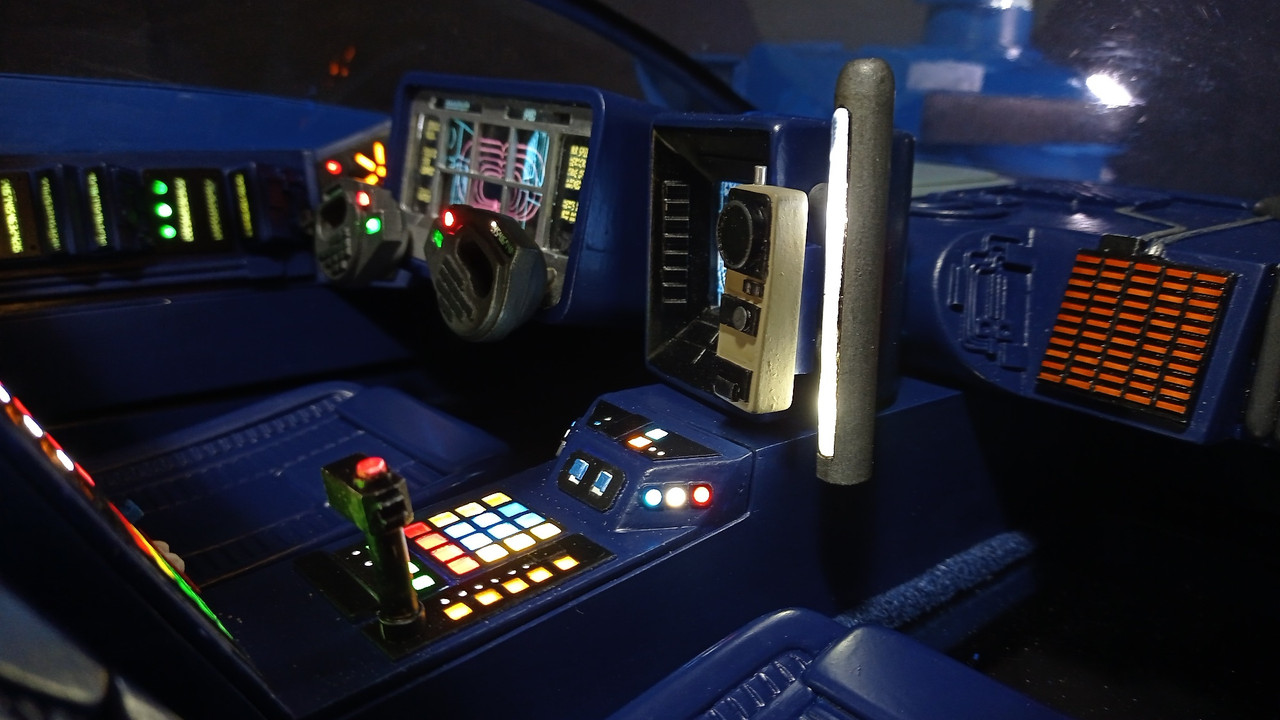
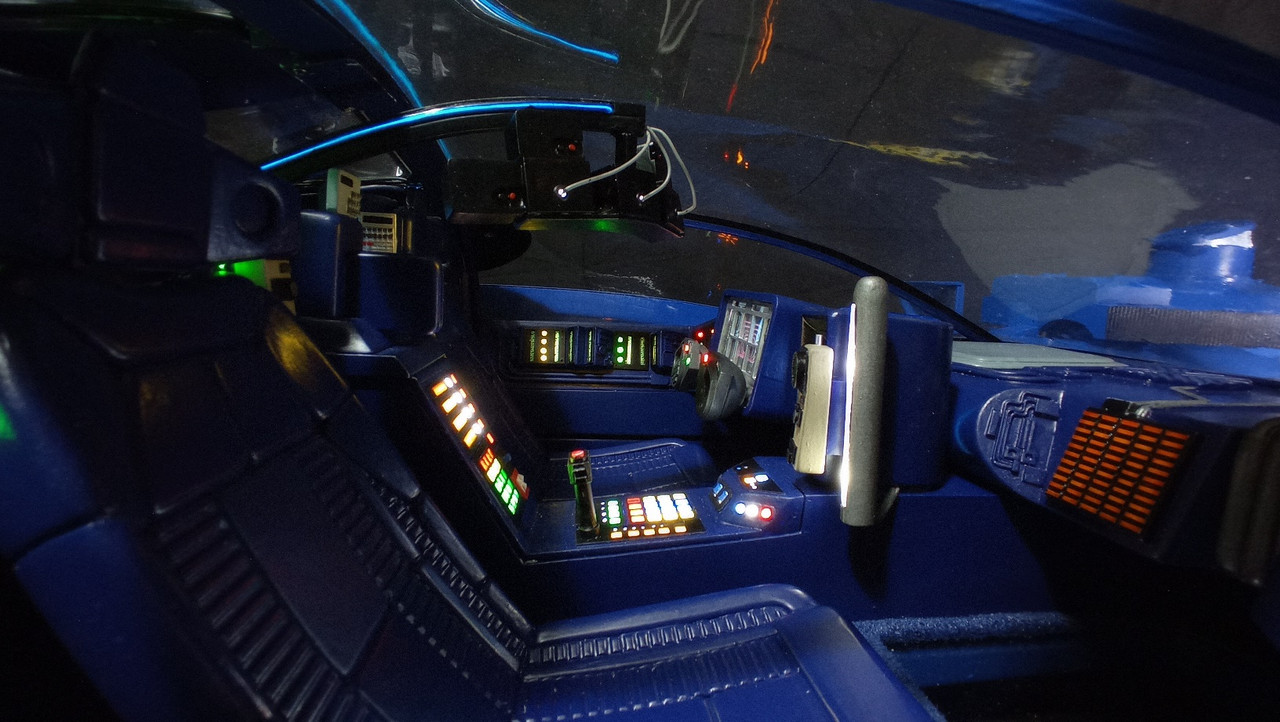
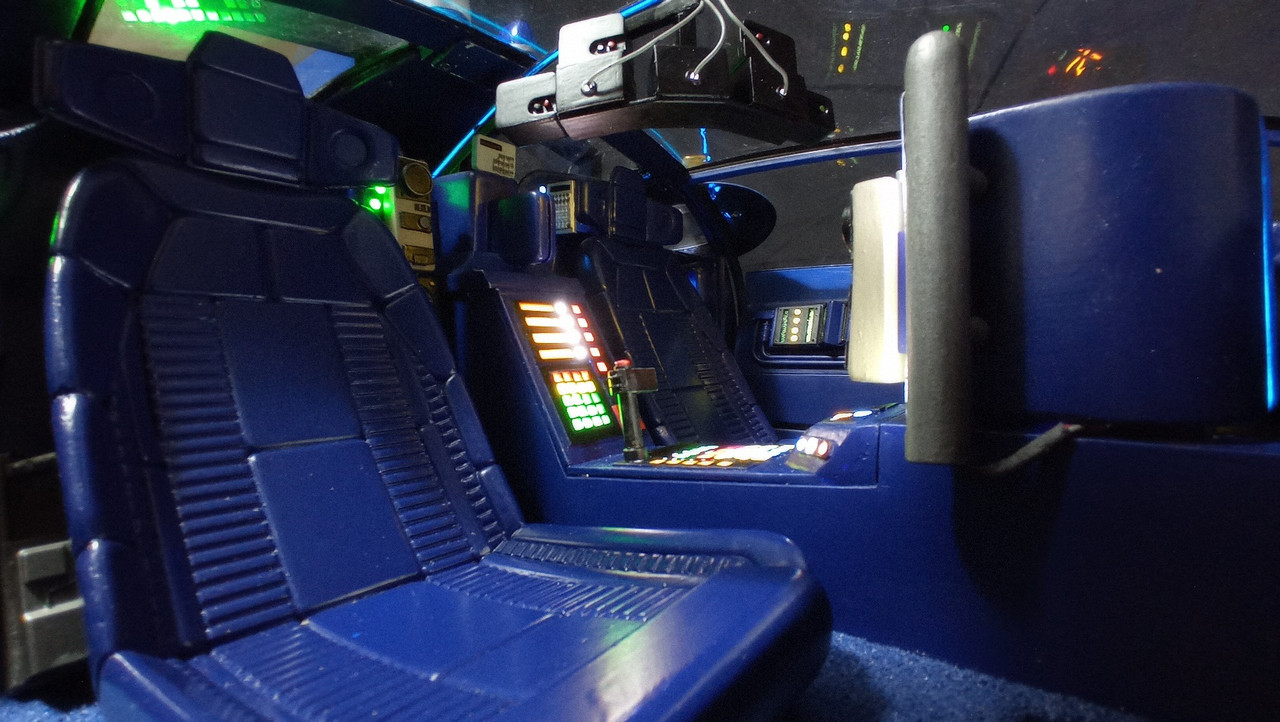
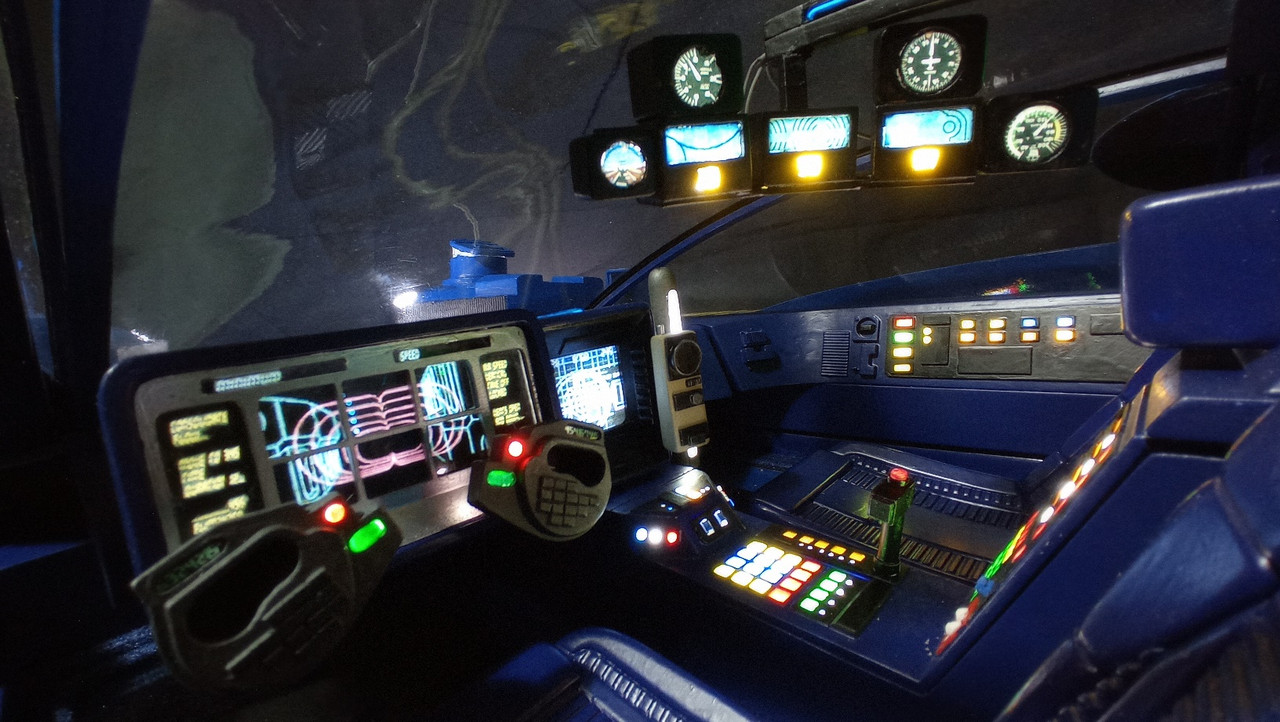
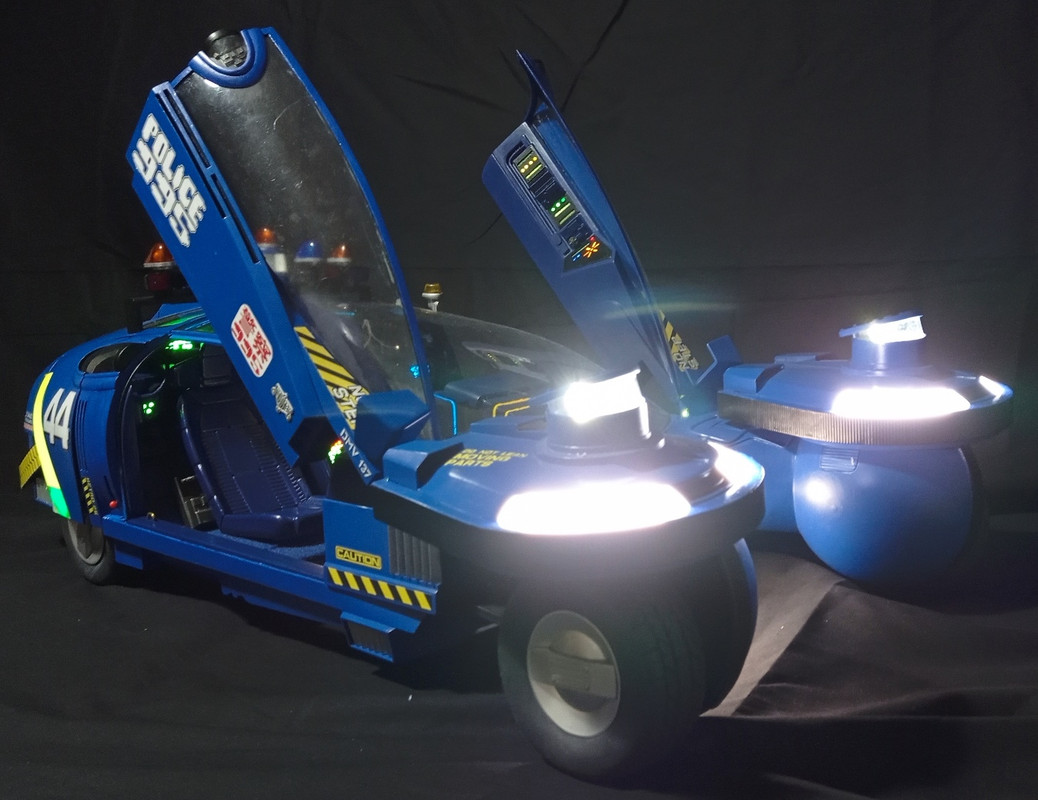
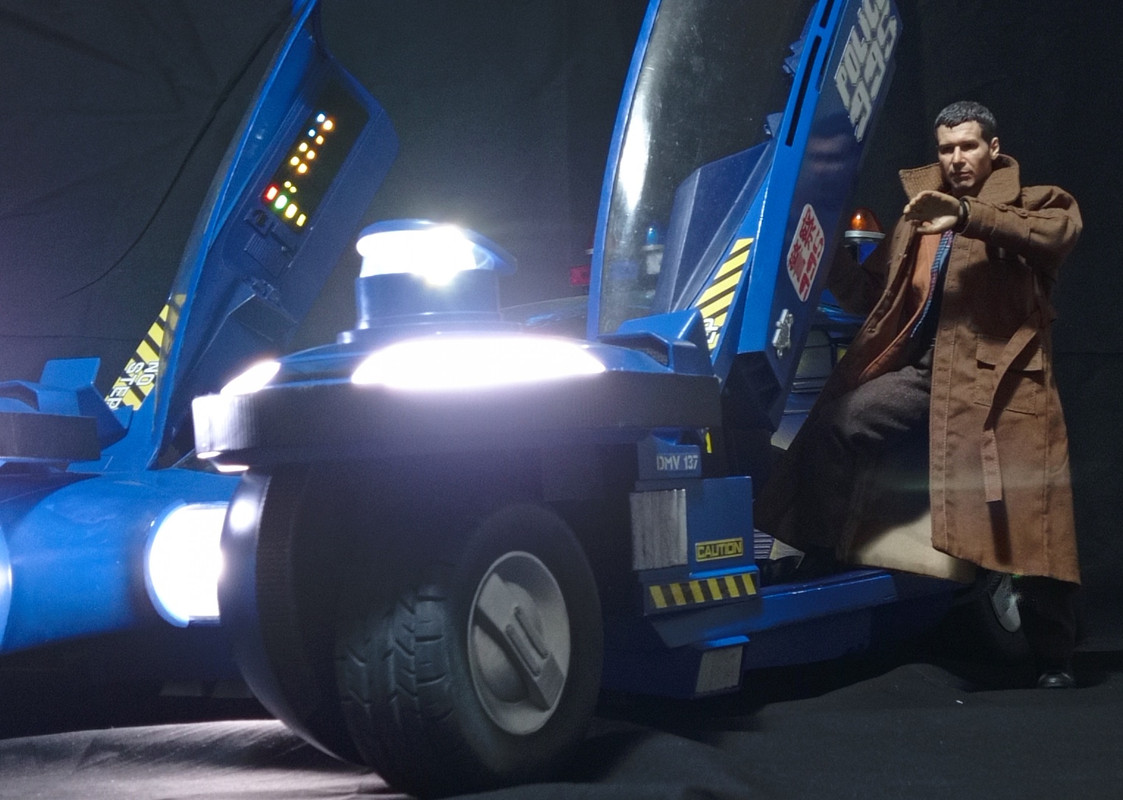
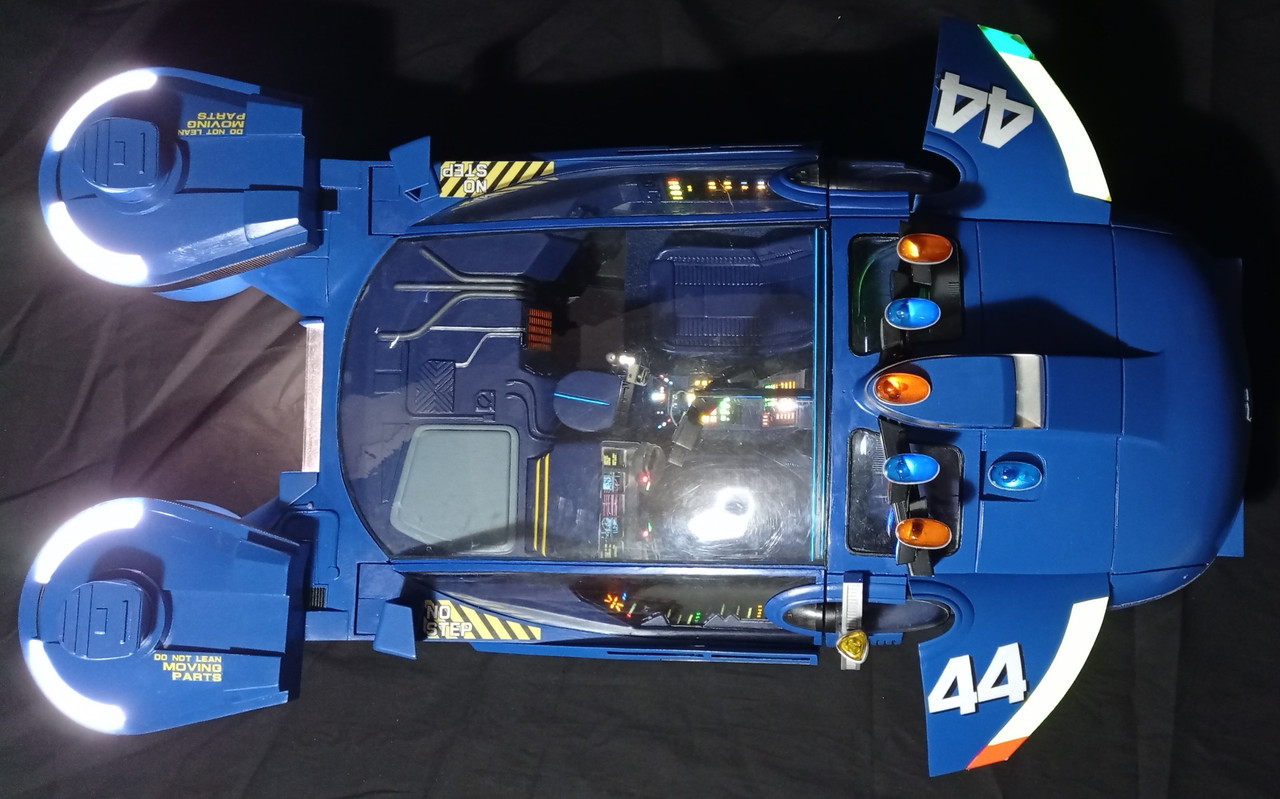
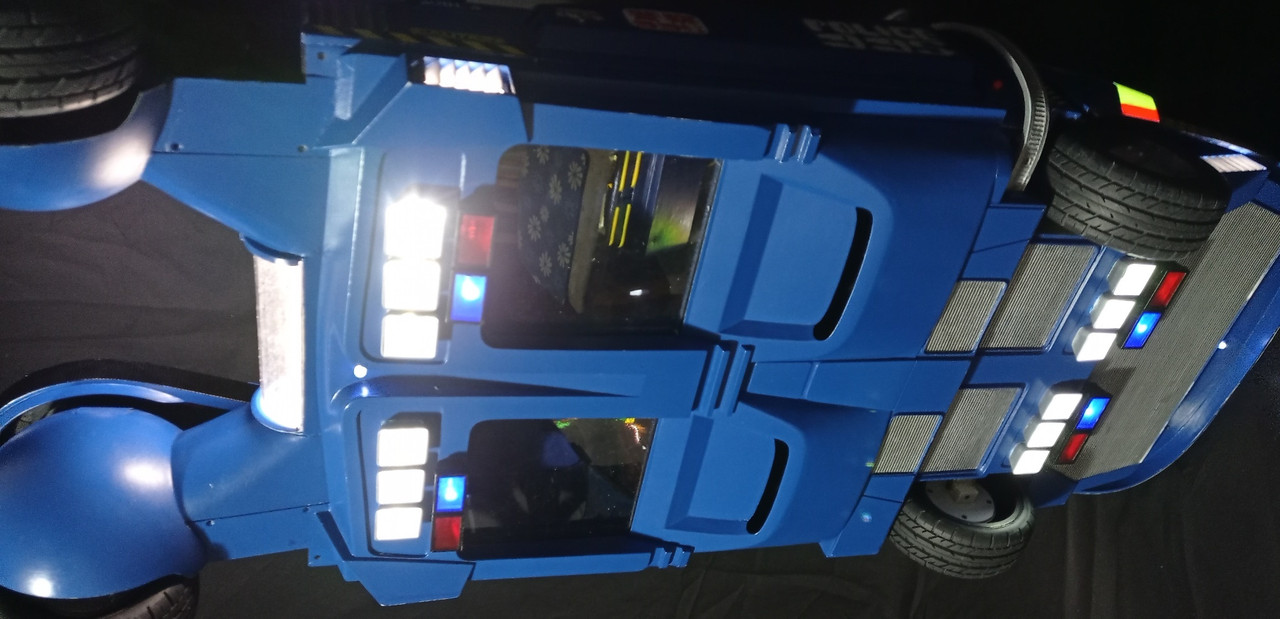
1/6 Scale Blade Runner Spinner scratchbuild (Complete!)

Collector Freaks Forum

Help Support Collector Freaks Forum:

This site may earn a commission from merchant affiliate links, including eBay, Amazon, and others.
Absolutely incredible!
And you have an (oft neglected) Gaff (well quasi-Gaff) figure to drive it. :cool:
Amazing build.
 
Last edited:
Simply put - this is one of the most amazing scratch builds I have ever seen. :bow

Your attention to detail is beyond reproach. Amazing work!!
 
I sourced the images from one of the Spinner threads on the RPF forums. After making some size adjustments and to match the blue paint i used, i printed it onto sticky paper. Then i covered the sheet with a sticky vinyl film. As they are paper based, I'm not able to get them wet in any way, ruling out any rain drenched shots. I'm missing the 2 decals on the windscreen and the door glass, as I couldn't think of a way to do them.
Can’t you make waterslide decals for the windows? They look like plexi or similar so why not get some printer waterslide decal paper, print them out and apply them like you would on a normal model kit?
I got what you stated about using paper with clear vinyl for the majority of the decals but the windows are of a different material.
It’s a wonderful job you’ve done and there’s a whole lot of people that would love to have something like that in their collection. It’s absolutely stellar.
 
Thanks for all the comments! Much appreciated.

Here are a few shots of the interior, without the figures in place. My original plan was to fit a photo viewer in the central screen to show various images. Unfortunately, when viewed off centre, the screen just looked like a white light, so i just used a printed image, backlit from behind.

spin299.jpg


spin300.jpg


spin301.jpg


spin302.jpg


spin303.jpg


spin304.jpg


spin305.jpg


spin306.jpg


spin307.jpg


spin308.jpg


spin309.jpg


spin310.jpg


spin311.jpg
 
Last edited:
Some videos to show the motorised features in operation.


I swapped the electric window motor previously used, for 3 linear actuators (2 at the front, 1 at the rear). This was to make the transition more gradual. IRL, these parts are quite big, so they would not move so quickly. The change also saved about a kilo in weight, as the electric window motor required a substantial battery to run it.


Last edited:
A few stats for you:

Length - 87cm
Width - 48cm
Height - 29cm
Weight - 9.5 kg

Parts used

LEDs - 66
LED strips - 11
EL wire - 4
EL panels - 4
Linear actuators - 5

Cost to build (approx)

Plasticard sheet - £120
Plastic / metal beams - £40
Tyres - £30
Linear actuators (X5) - £125
Vacforming (2 attempts) - £80
Electronics - £40
Glue / Paint - £70

Total - £505
 
Back
Top